12551
12551
If you visit a non-panel clinic or provider and paid for your visit out of pocket, your company may require you to submit a non-panel claim with the Mednefits app to process your reimbursement.
When your non-panel claim is approved, the claim amount is deducted from your account, and your company (or, in some cases, Mednefits) will then reimburse you. To know more about the process of reimbursement, kindly refer to this article: When will I get my claim reimbursement?
You can submit claims through either the Mednefits mobile app or the member portal!
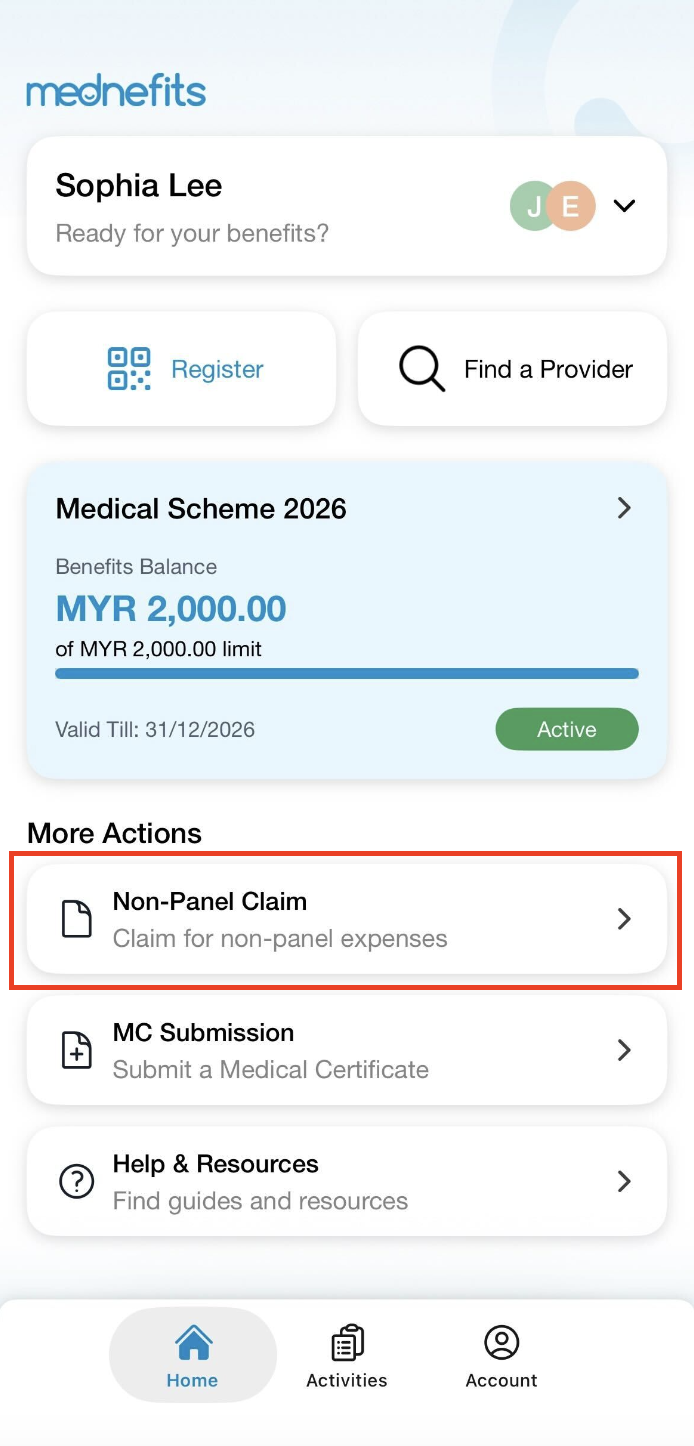
Step 1: Log into the Mednefits mobile app.
Step 2: Tap on Non-Panel claims under More Actions.
Step 3: Choose the name of the member you want to submit the claim.
- Member: For accounts without a dependent, the name of the account holder will be shown as the one who submits the claim.
- 🆕 For accounts that have dependents enrolled under it, when submitting a claim you will see a "Select a Member" button where you can select which dependent you want to submit the claim for.
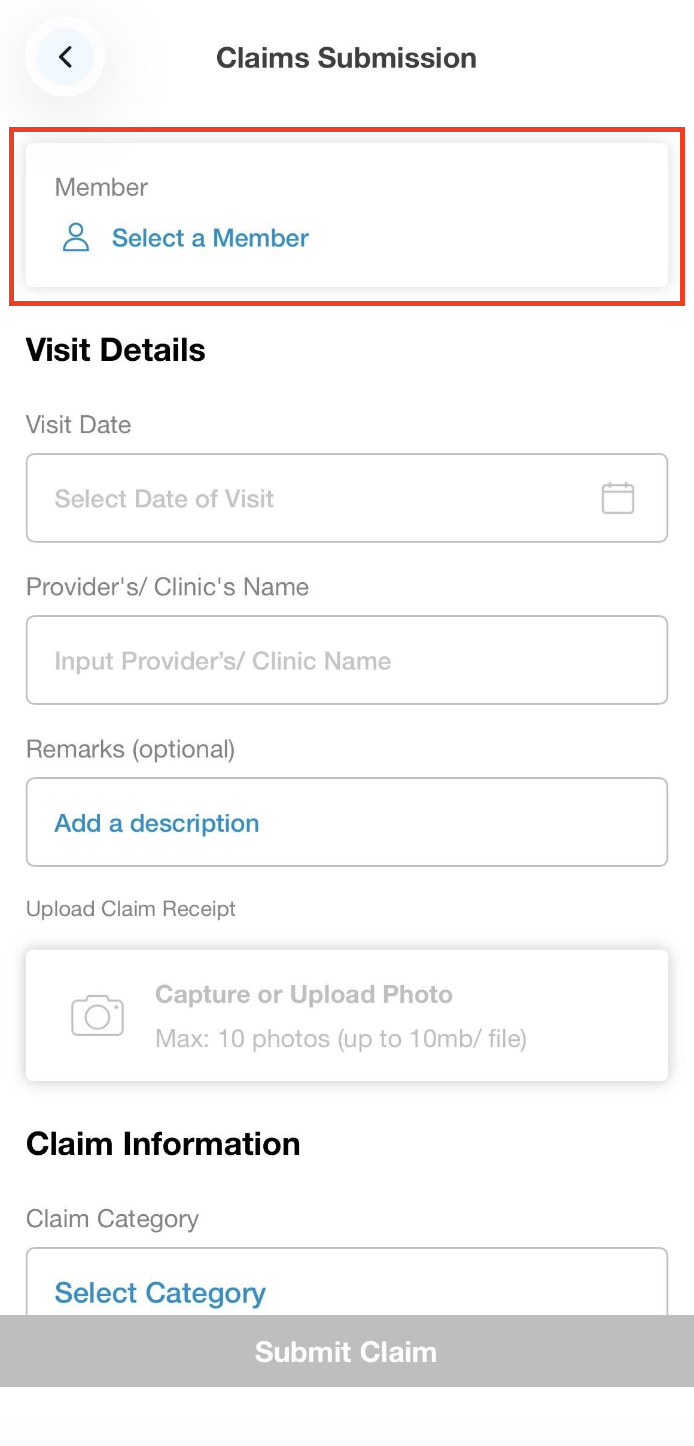
Continue to fill up the Visit Details:
- Visit Date: The date of your visit, as stated on your receipt. (Please note that you are only able to select the date within your Benefits Period)
- Provider's/Clinic's Name: Enter the name of the clinic, hospital, or health provider you visited.
- Remarks (optional): Input any information about the claim you are submitting for your HR to review.
-
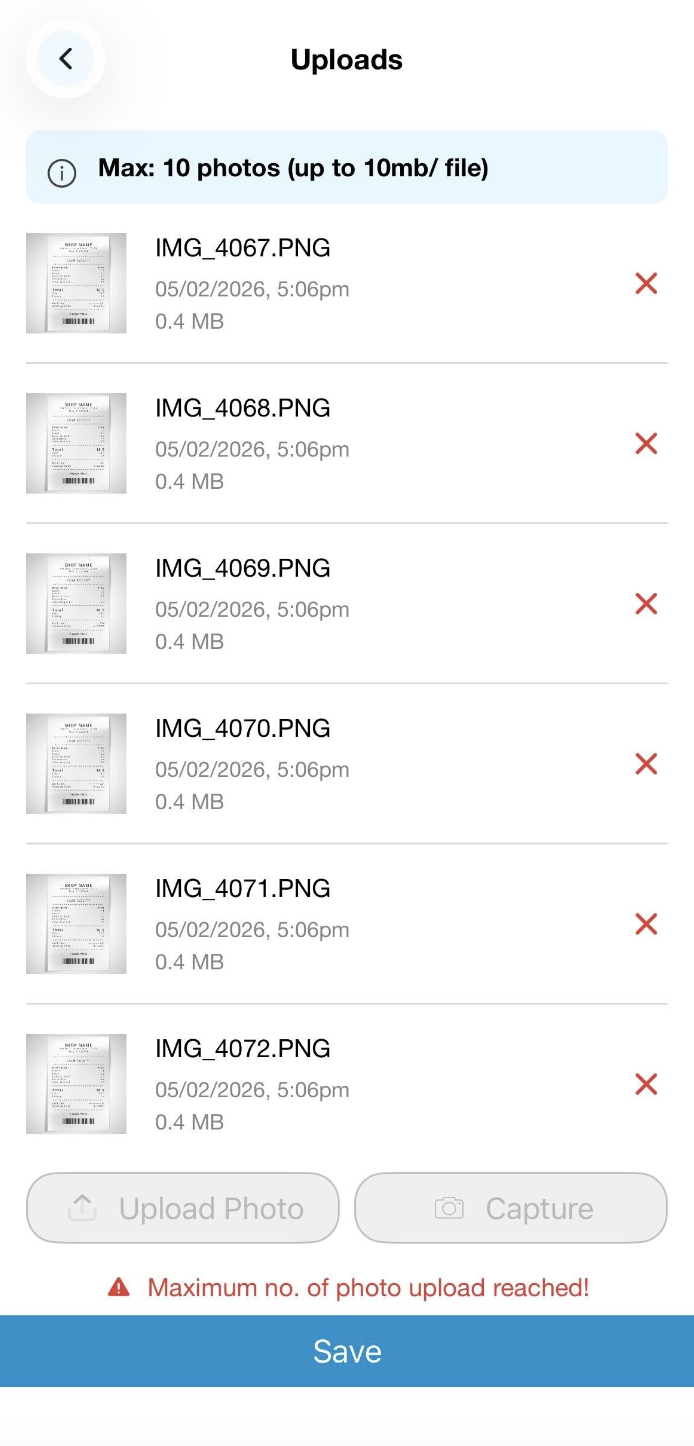
Upload Claim Receipt: If the app requests permission to access your phone camera, tap OK (iOS) or Allow (Android). Press the camera button to take a photo of your receipt.
- If you already have a photo of the receipt on your phone, you can tap the Upload Photo to select the photo from your album.
- If you have multiple receipts to upload, select Capture and take photos of all the receipts you need to upload.
- 🆕 You may edit and preview the photos you have uploaded simply by tapping the image row to preview the selected image you wish to preview and also editing them (if needed)
- To edit the images you may choose from the following:
- Crop
- Rotate
- Draw
- Adjust brightness


Proceed to fill up the Claim Information:
- Claim Category: You may choose from the following based on your benefits scheme if a Non-Panel claim is applicable.
- Dental
- GP
- Accident & Emergency
- Optical
- Health Screening
- Specialist
- Wellness
- Pap Smear
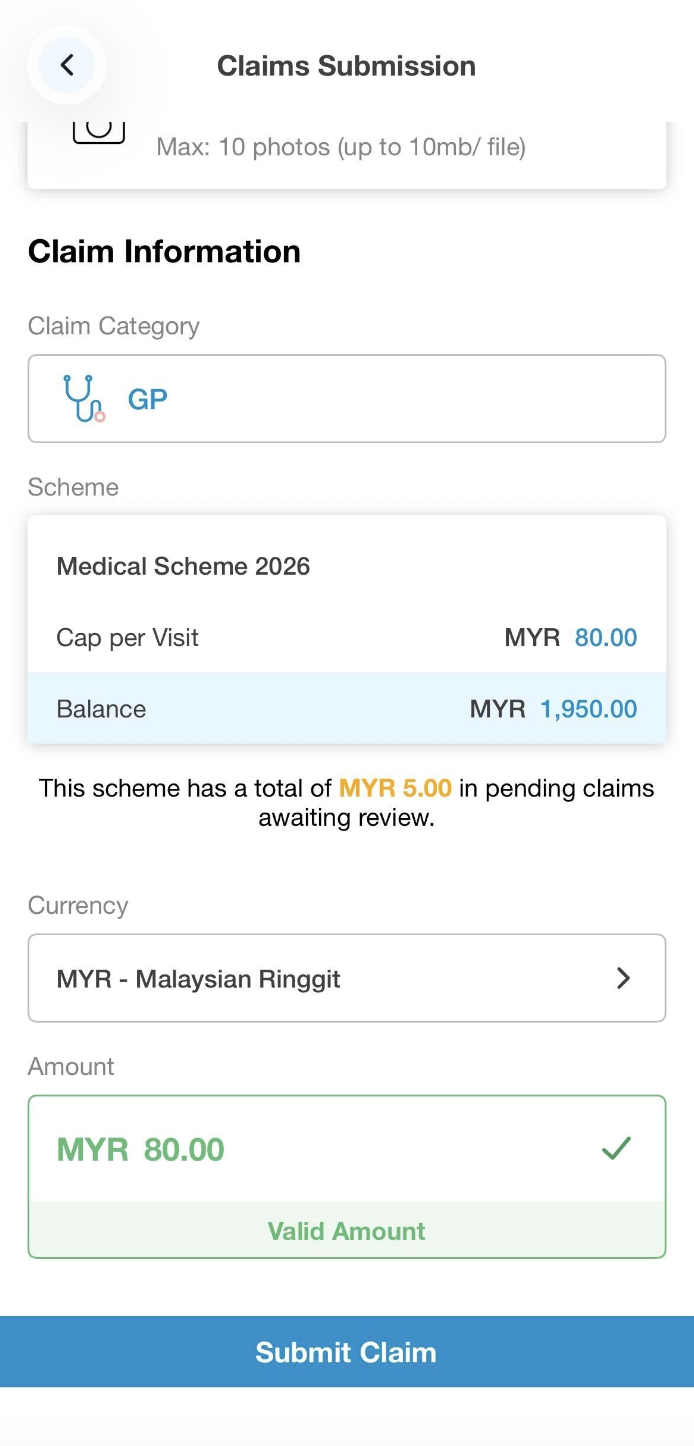
After you have chosen the category, you are able to see your balance and if there is any cap per visit applicable under the selected scheme. Please note that you can only submit a claim within your cap per visit amount.
- Currency: Select SGD (Singapore Dollar) or MYR (Malaysian Ringgit).
- Claim Amount: The amount on your receipt

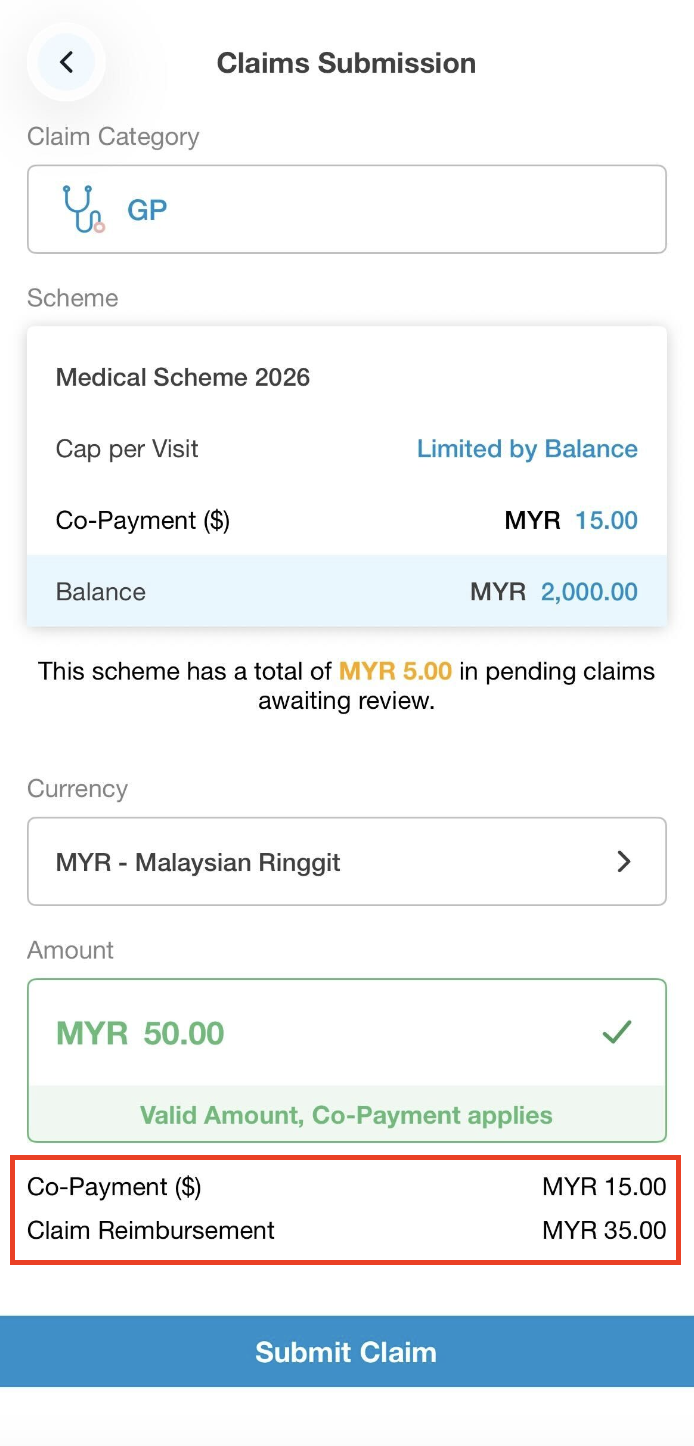
Claim amount with Co-Payment (if applicable):
- Kindly ensure that the submitted amount corresponds to the total bill indicated on the receipt, as the co-payment will be deducted accordingly.
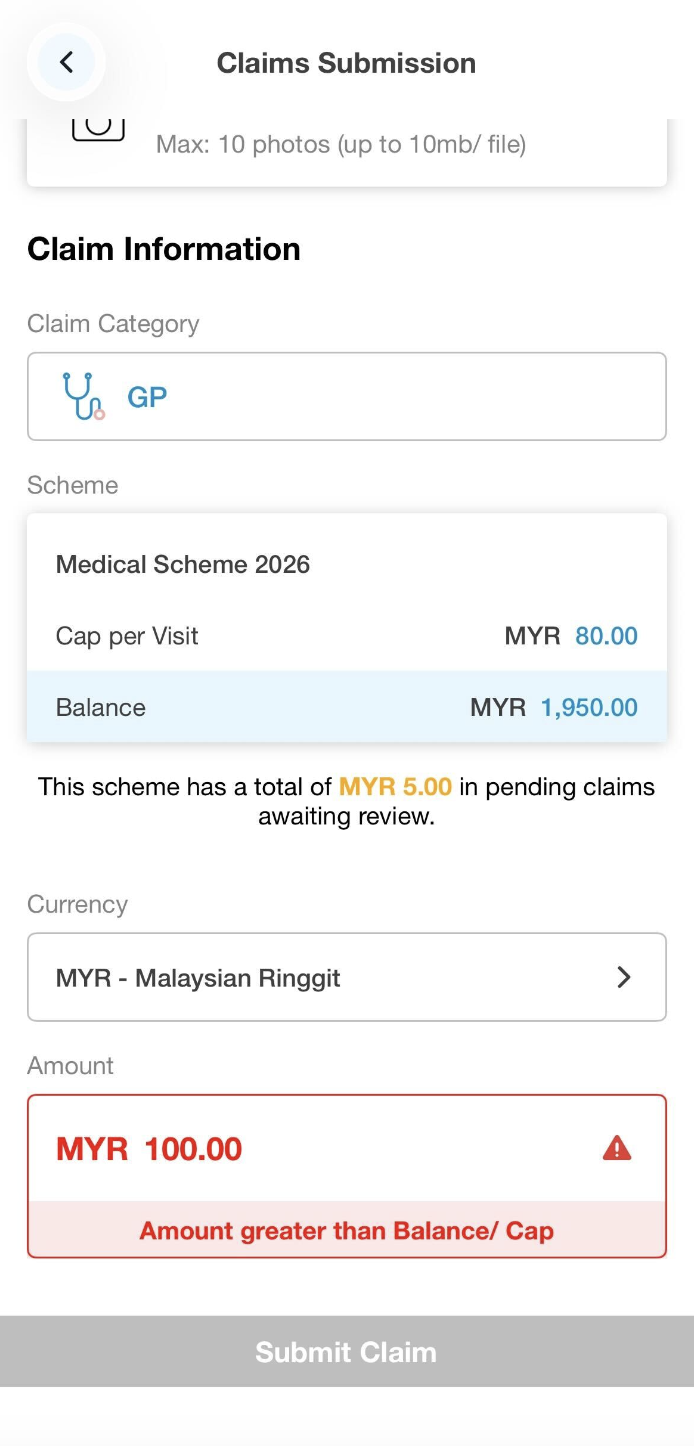
Claim amount with Cap Per Visit (if applicable):
- Any amount submitted above the implemented Cap Per visit will result in an error message, "Amount greater than Balance/Cap," and the submission will not proceed to the next page.
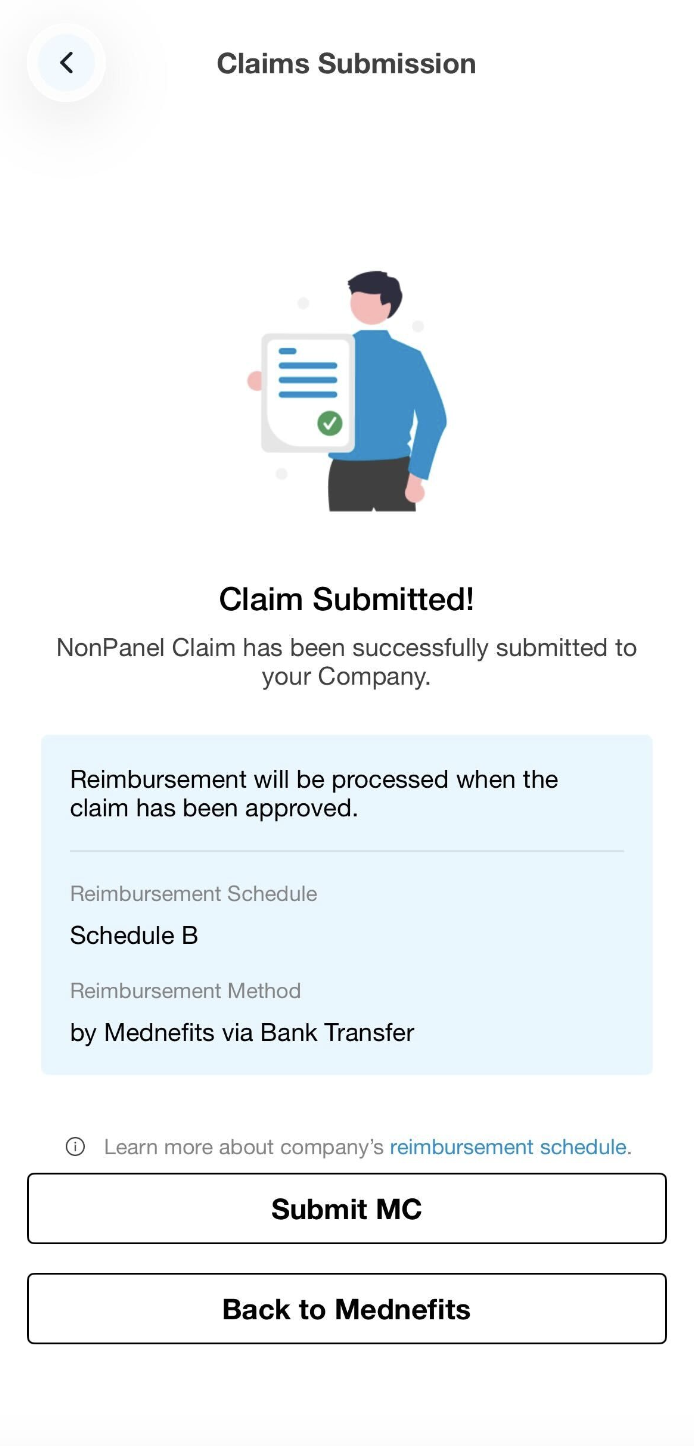
Step 4: After reviewing your claim details, you may proceed to tap on Submit Claim to complete your submission.
Once submitted, the screen will display the reimbursement arrangement set by your company:
- By Mednefits via Bank Transfer - Will display the reimbursement processing schedule that is followed by your company
- By Company via Payroll - You may reach put to your HR on the reimbursement processing

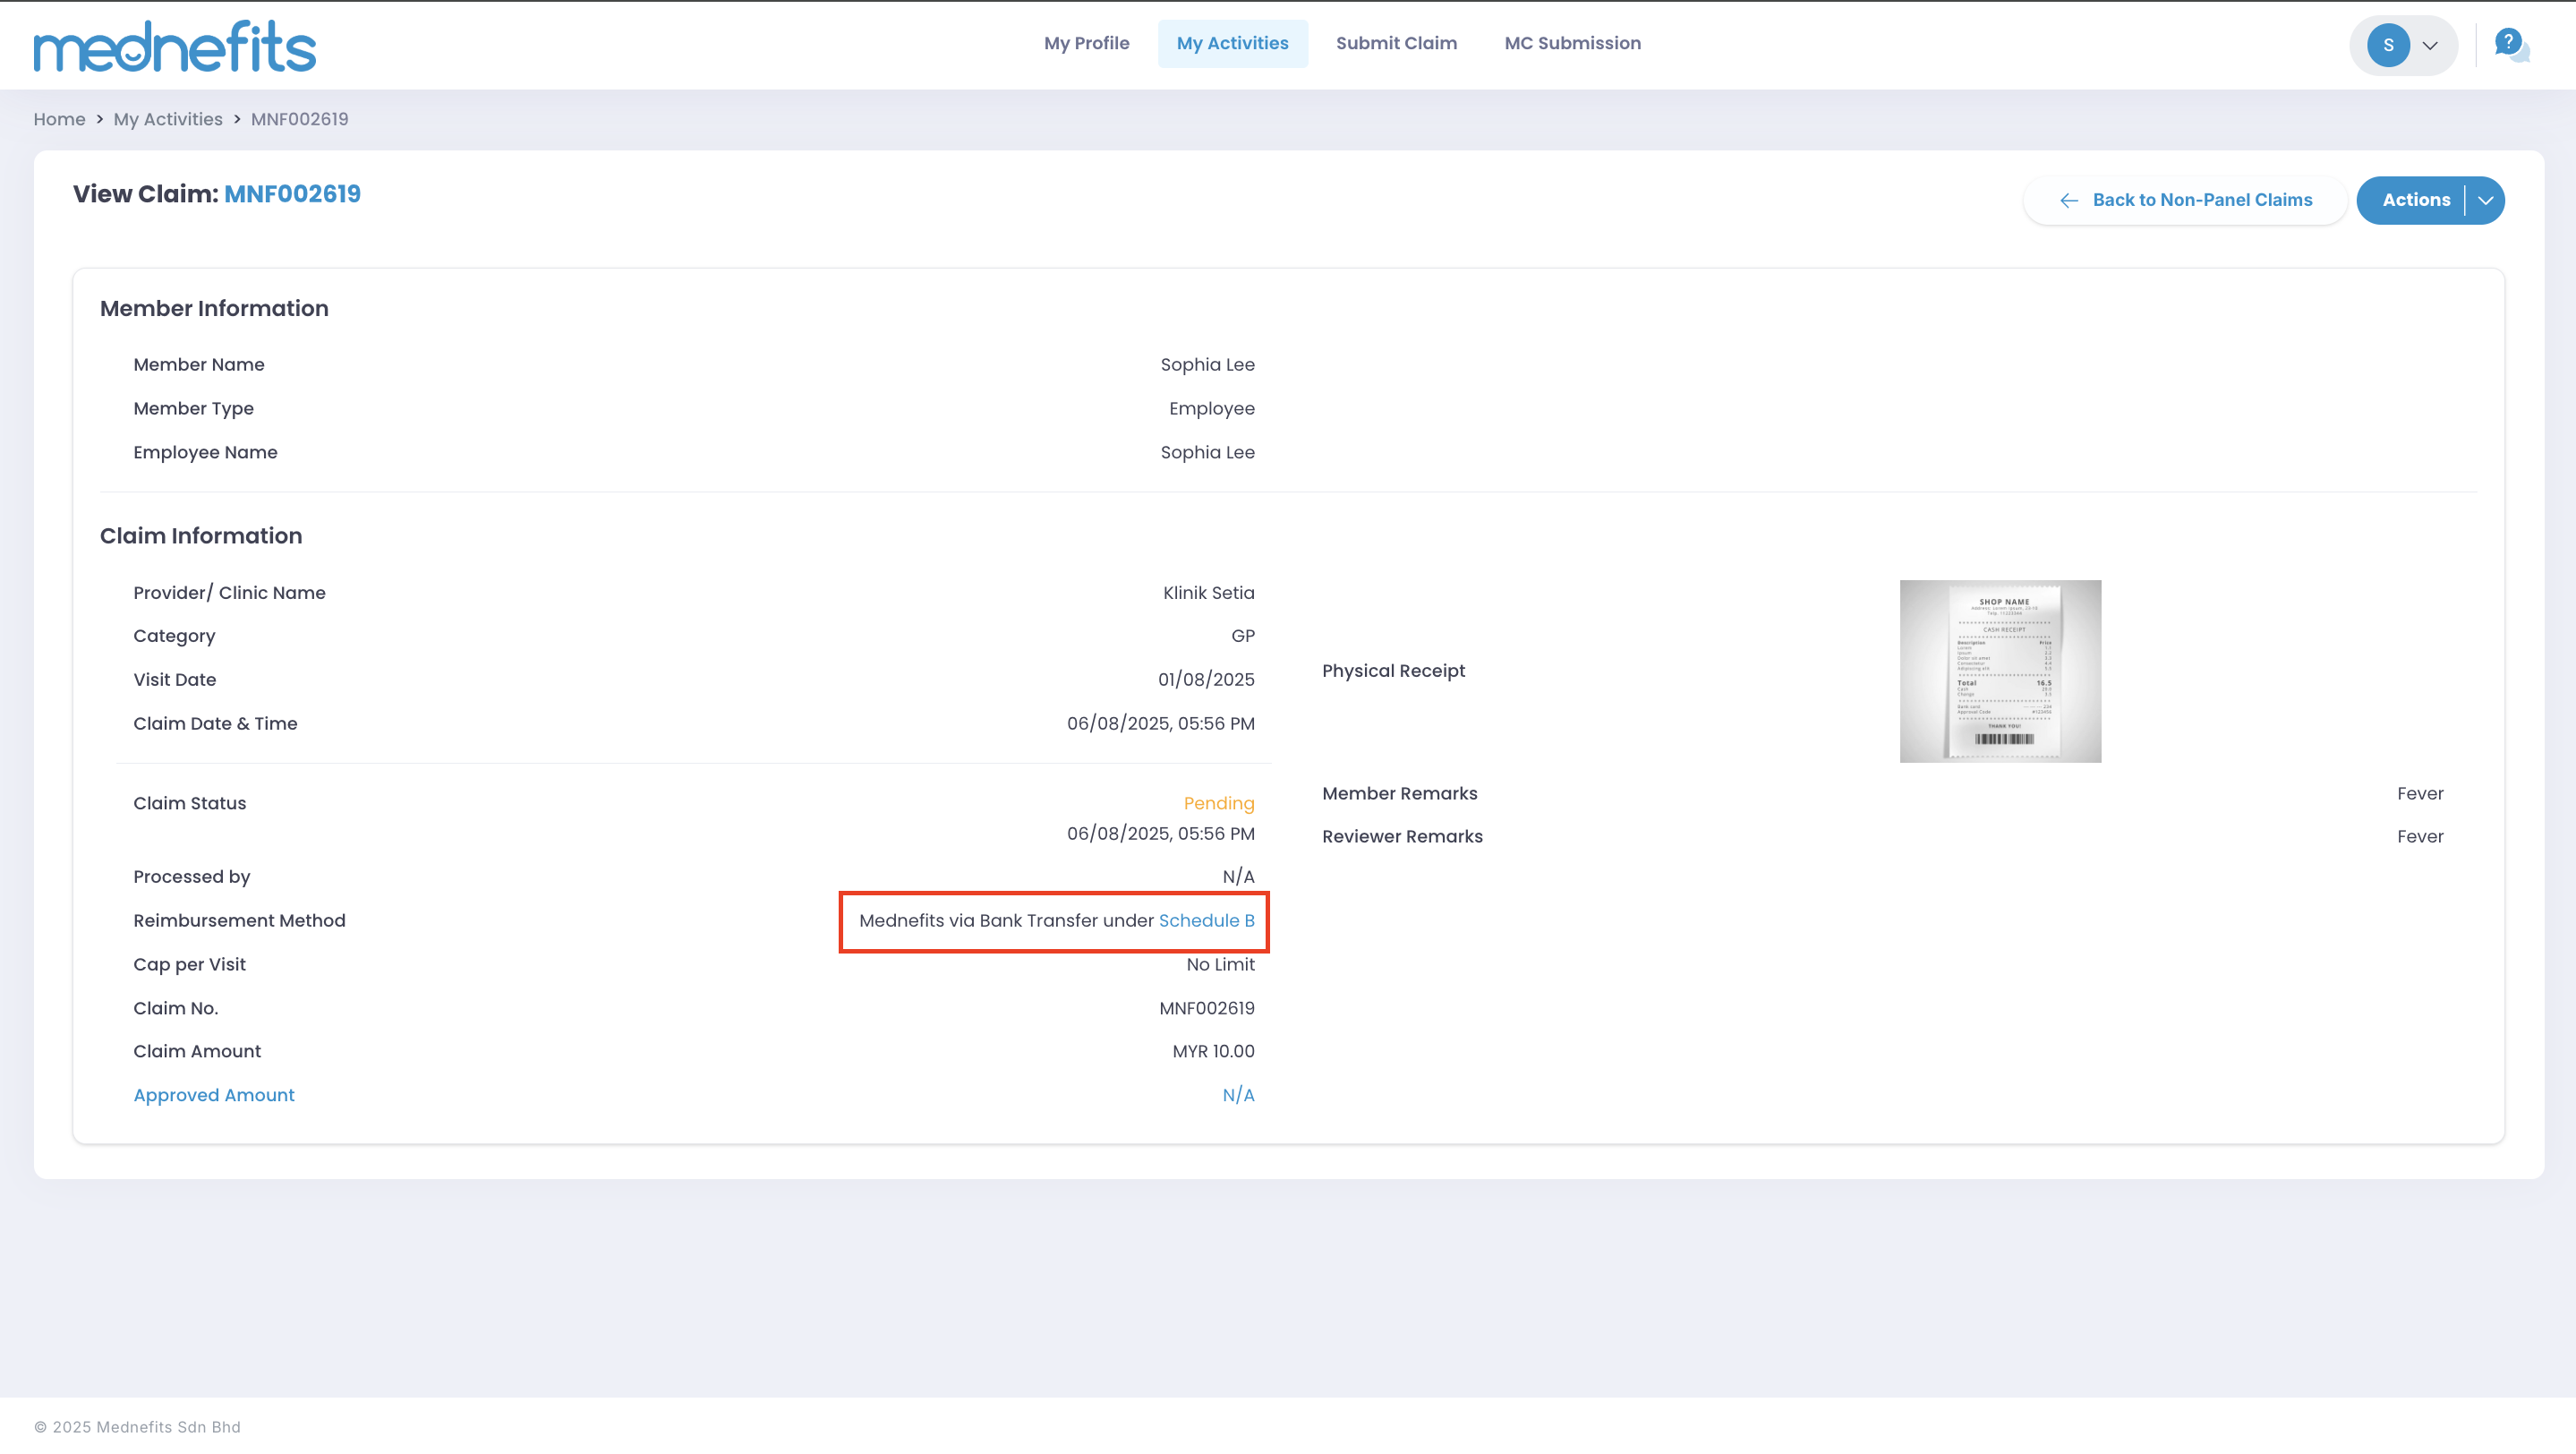
Once the status of your claim has been changed to Approve, you may monitor your claim status by clicking on Activities and choose the claim to view status history. You will be able to view the reimbursement method and the reimbursement schedule followed by your company.
You may click on the link to learn more about the reimbursement schedule.

Step 1: Log into the Mednefits member portal.
Step 2: Click on Submit Claim on the top menu bar.

Step 3: Fill in the details of your claim:
- Member: Tap on the Member field to bring up a list of all the members associated with your account, including your dependents (if any). Select the member the claim is for.
- Visit Date: The date of your visit, as stated on your receipt.
- Provider's/Clinic's Name: Enter the name of the clinic, hospital, or health provider you visited.
- Remarks (optional): Input any information about the claim you are submitting for your HR to review.
- Claim Category: Choose from the following:
- Dental
- GP
- Accident & Emergency
- Optical
- Screening
- Specialist
- Wellness
- Pap Smear
- Currency: Select SGD (Singapore Dollar) or MYR (Malaysian Ringgit).
- Claim Amount: The amount on your receipt.
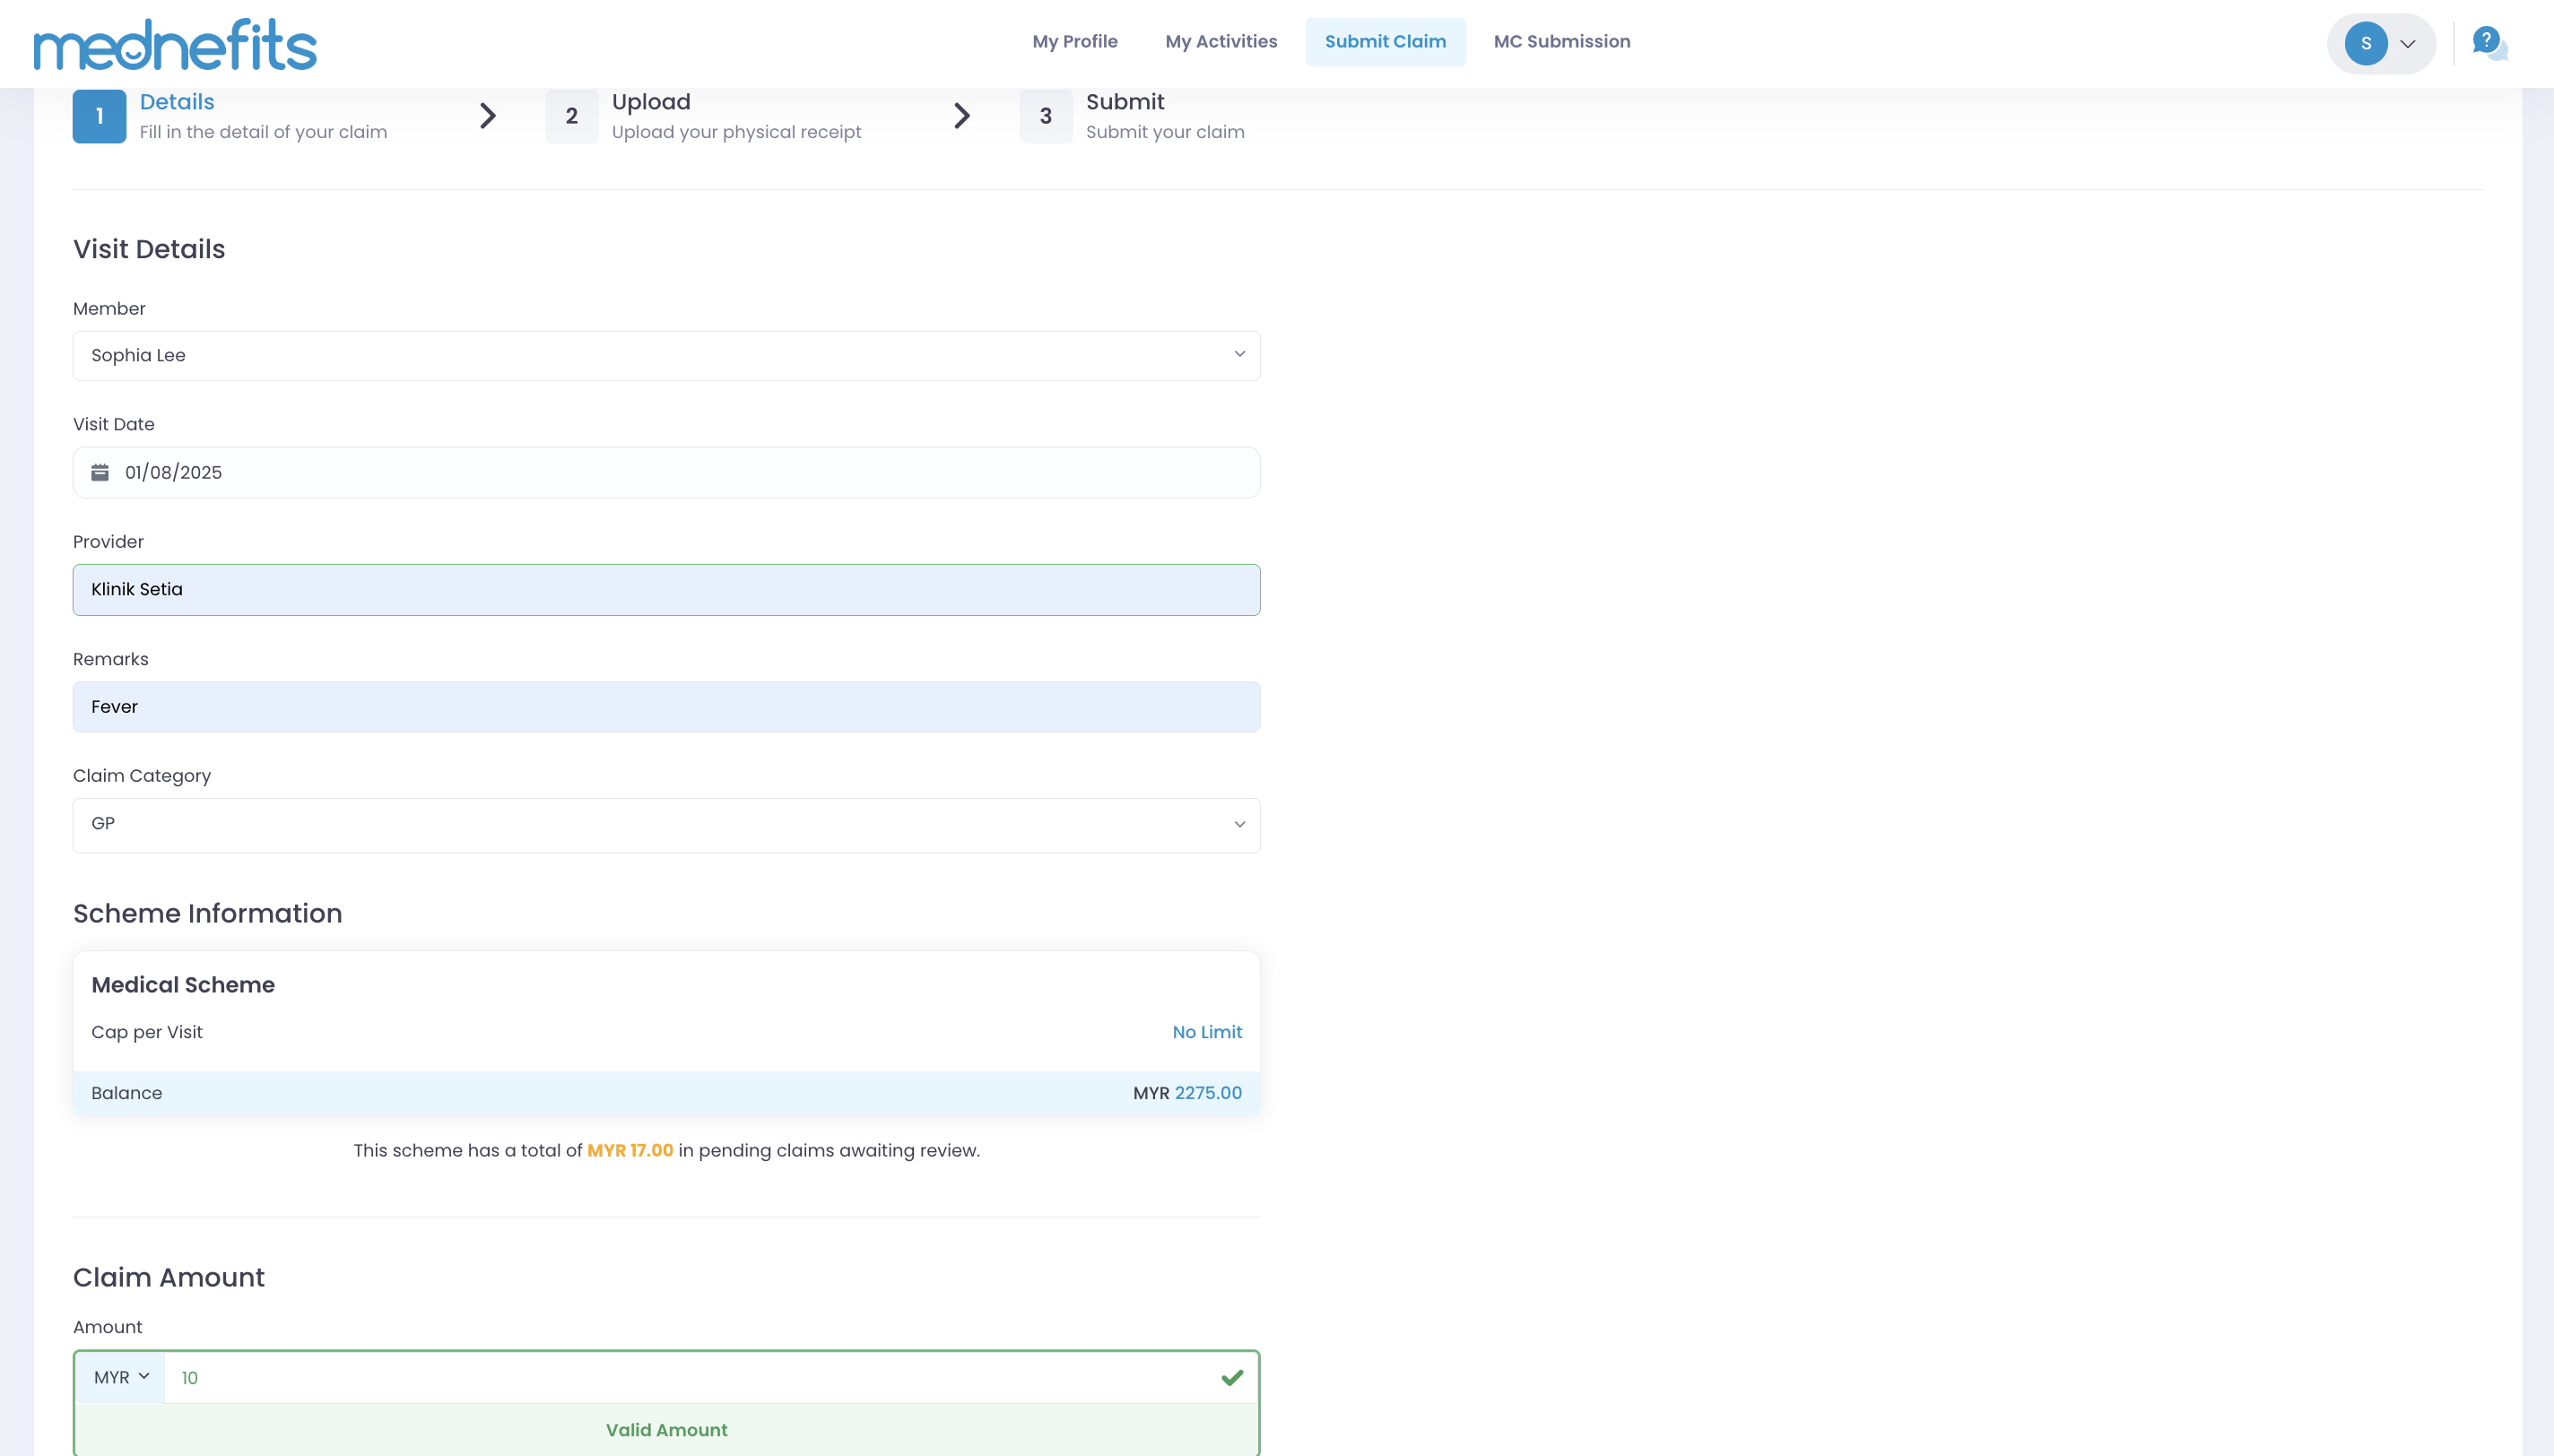
Note: This scheme has a total of MYR 17.00 in pending claims awaiting review.
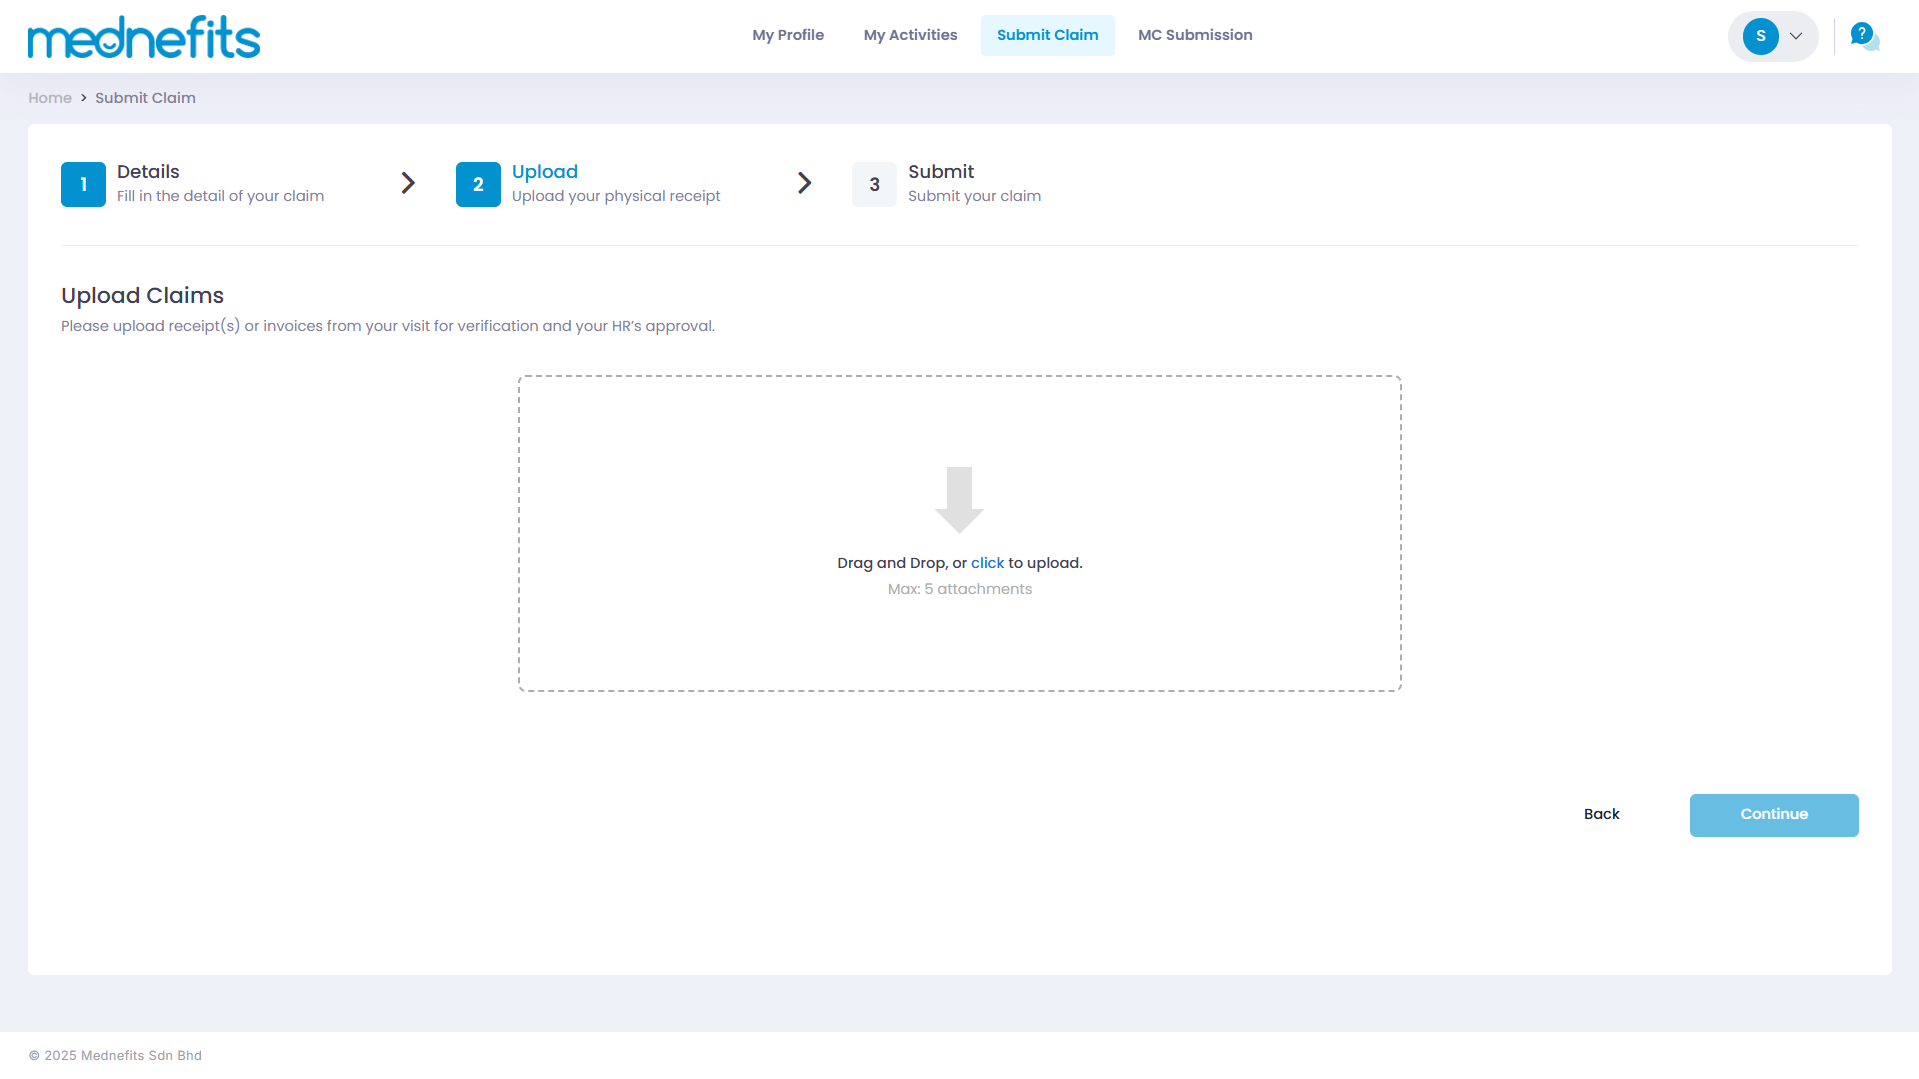
Step 4: On this Upload page, Drag and Drop or click to upload your receipt into the upload box.
- You can attach up to 5 attachments to your receipt.
- Once the receipt has finished uploading, click Continue.
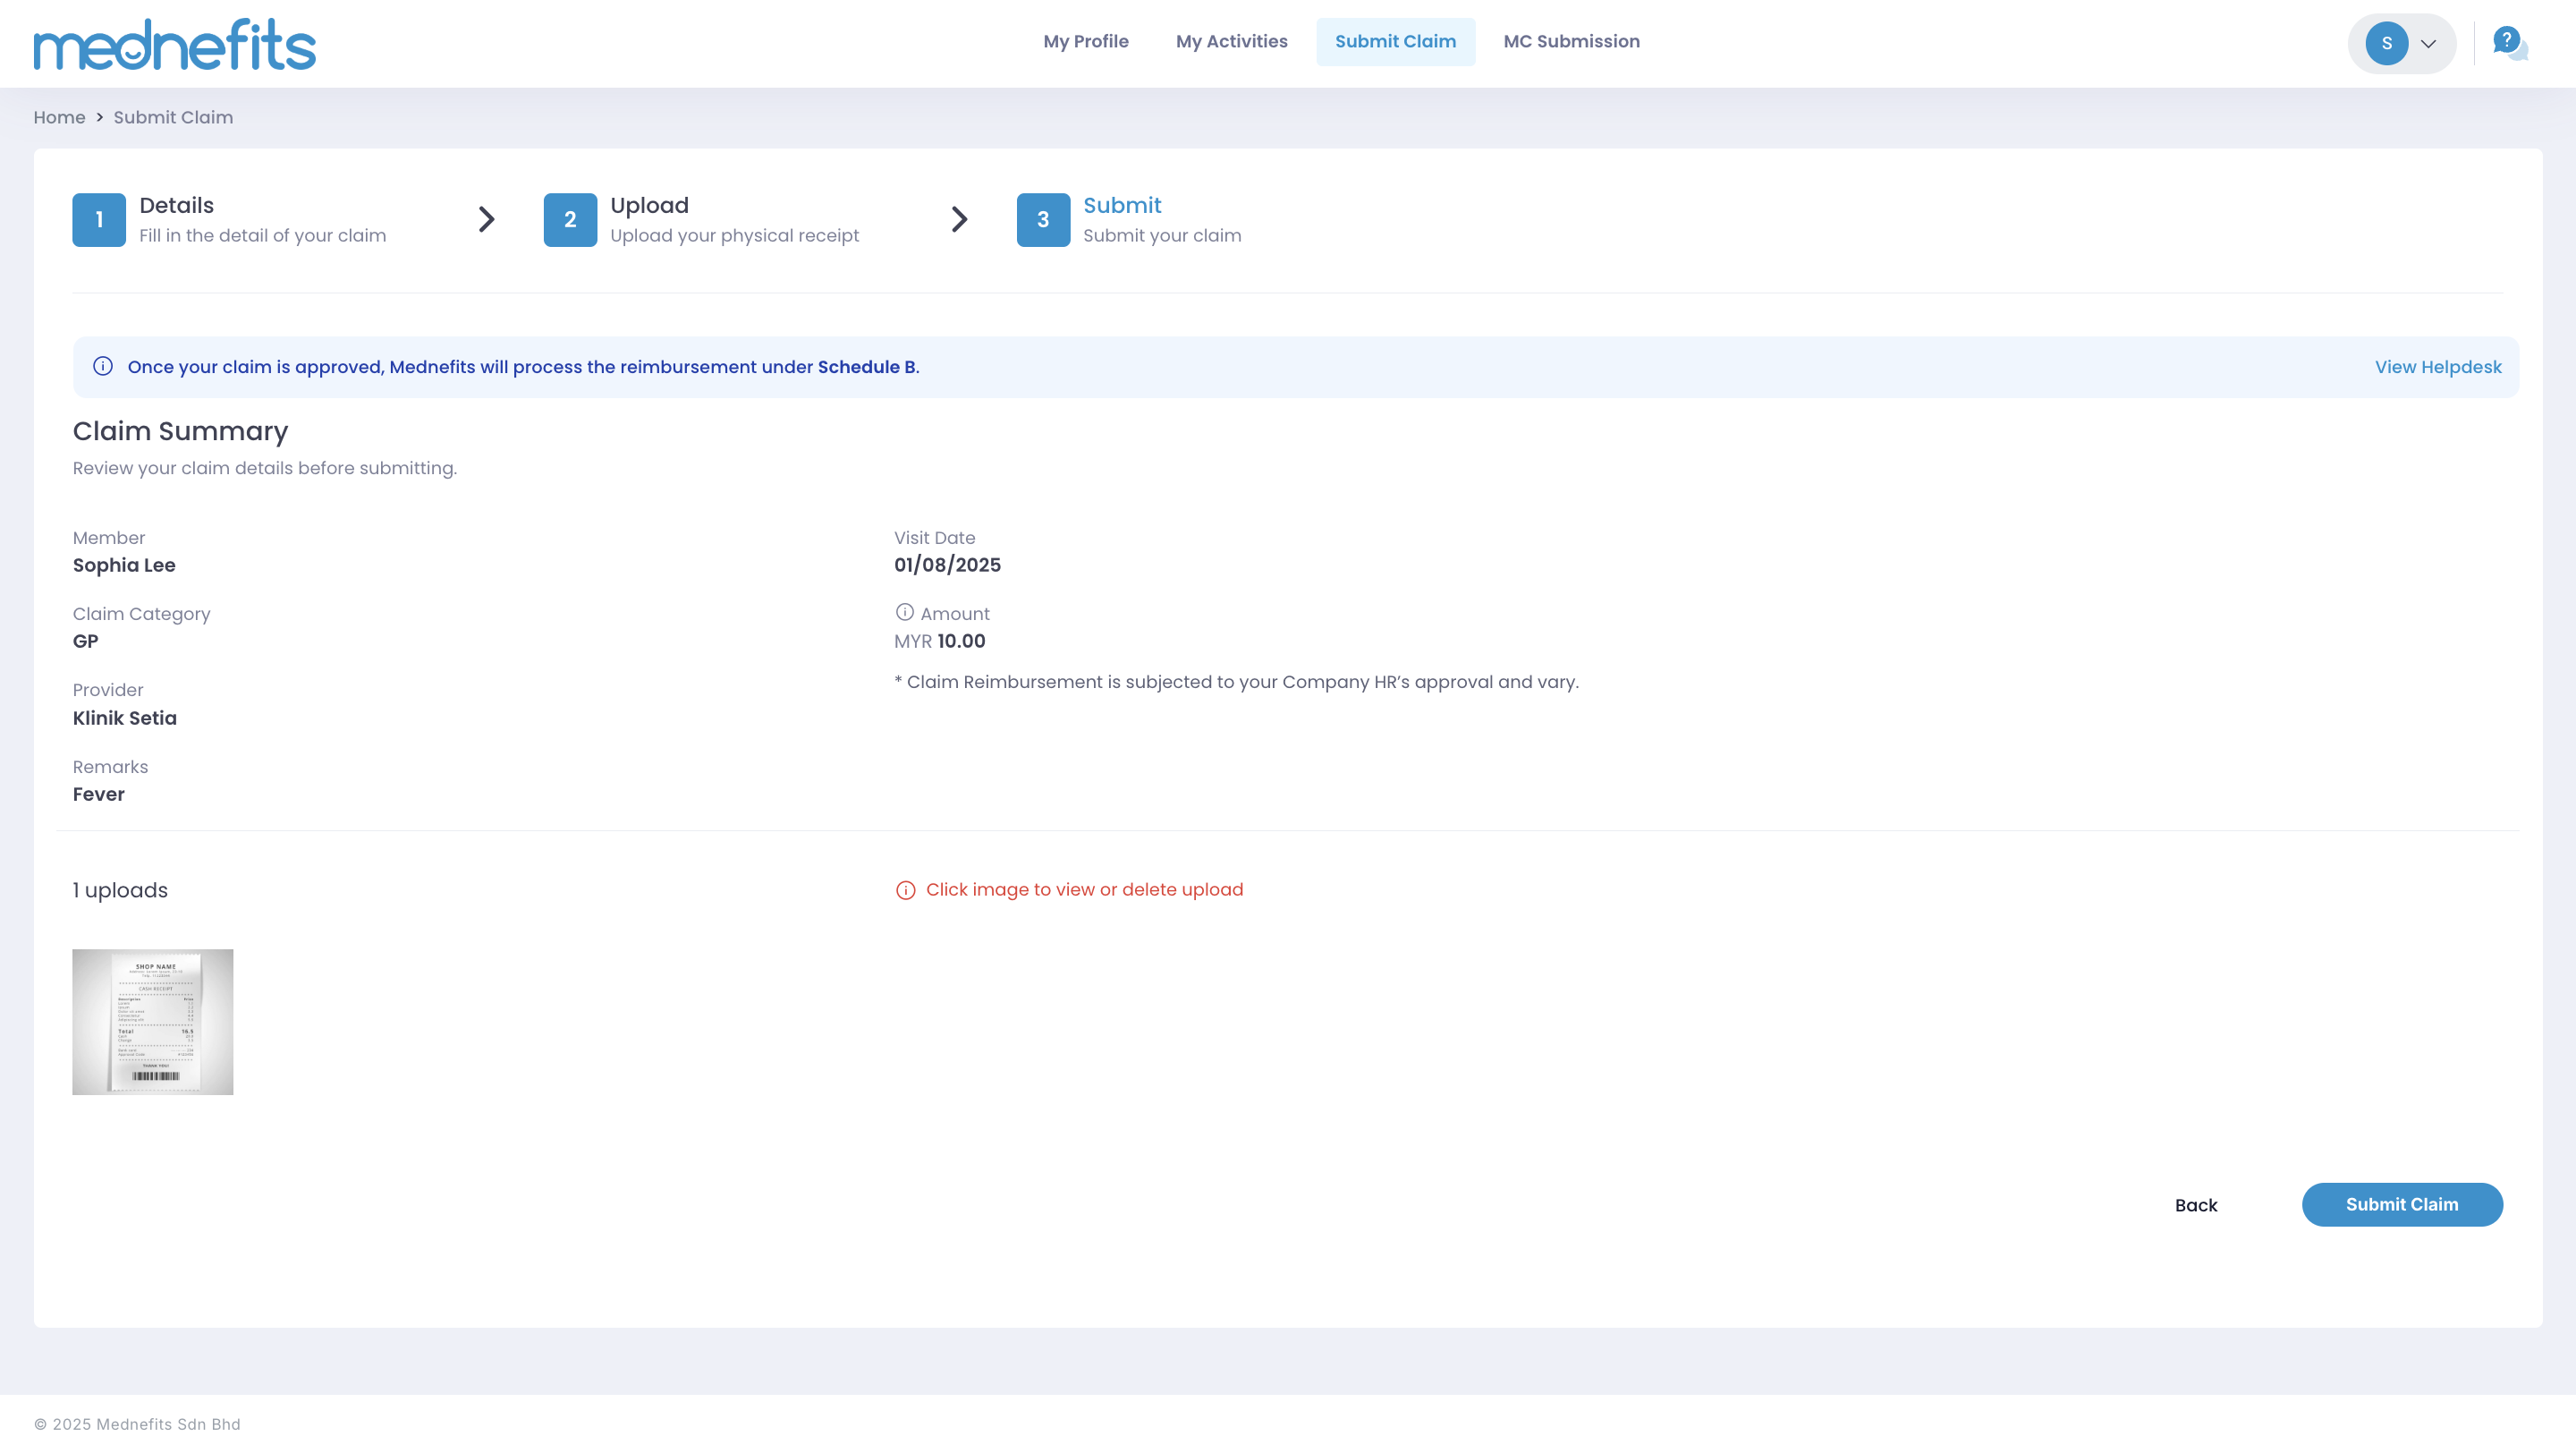
Step 5: On Submit page, you may review your submission.
- Click on Back if you want to amend your submission and may proceed to click on Submit Claim to complete your submission when it is good to go!
- You can view the uploaded image by clicking on the image and deleting the image by clicking Remove Upload.
- A blue banner will appear at the top to indicate the claim processing cycle followed by your company.
You may progressively monitor your claim status by clicking on My Activities, under Non-Panel tab and click on the claim number you wish to check. You will be able to view the reimbursement method and the reimbursement schedule followed by your company.
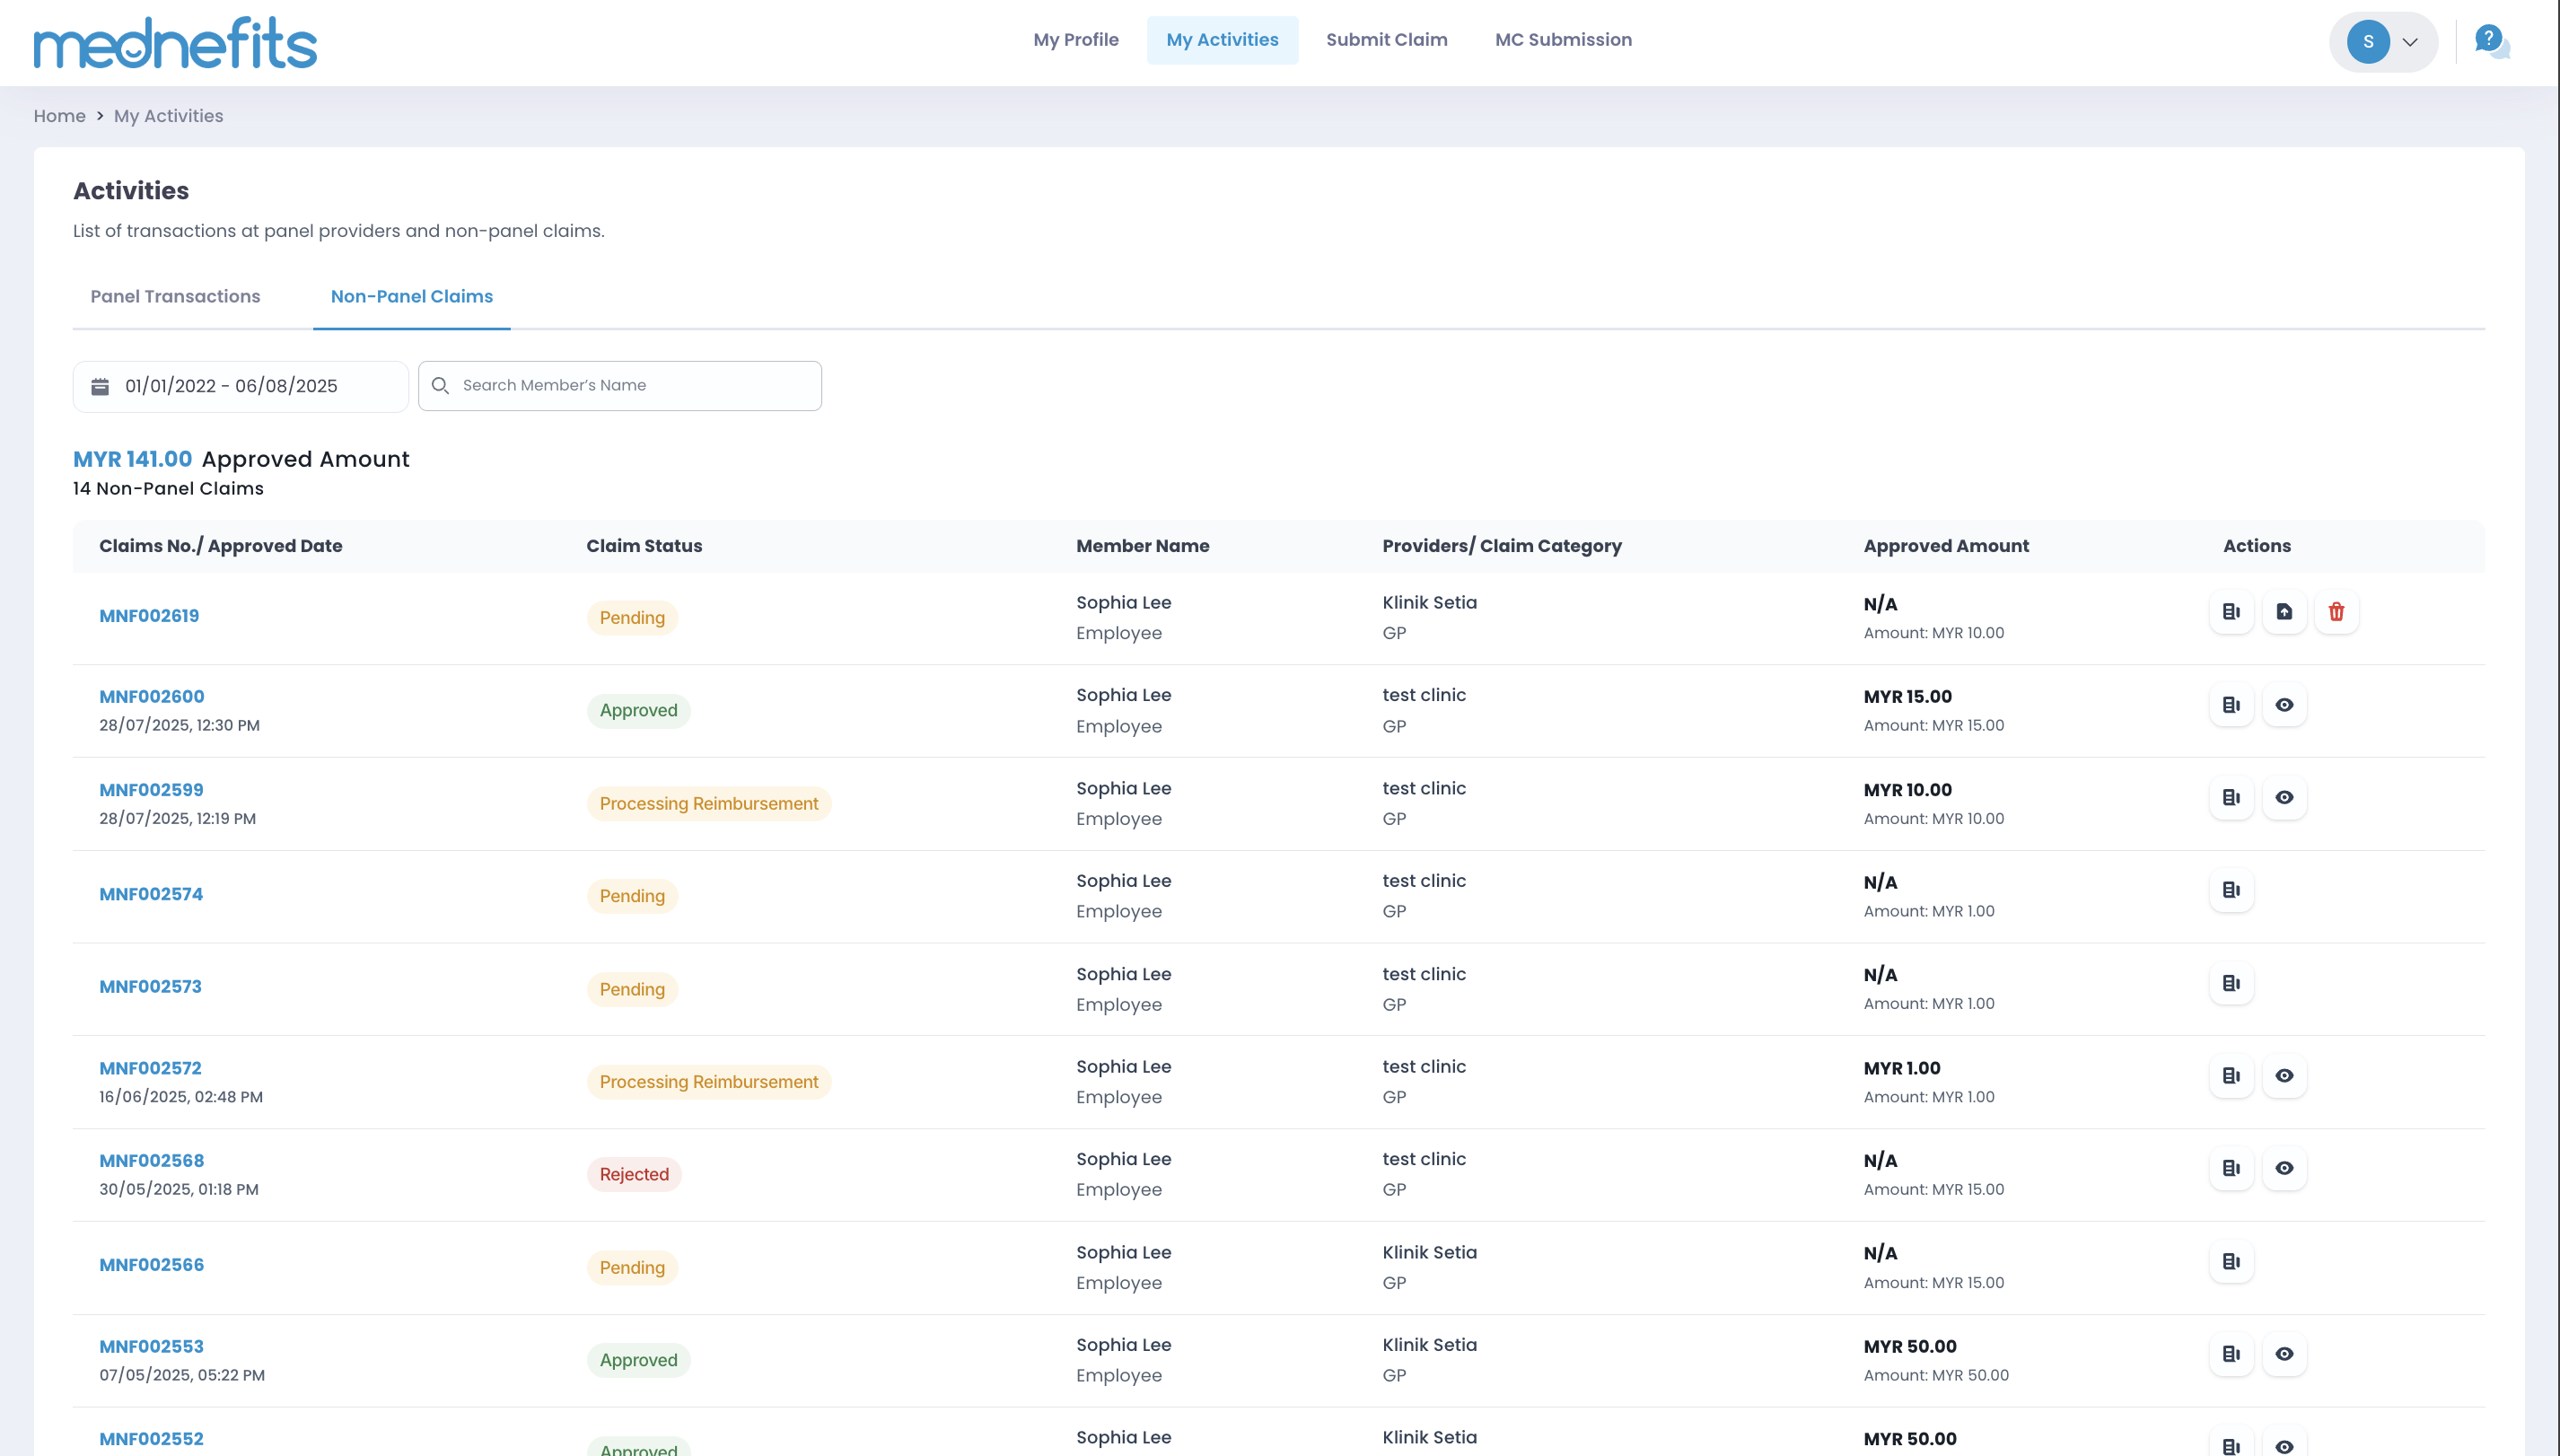
You may click on the link under any claim to learn more about the reimbursement schedule.