
 567
567
The Benefits Pass feature allows employees to visit designated providers for specific services. This includes the Medical Examination: Pre-Employment Check-Up, which will take effect immediately.
⚠️ Important Note:
-
Malaysia: Employees are required to print and present the Medical Report during their appointment.
-
Singapore: Employees will use the individual clinic’s medical report format. No Mednefits Medical Report is required.
You may refer to a sample report via this link.
For a copy of the actual Medical Report (Malaysia only), please contact [email protected].
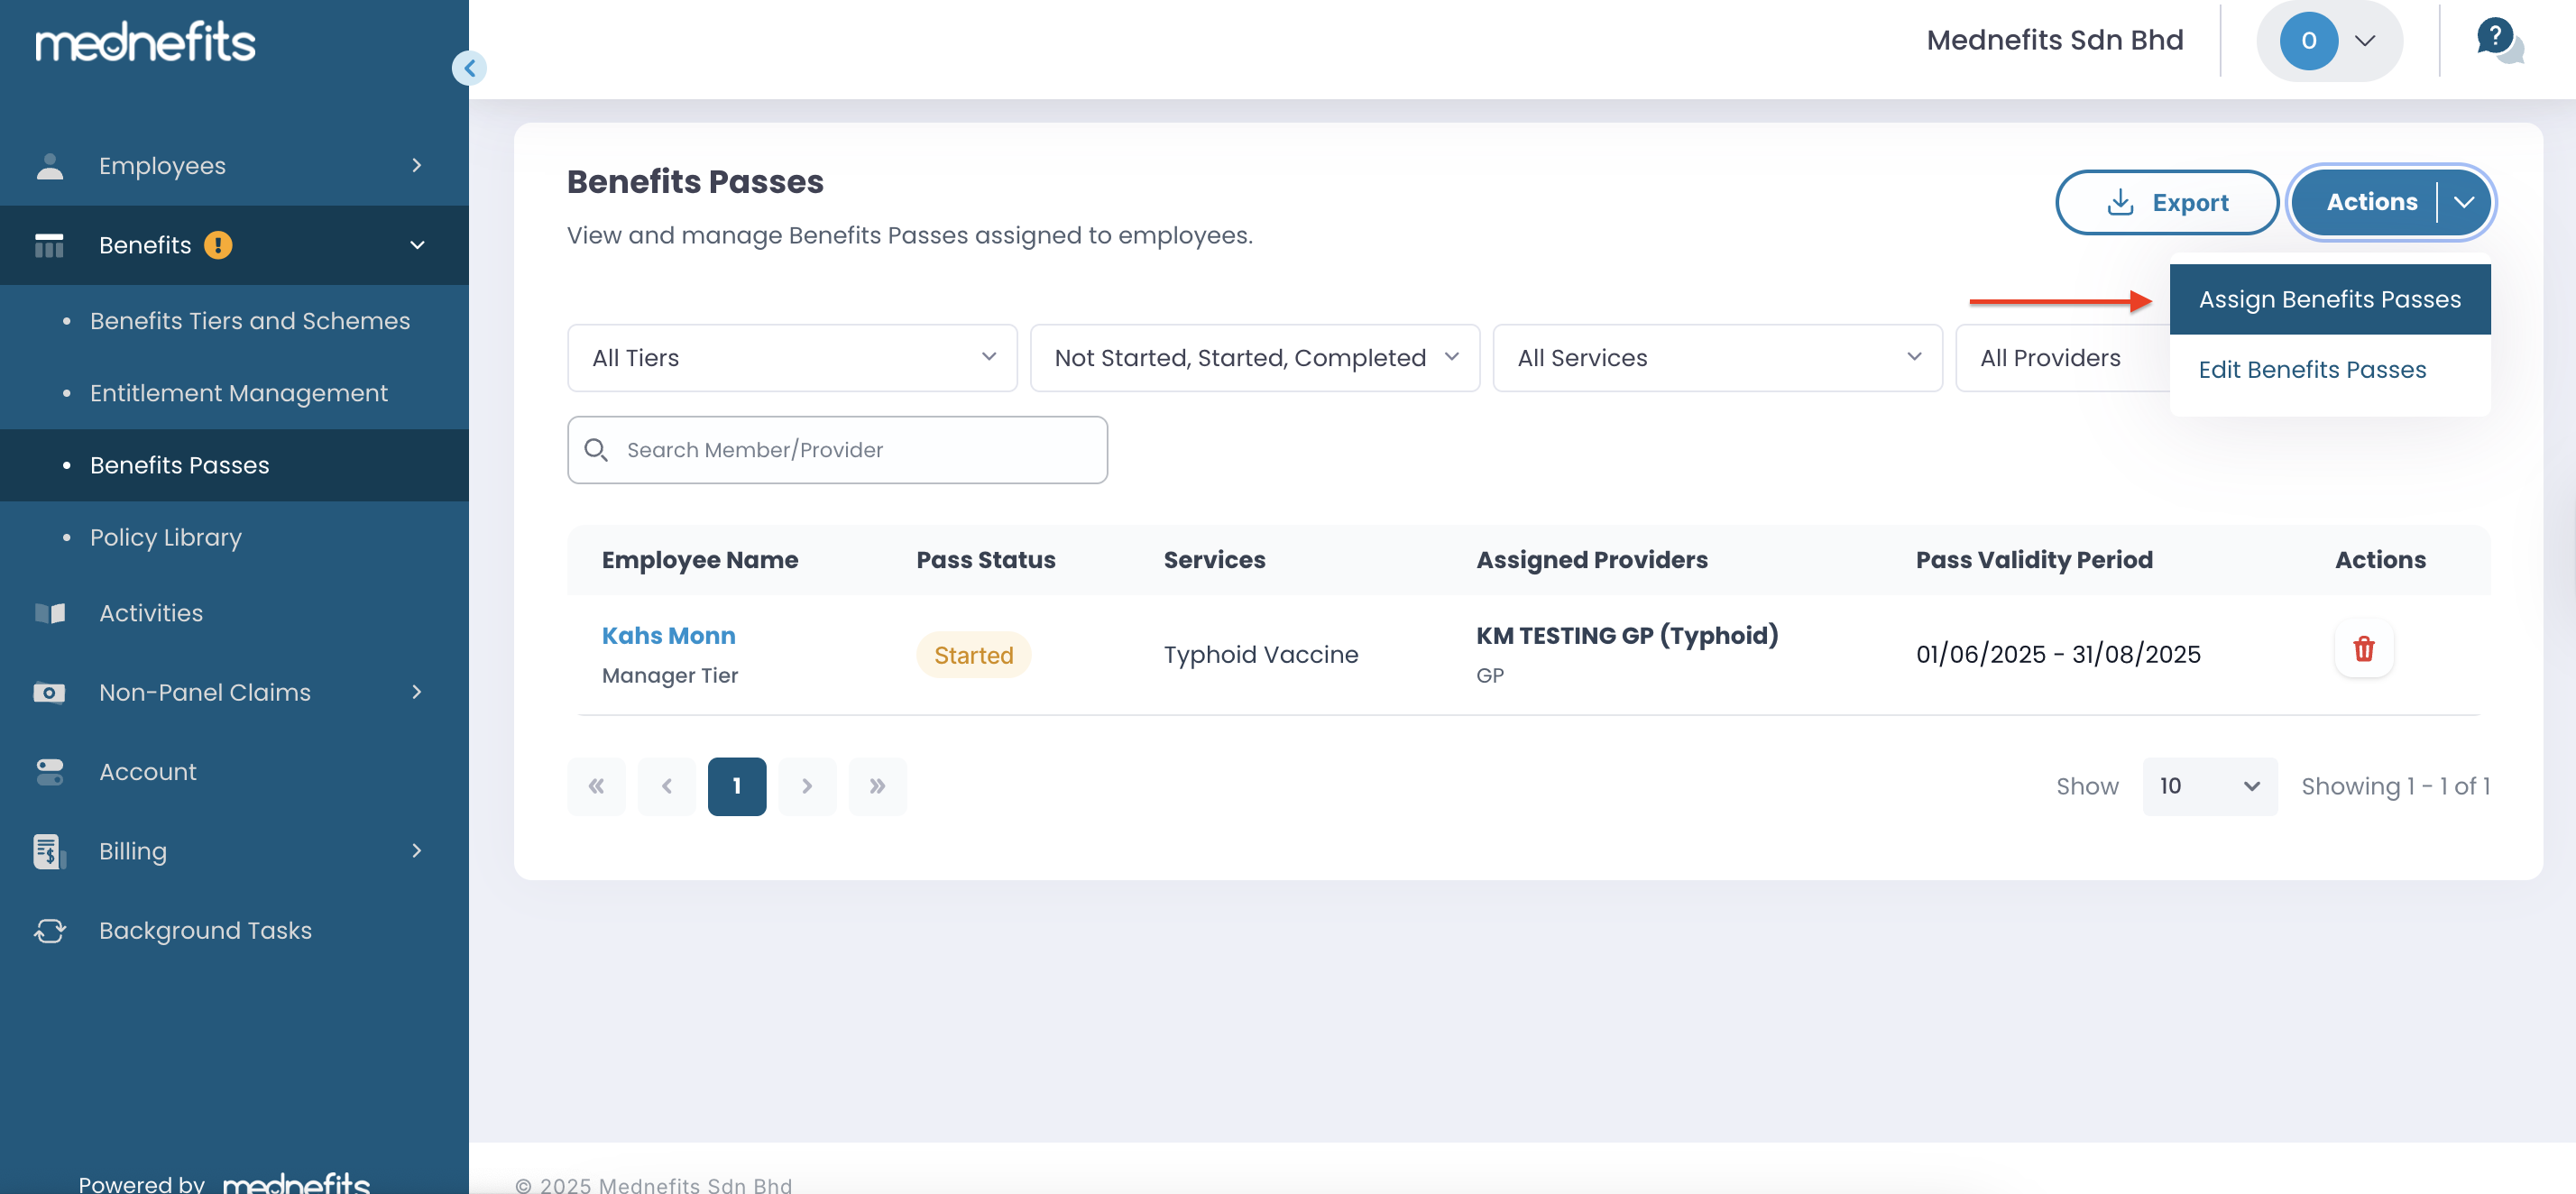
Step 1: To assign a new Benefits Pass to an employee, navigate to: Benefits → Benefits Passes → Actions → Assign Benefits Passes.
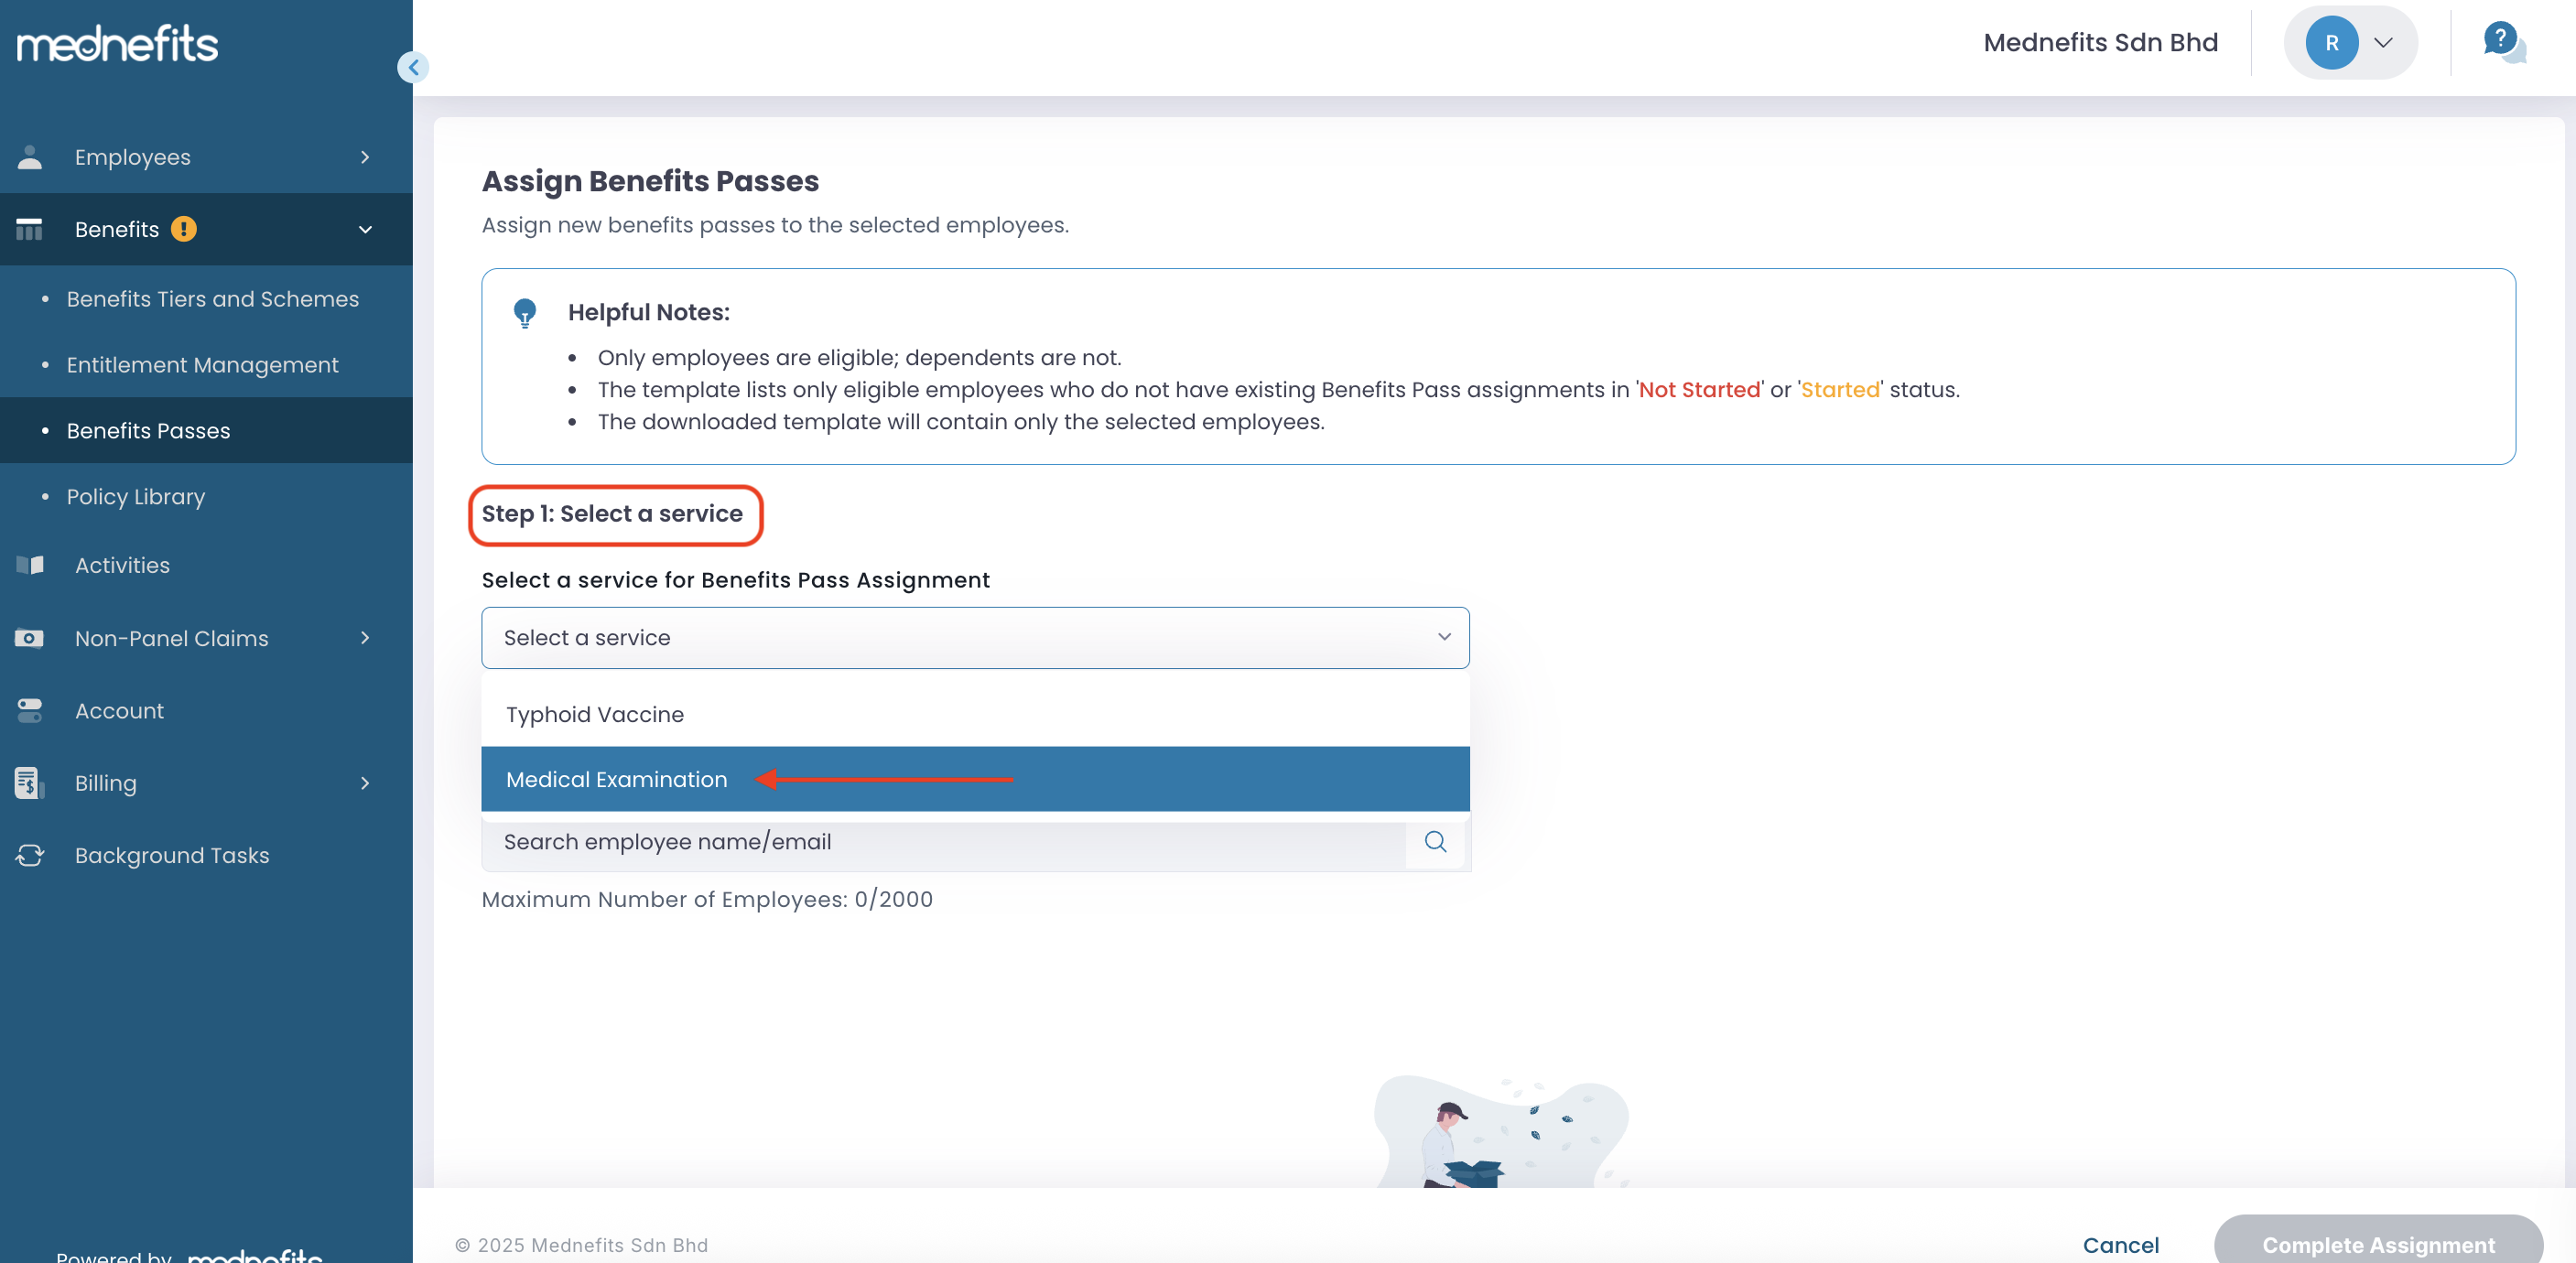
Under Select a service, choose Medical Examination.
Step 2: Search and select the employee(s) to assign the Benefits Pass.
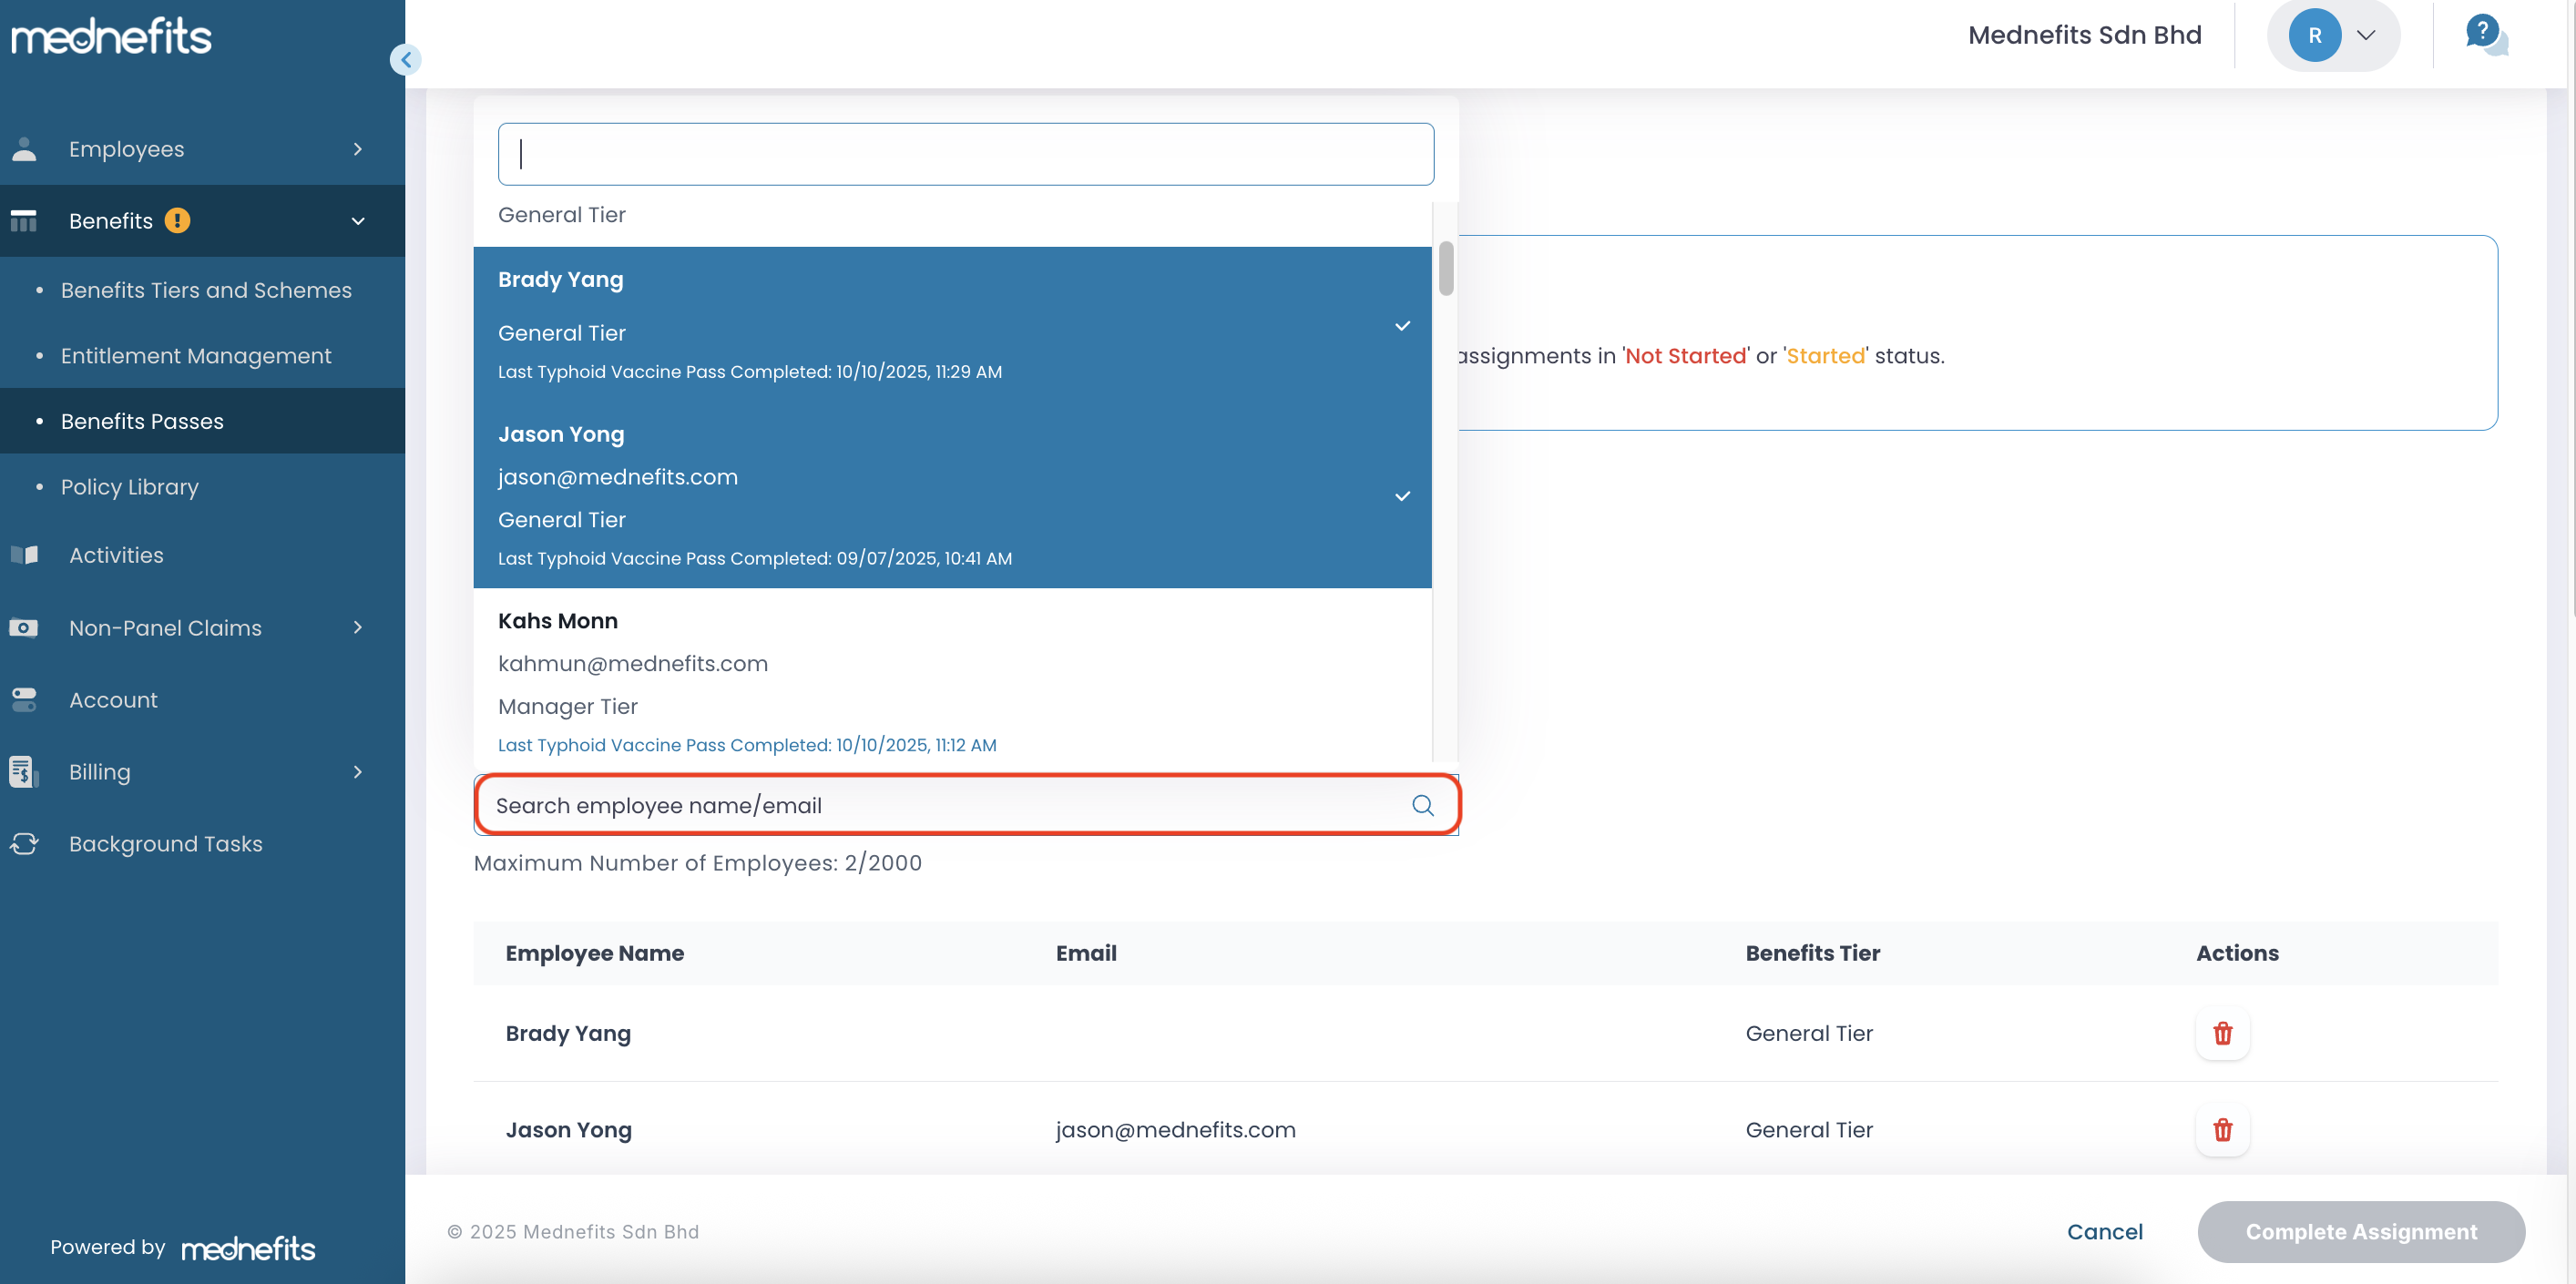
Notes: Only employee(s) meeting the following criteria are eligible for selection:
- Have active GP schemes.
- Do not have existing Benefits Pass assignments in 'Not Started' or 'Started' status in the Overview table.
- Previously completed their assigned Benefits Pass, with a completion date earlier than today.
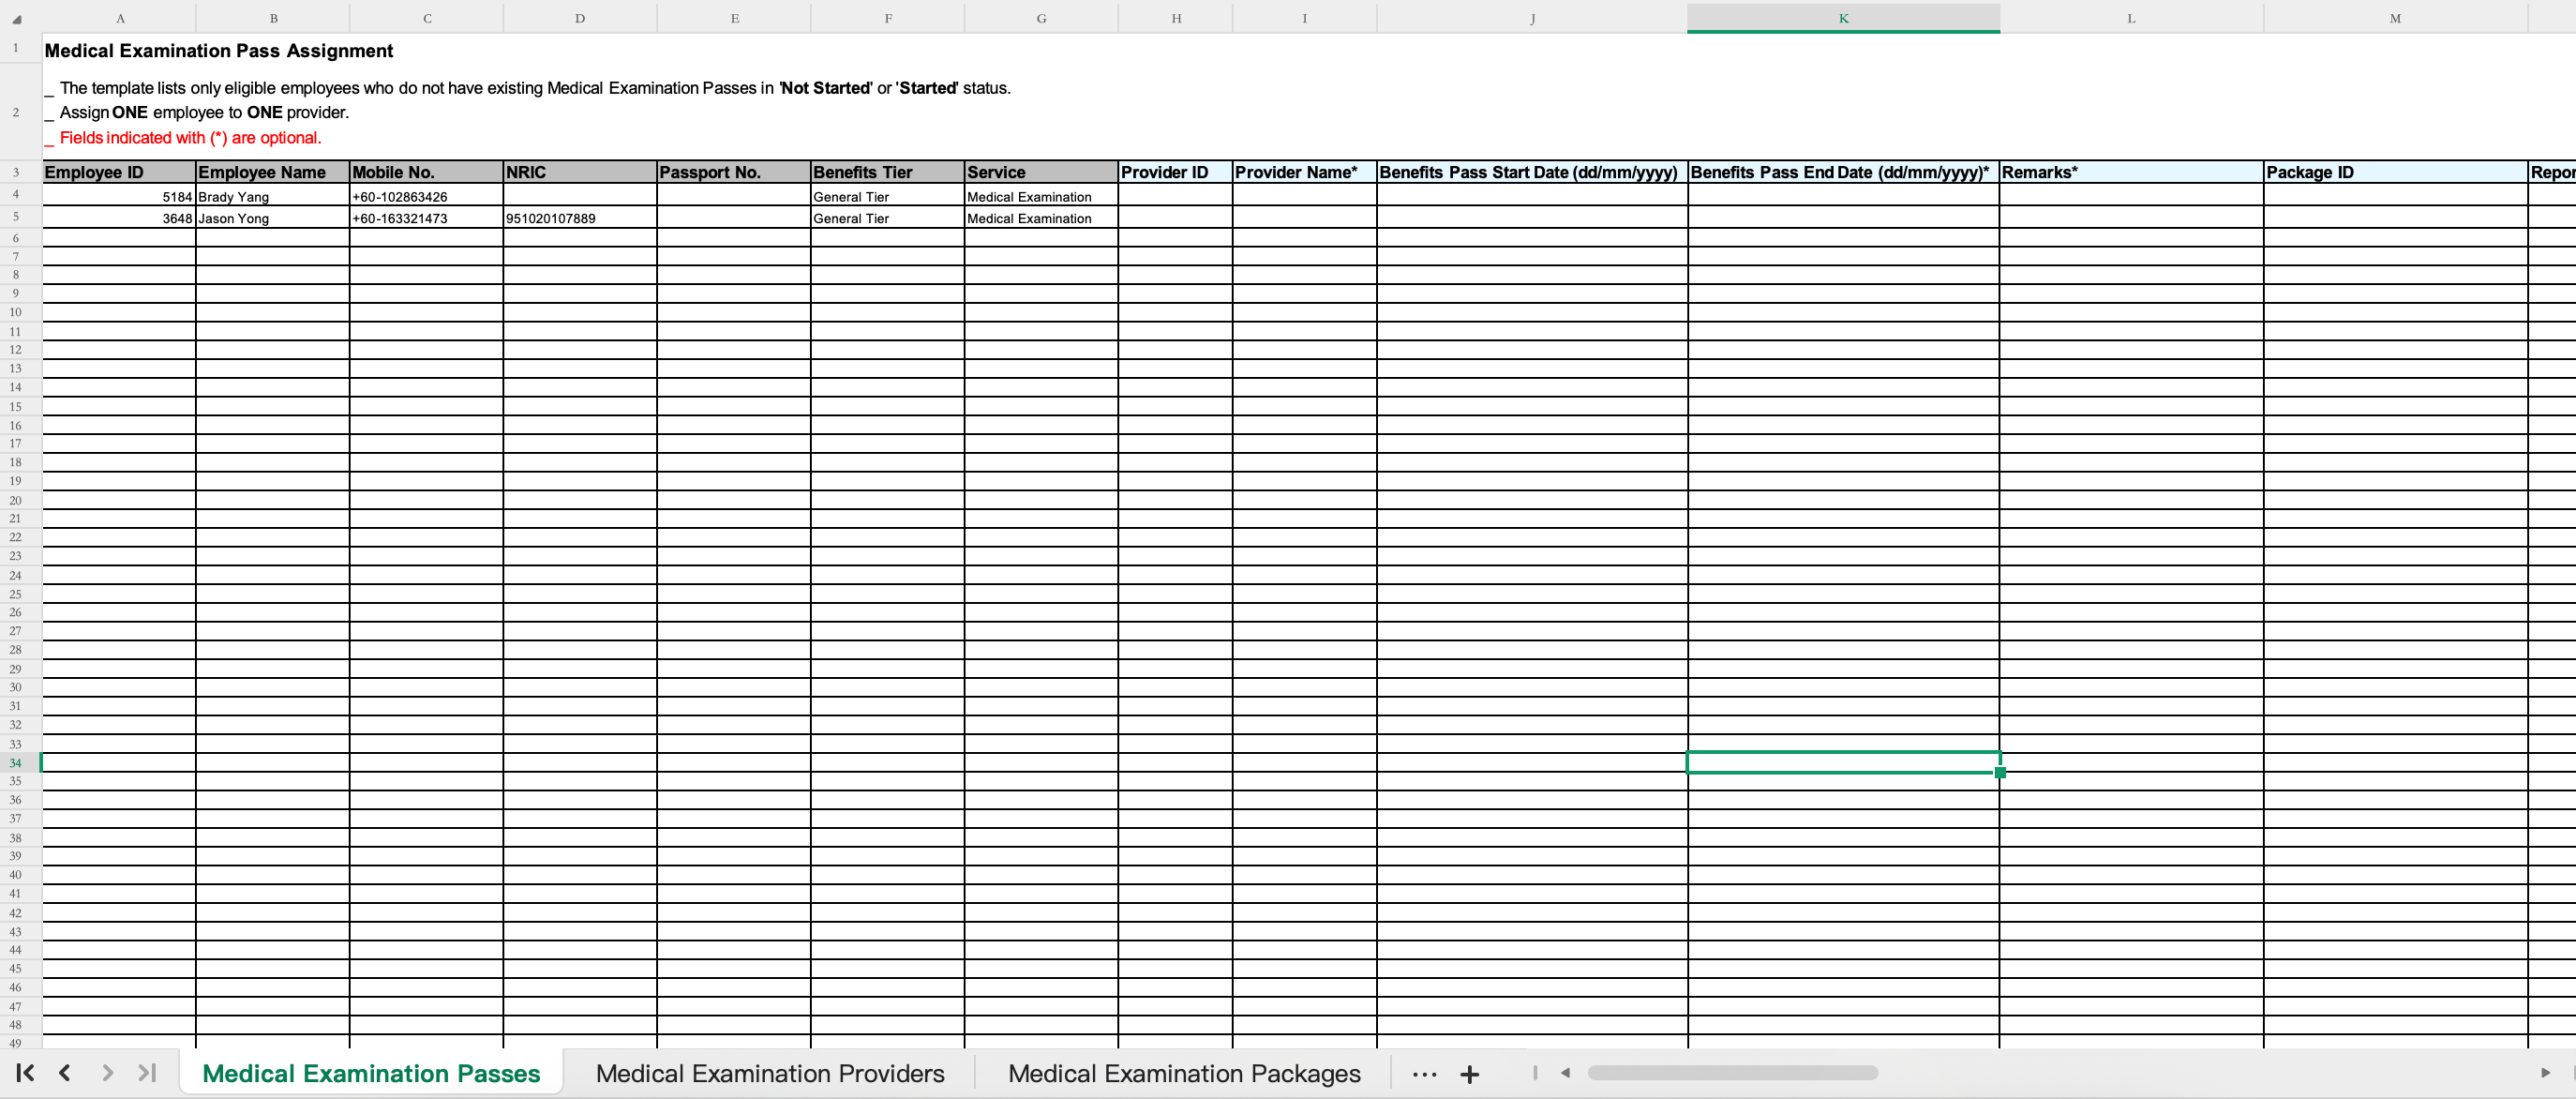
Step 3: Download the Benefits Pass template and fill it in.
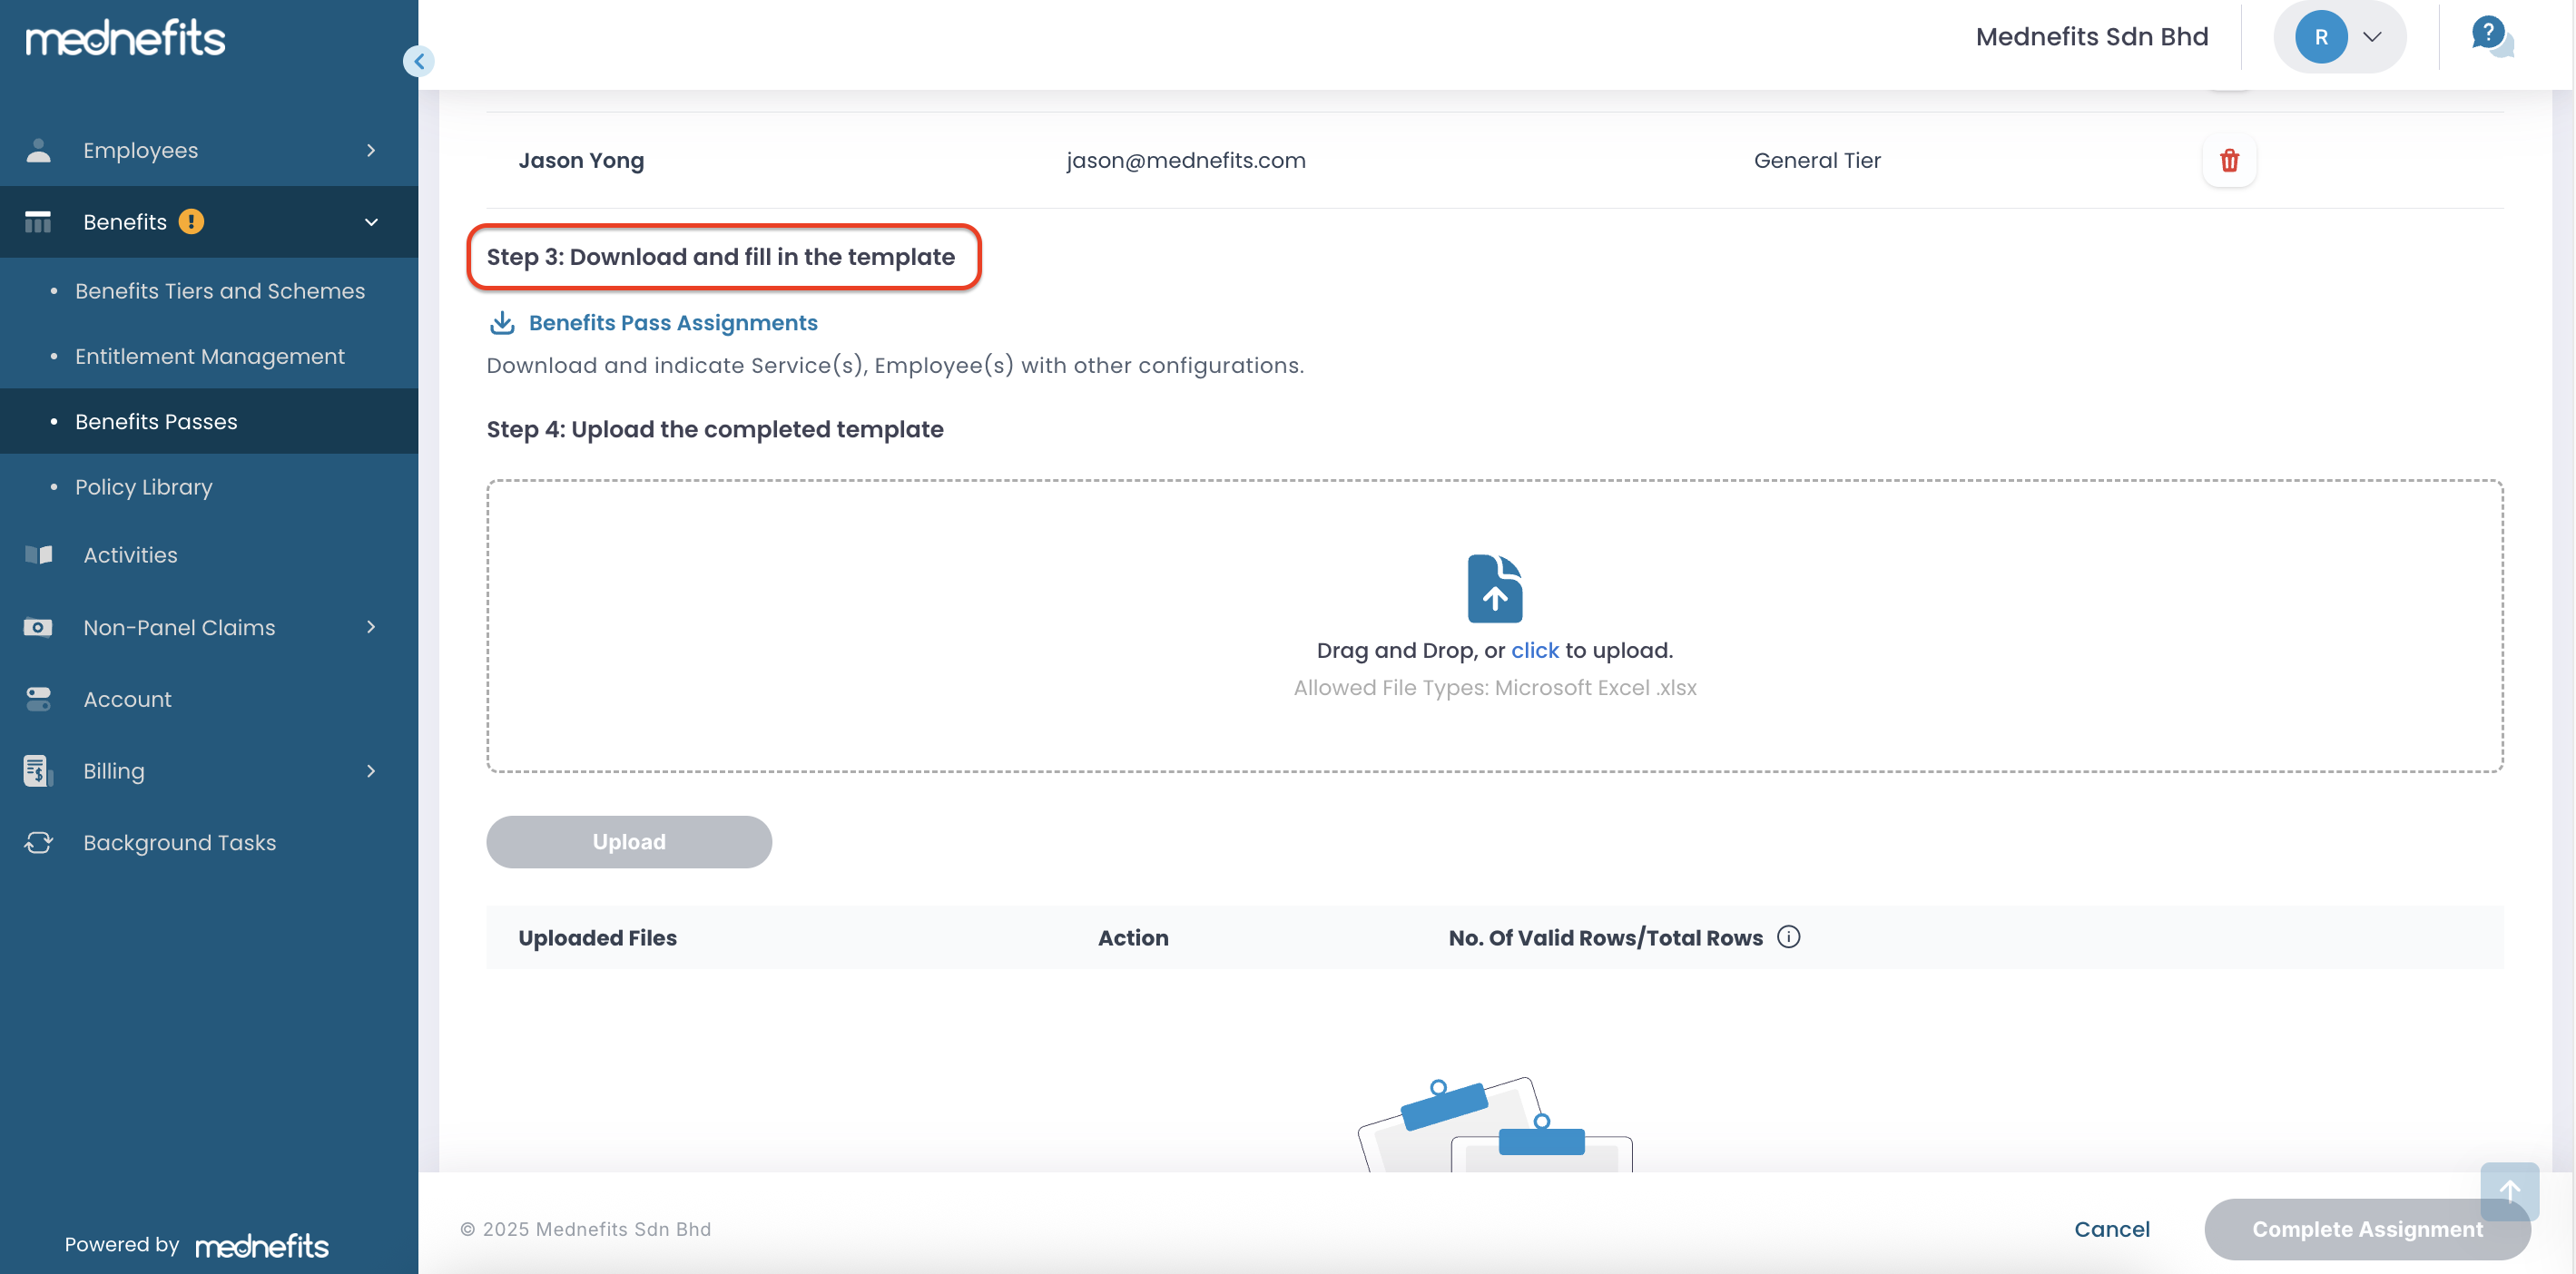
Notes: Navigate to the Medical Examination Benefit Passes sheet to specify the provider(s) and other configurations. HR/admin is required to complete the following fields:
-
Provider ID: Refer to the Medical Examination Providers sheet. Only ONE Provider ID should be inputted.
-
Provider Name (optional): Medical Examination Providers sheet. Only ONE Provider ID should be inputted.
-
Benefits Pass Start Date: dd/mm/yyyy.
-
Benefits Pass End Date: dd/mm/yyyy. Leave blank if there is no End Date.
-
Remarks (optional): Free text field. If inputted, the remarks will appear under the Information section on the Benefits Pass Details page in both the Member App and Member Portal.
-
Package ID: Indicate ONE Package ID the employee will take (refer to Medical Examination Packages sheet)
-
Report Dispatch Method: Indicate E if the report should be emailed to HR, or C if the employee will collect it in person (E= Email, C= Self Collection)
-
HR Email: Specify the HR recipient email when reports are dispatched via email to HR.
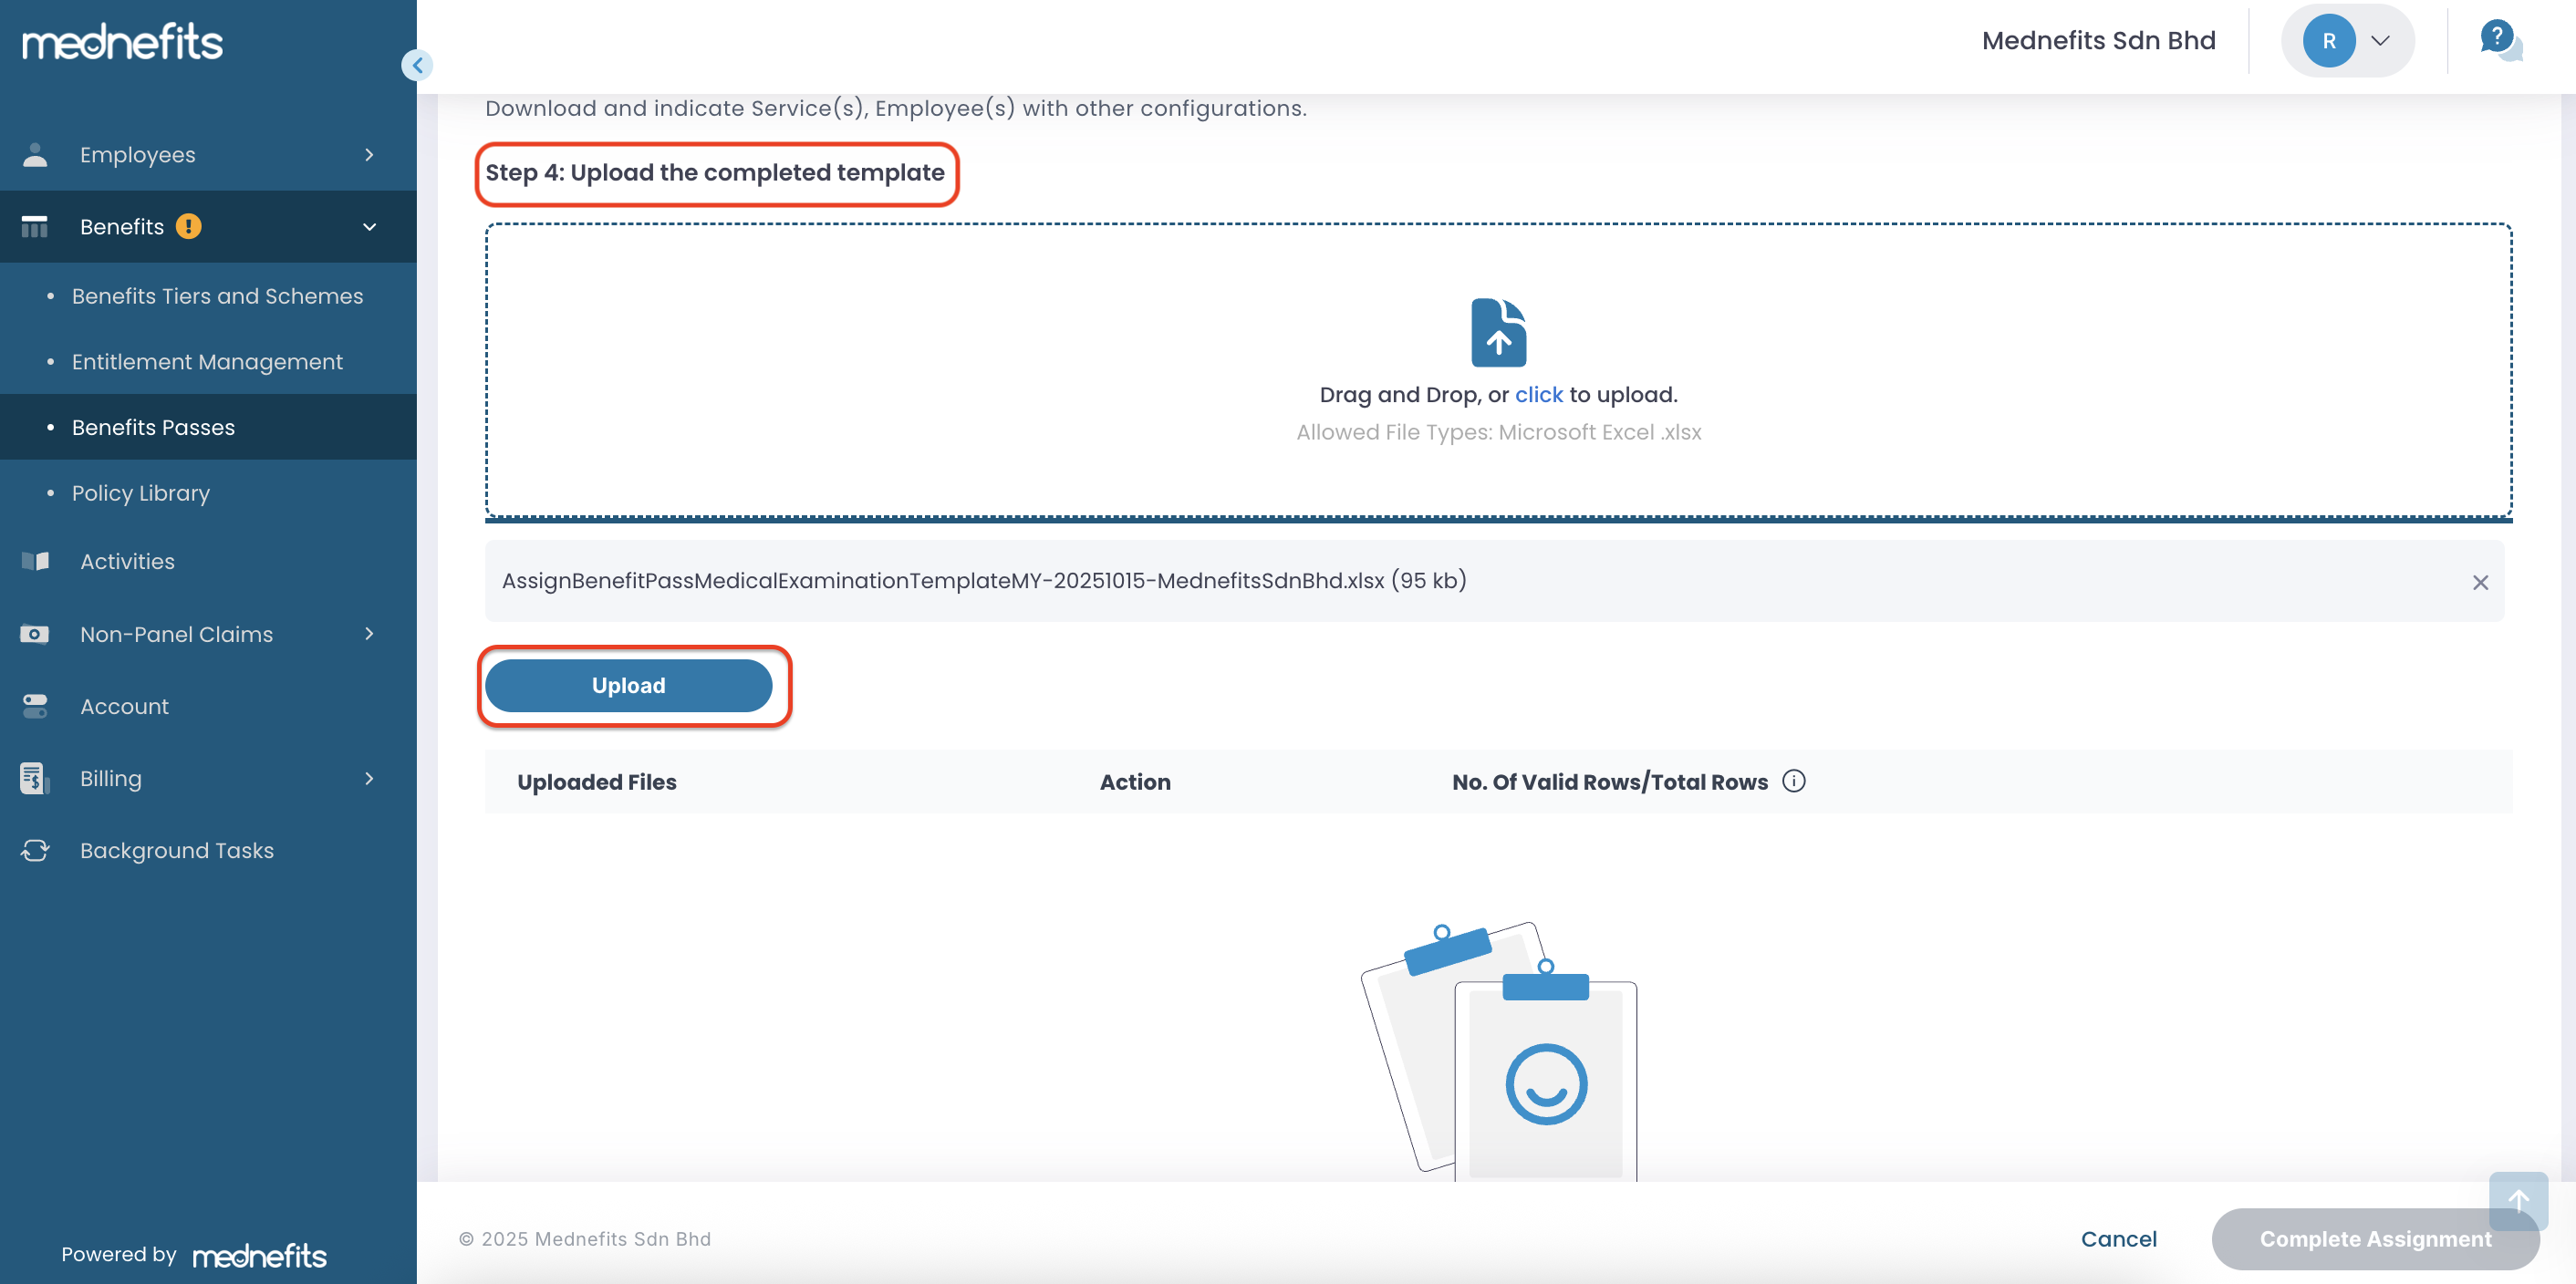
Step 4: Upload the completed template.
Once the template is completed, proceed with the upload. If the file contains no errors, proceed with completing the assignment.
❗ Error! Unable to proceed (if any)

Possible Errors:
-
Unmatched Entry (Provider ID): The Provider ID does not match any ID in the Typhoid Providers sheet.
-
Invalid Format (Benefits Pass Start Date / End Date): Date format does not follow dd/mm/yyyy.
-
Invalid Entry (Benefits Pass End Date): End Date is earlier than the Start Date.
-
Package ID: An Invalid ID has been entered.
-
Empty Entry (Report Dispatch Method E/C): Provider ID and Package ID are entered, but required fields are left blank.
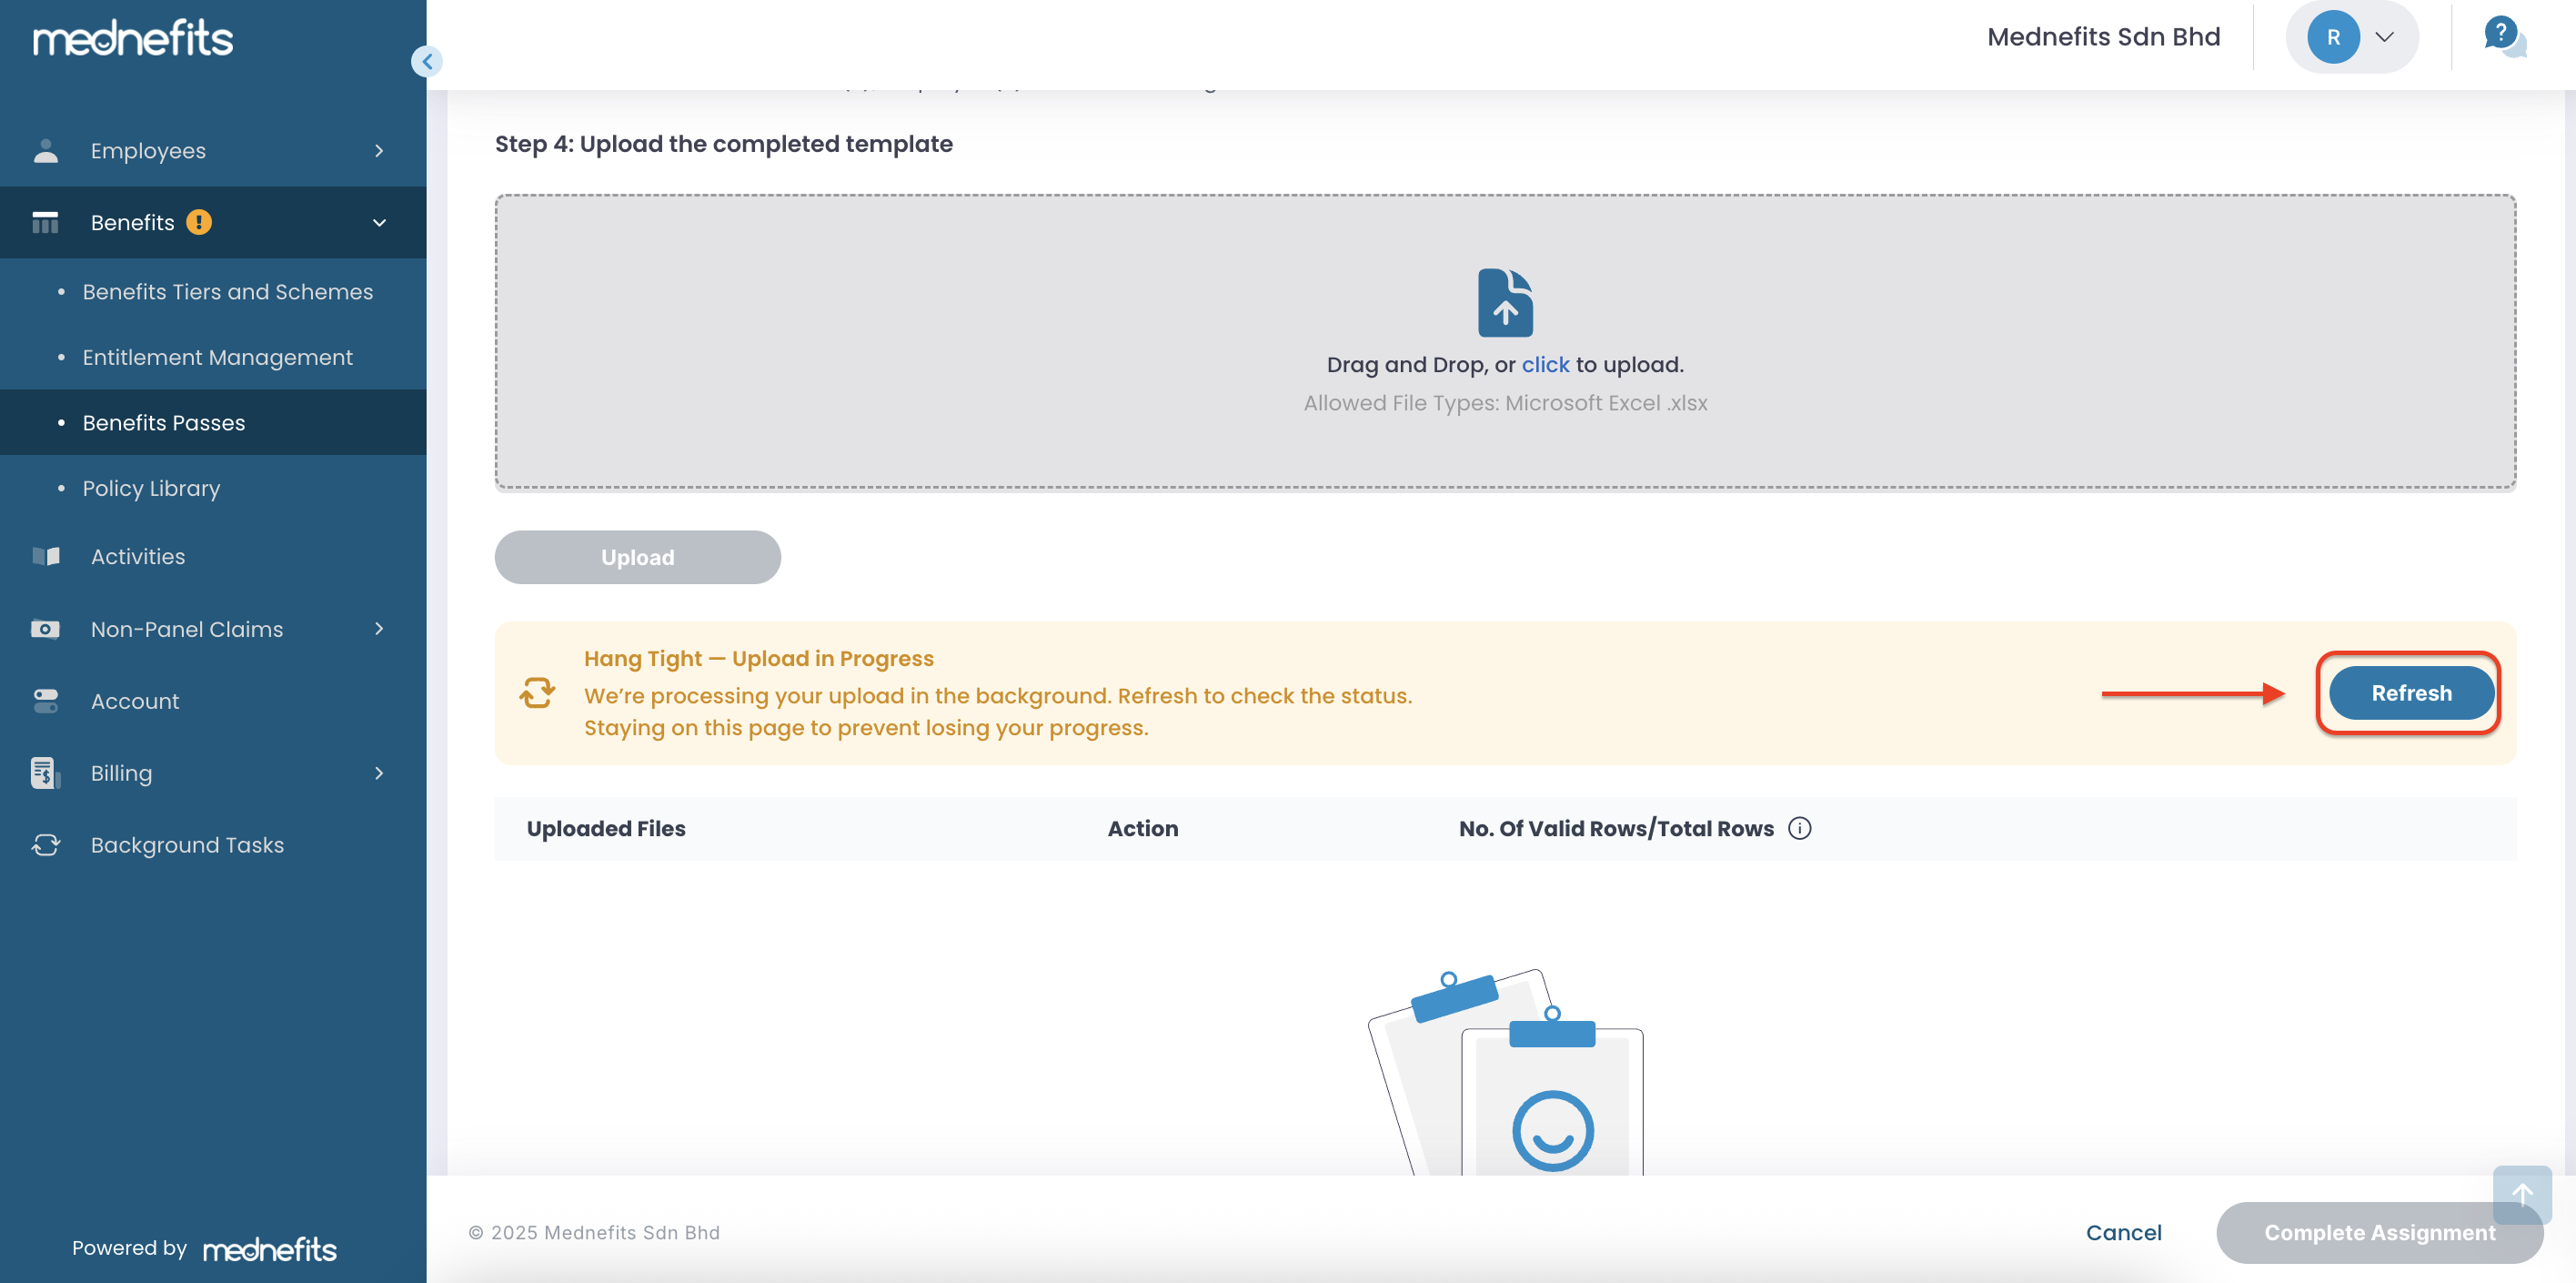
Step 5: After the upload, click Refresh to check the status.
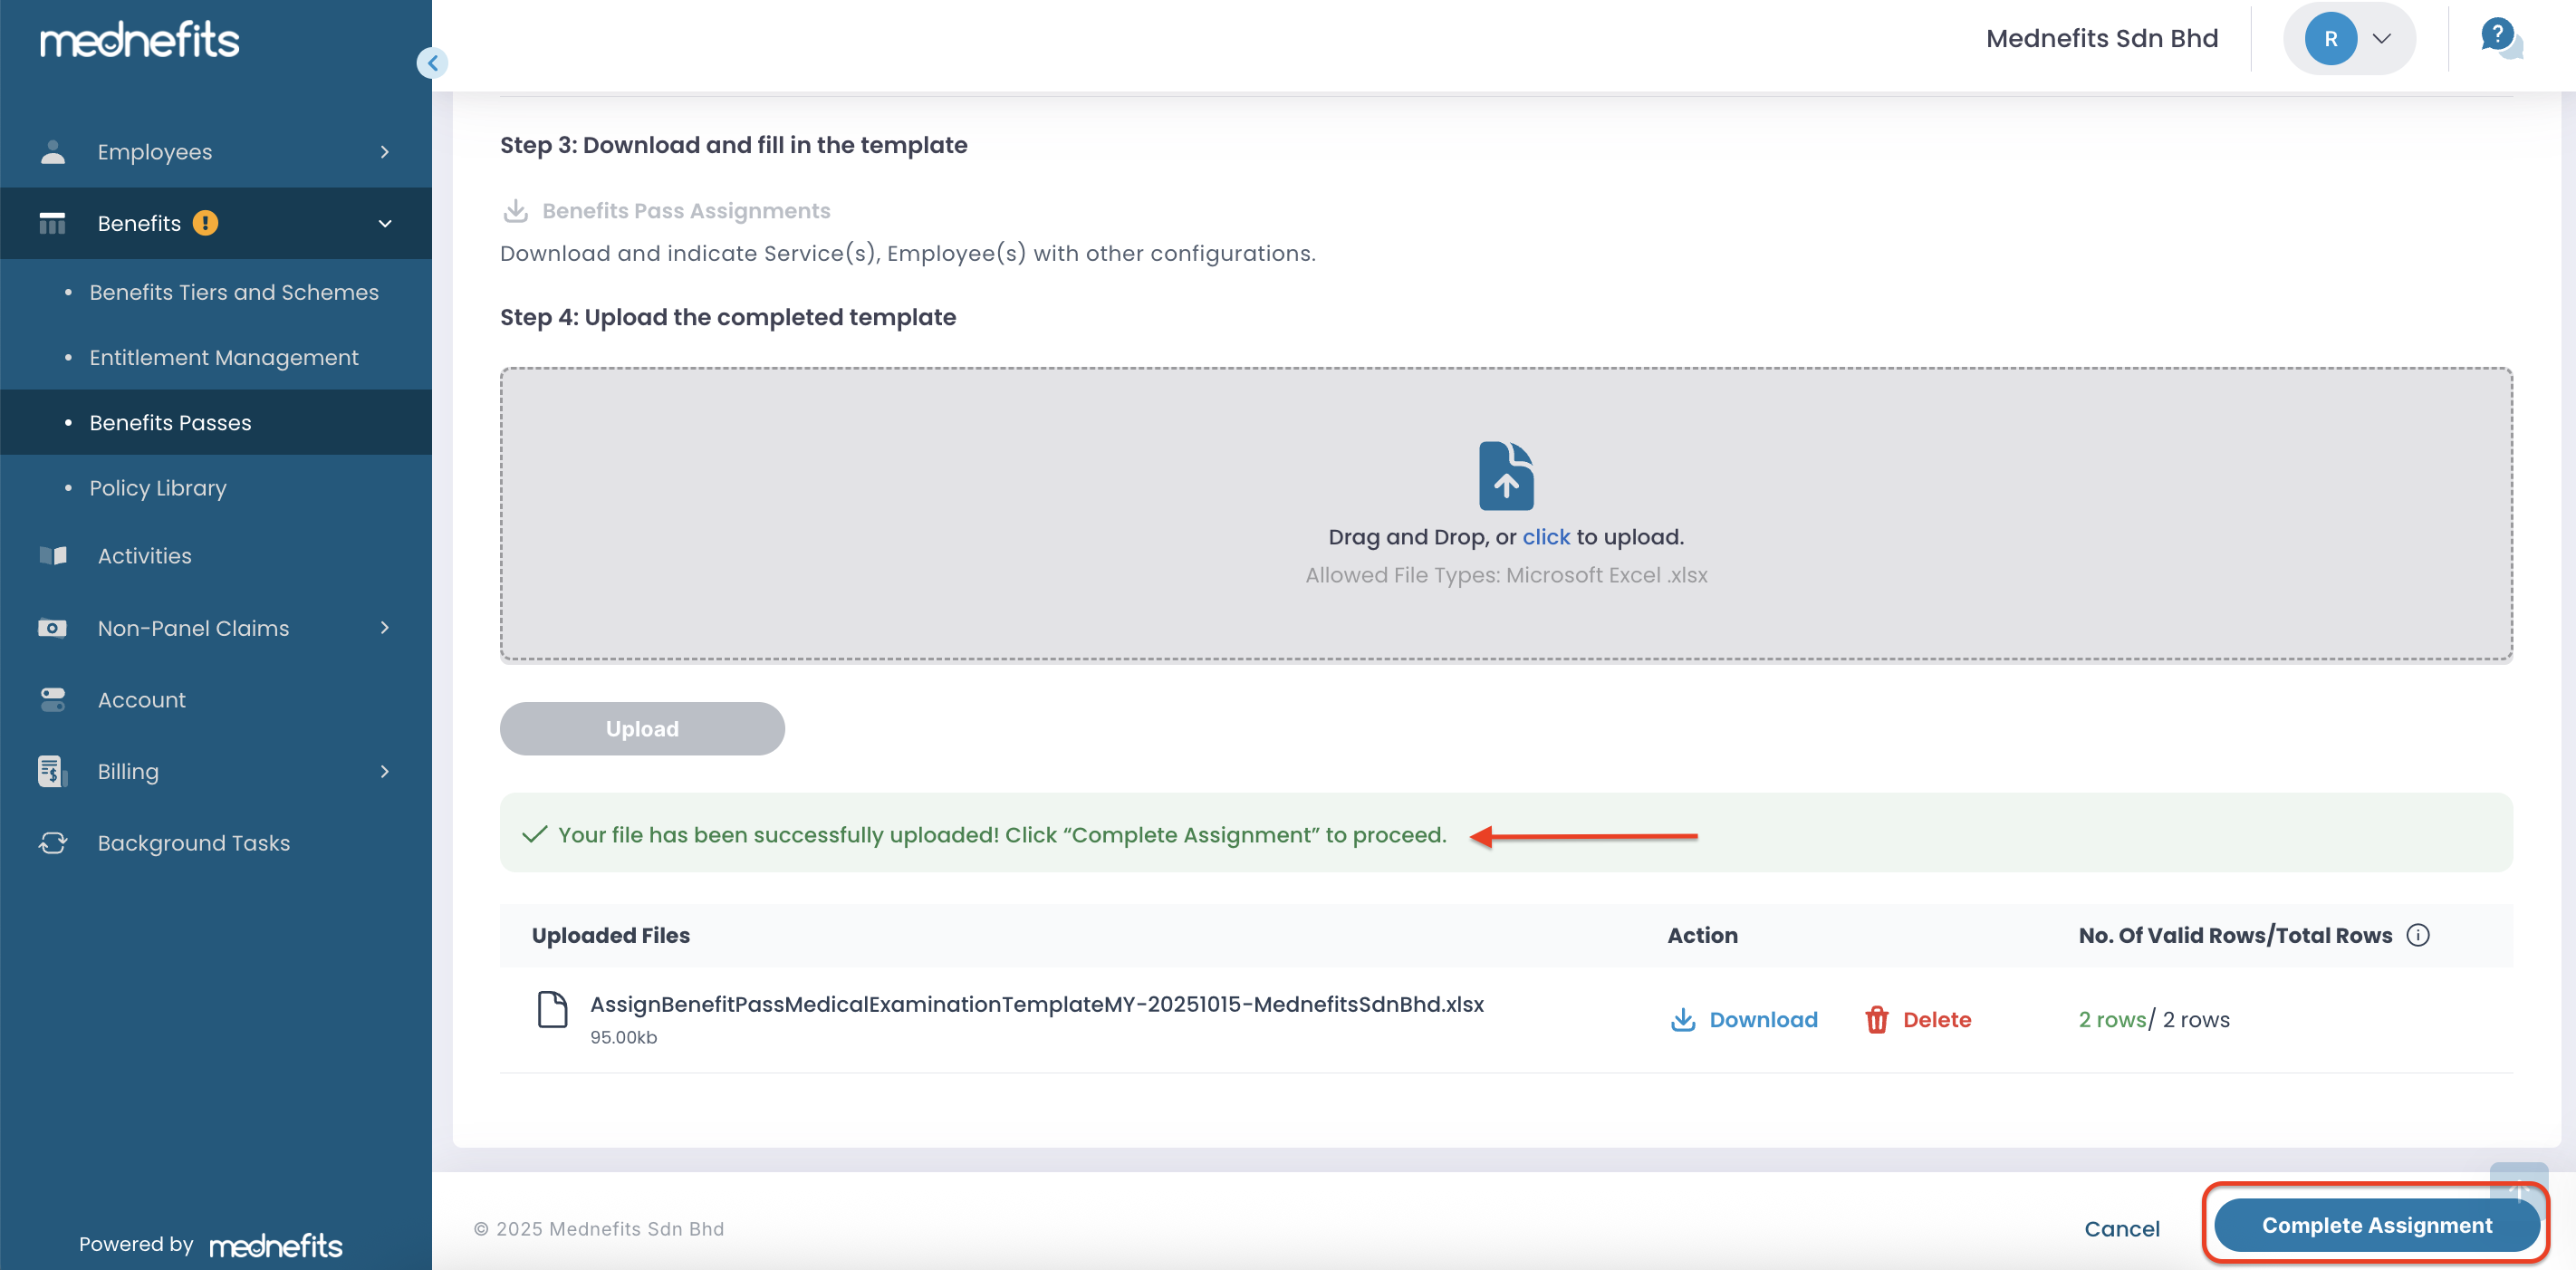
Step 6: Click "Complete Assignment" after the upload is complete.
Step 7: You will be directed to the Background Tasks page.

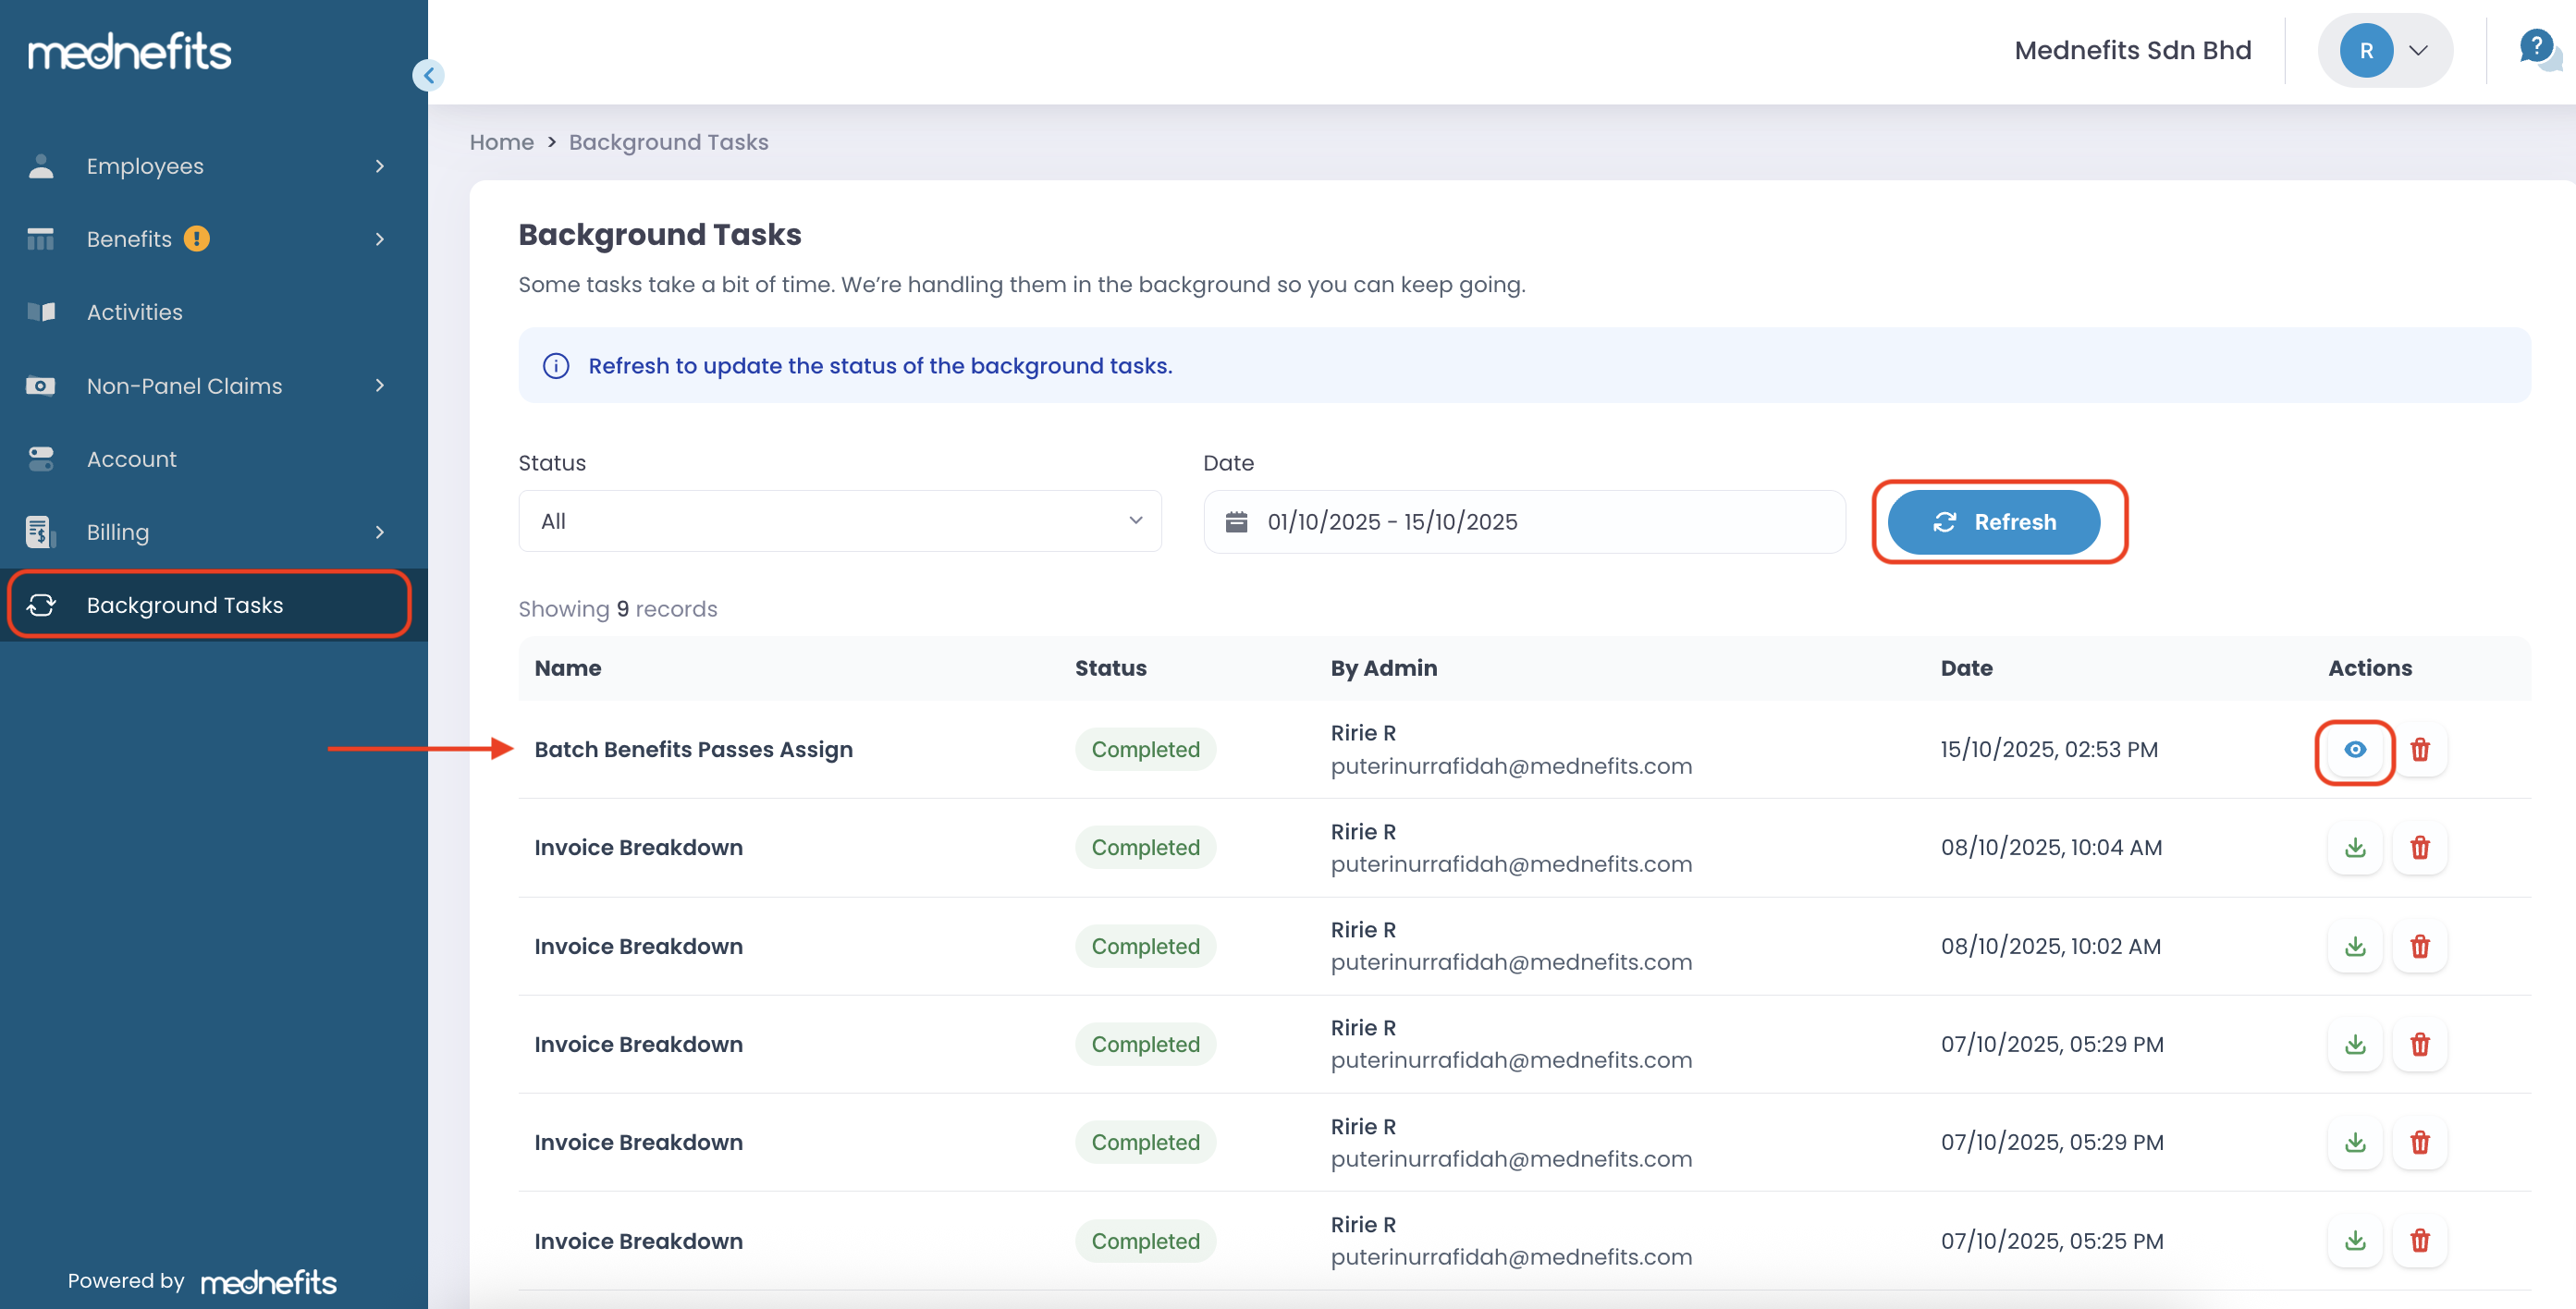
- Click Refresh to get the latest updates.
- Click View Page to navigate to the Benefits Passes Overview table and verify if the assignments were successful.
- The appointed clinic will receive an email notification for a successful assignment/appointment.
If you need to edit any existing Benefits Passes, please visit this helpdesk article: How to Modify Existing Benefits Passes

