
 4
4
Benefits Passes are newly introduced to allow employees to visit designated providers for specific services, such as the Pre-Employment Check-Up with effective 1 November 2025.
Important Note: Employees are required to print out and present the Medical Report during their appointment. You may download them from this link
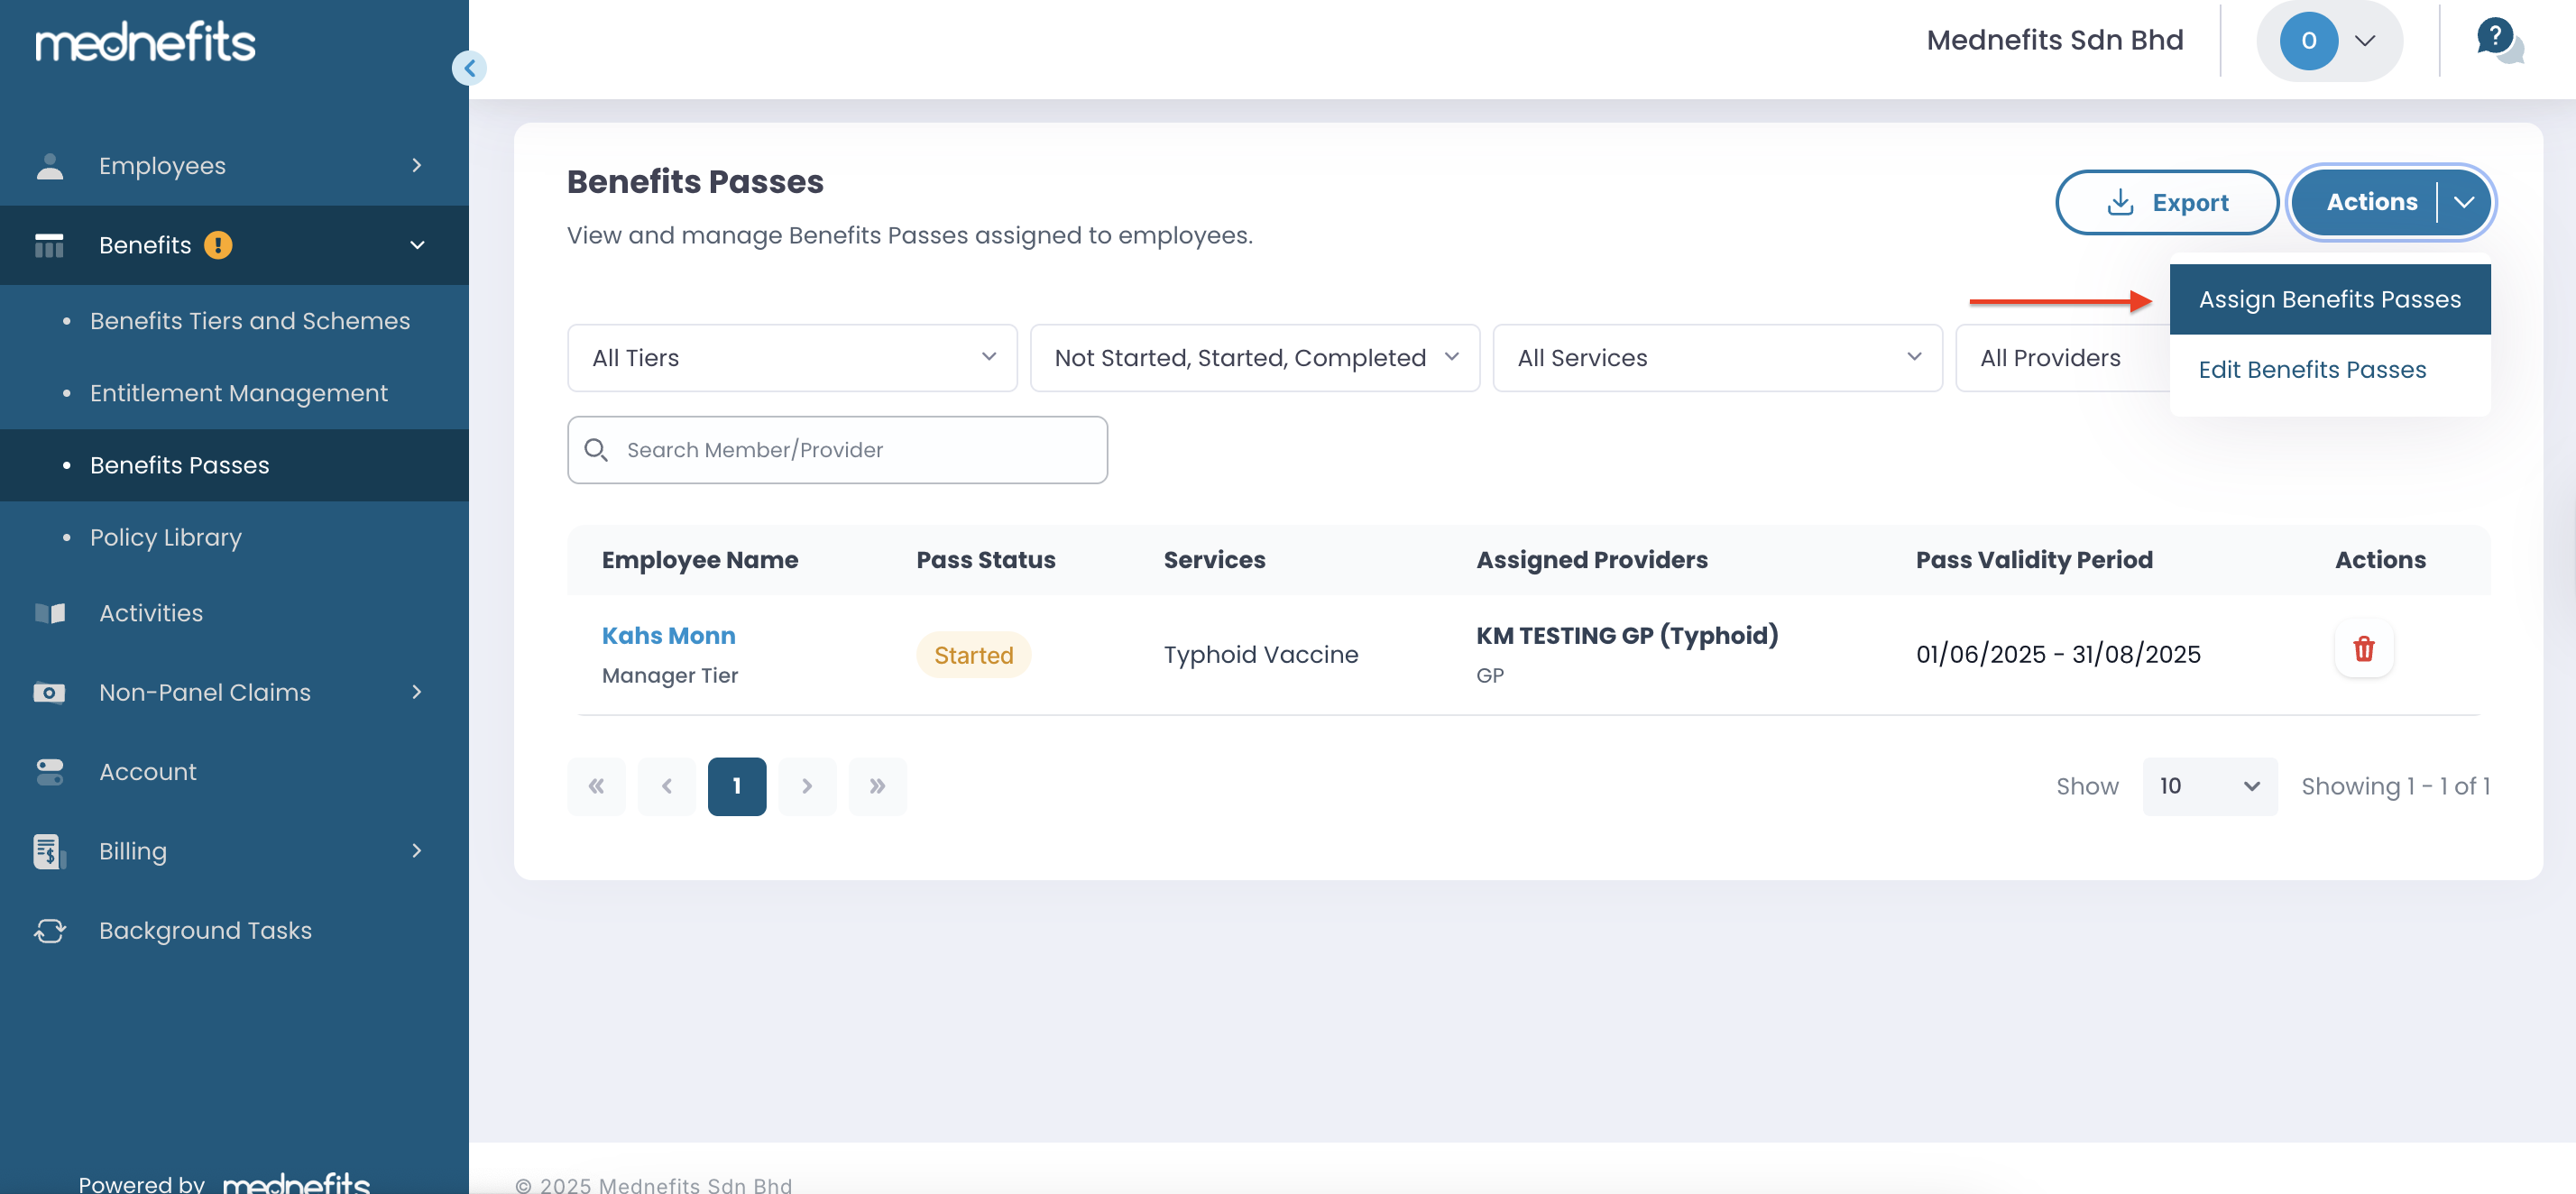
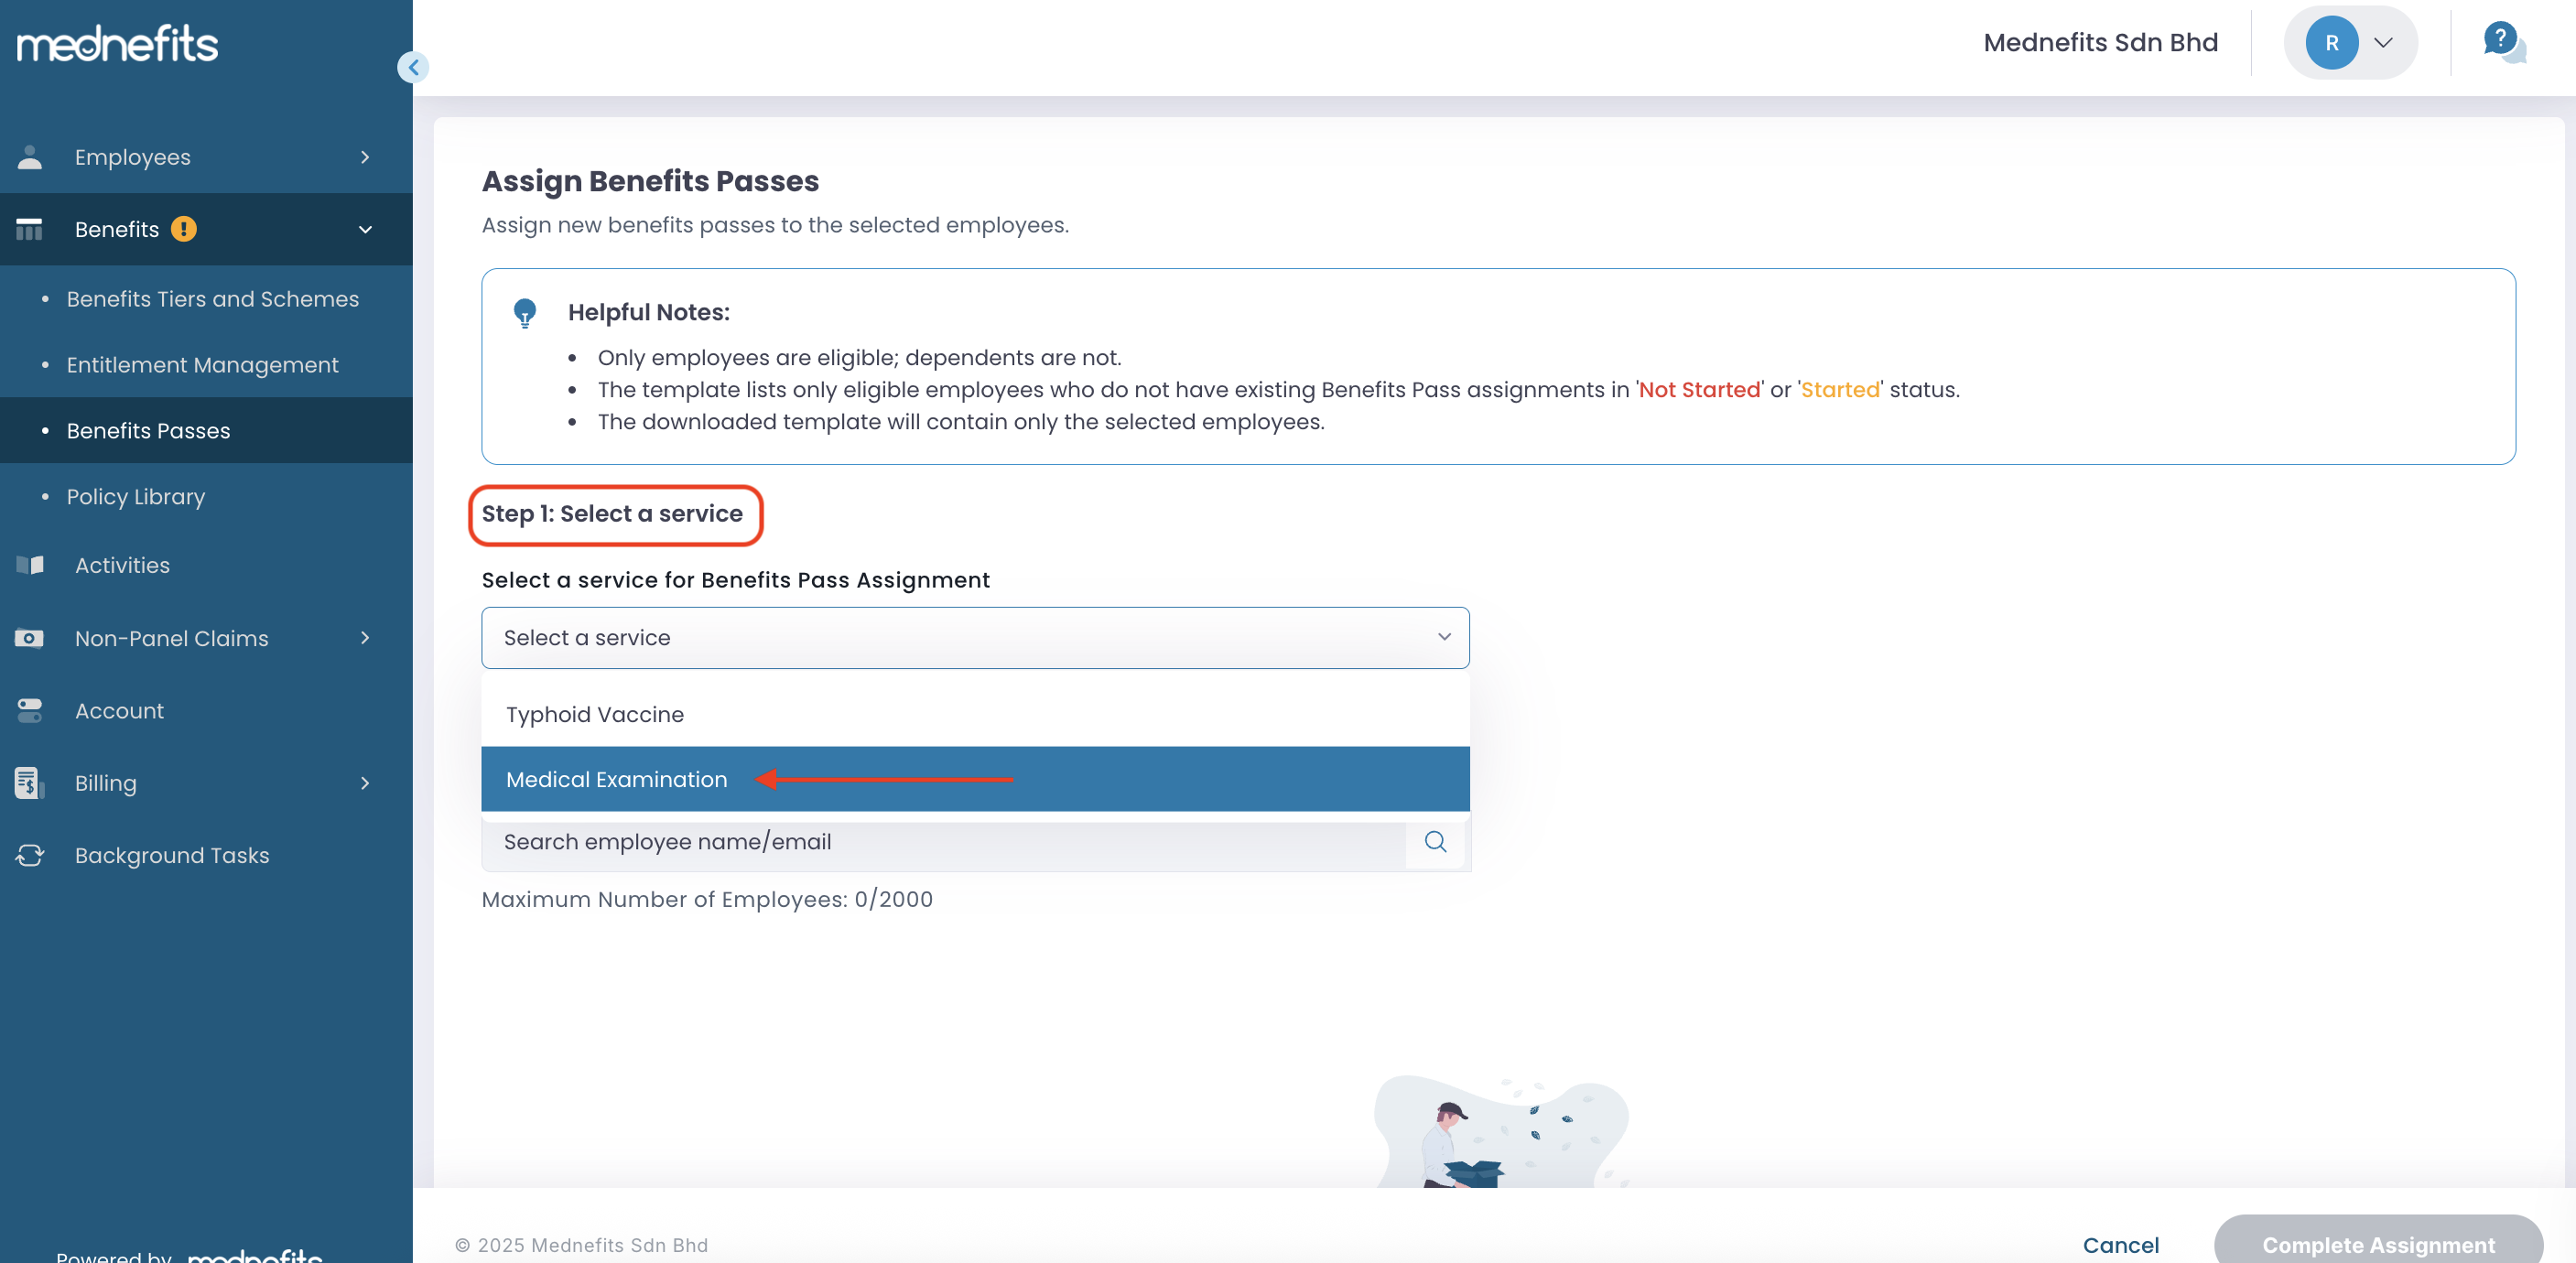
Step 1: To assign a new Benefits Pass to an employee, navigate to: Benefits → Benefits Passes → Actions → Assign Benefits Passes.
Under Select a service, choose Medical Examination.
Step 2: Search and select the employee(s) to assign the Benefits Pass.
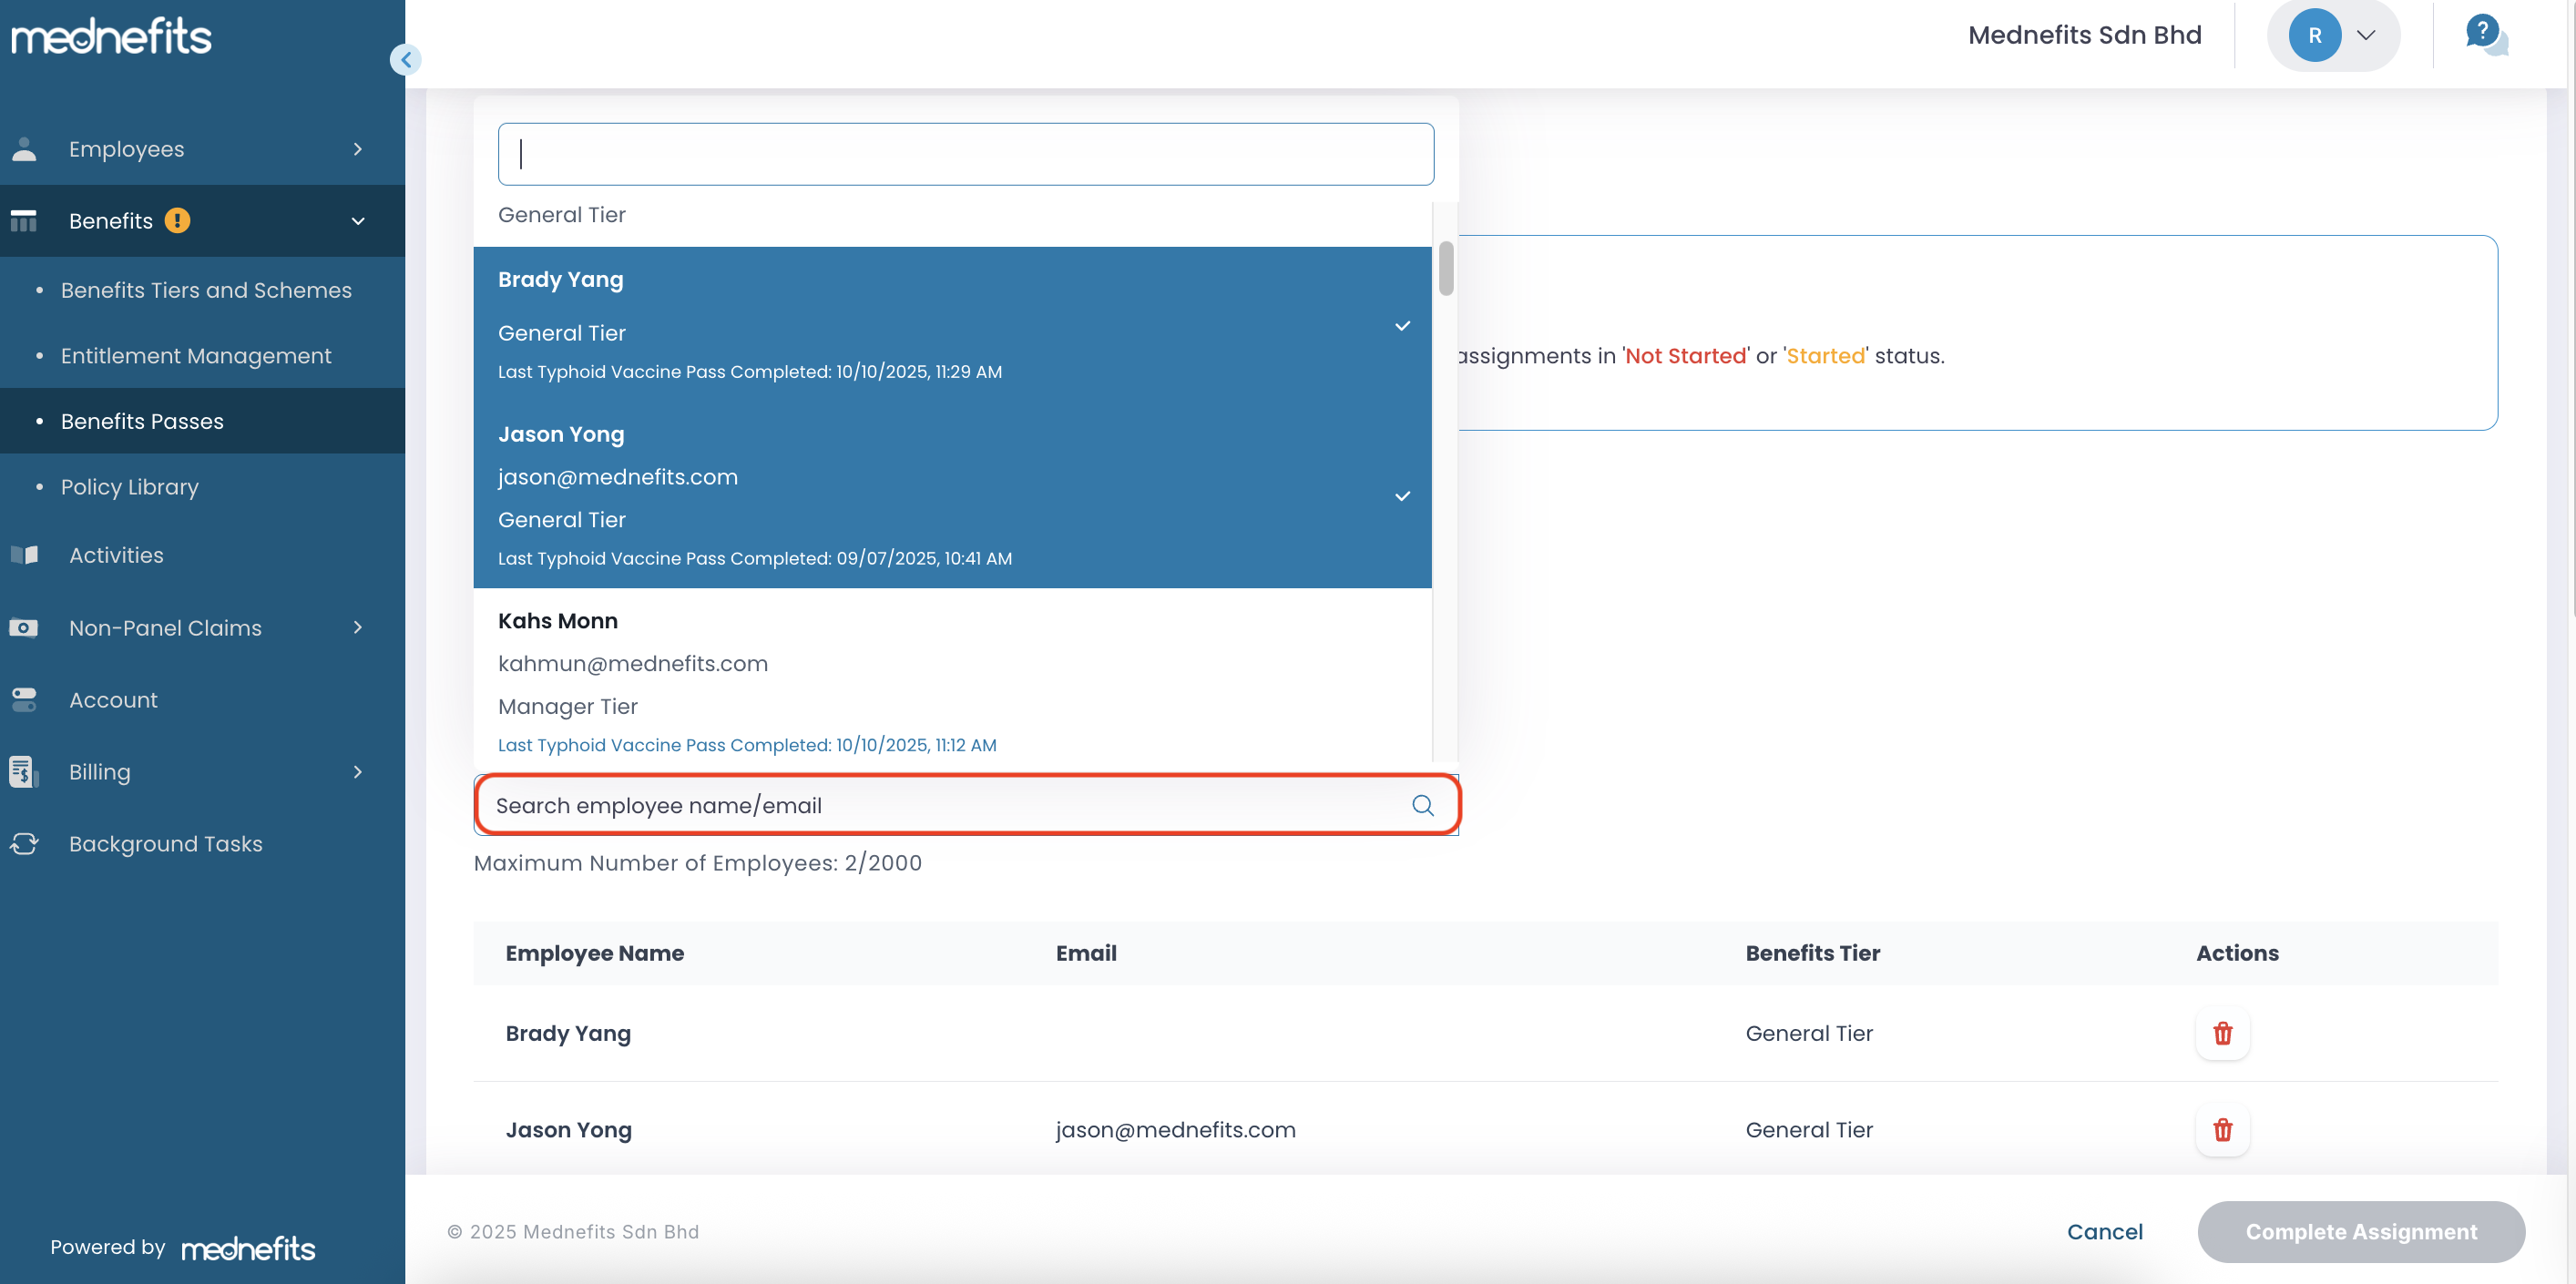
Notes: Only employee(s) meeting the following criteria are eligible for selection:
- Have active GP schemes.
- Do not have existing Benefits Pass assignments in 'Not Started' or 'Started' status in the Overview table.
- Previously completed their assigned Benefits Pass, with a completion date earlier than today
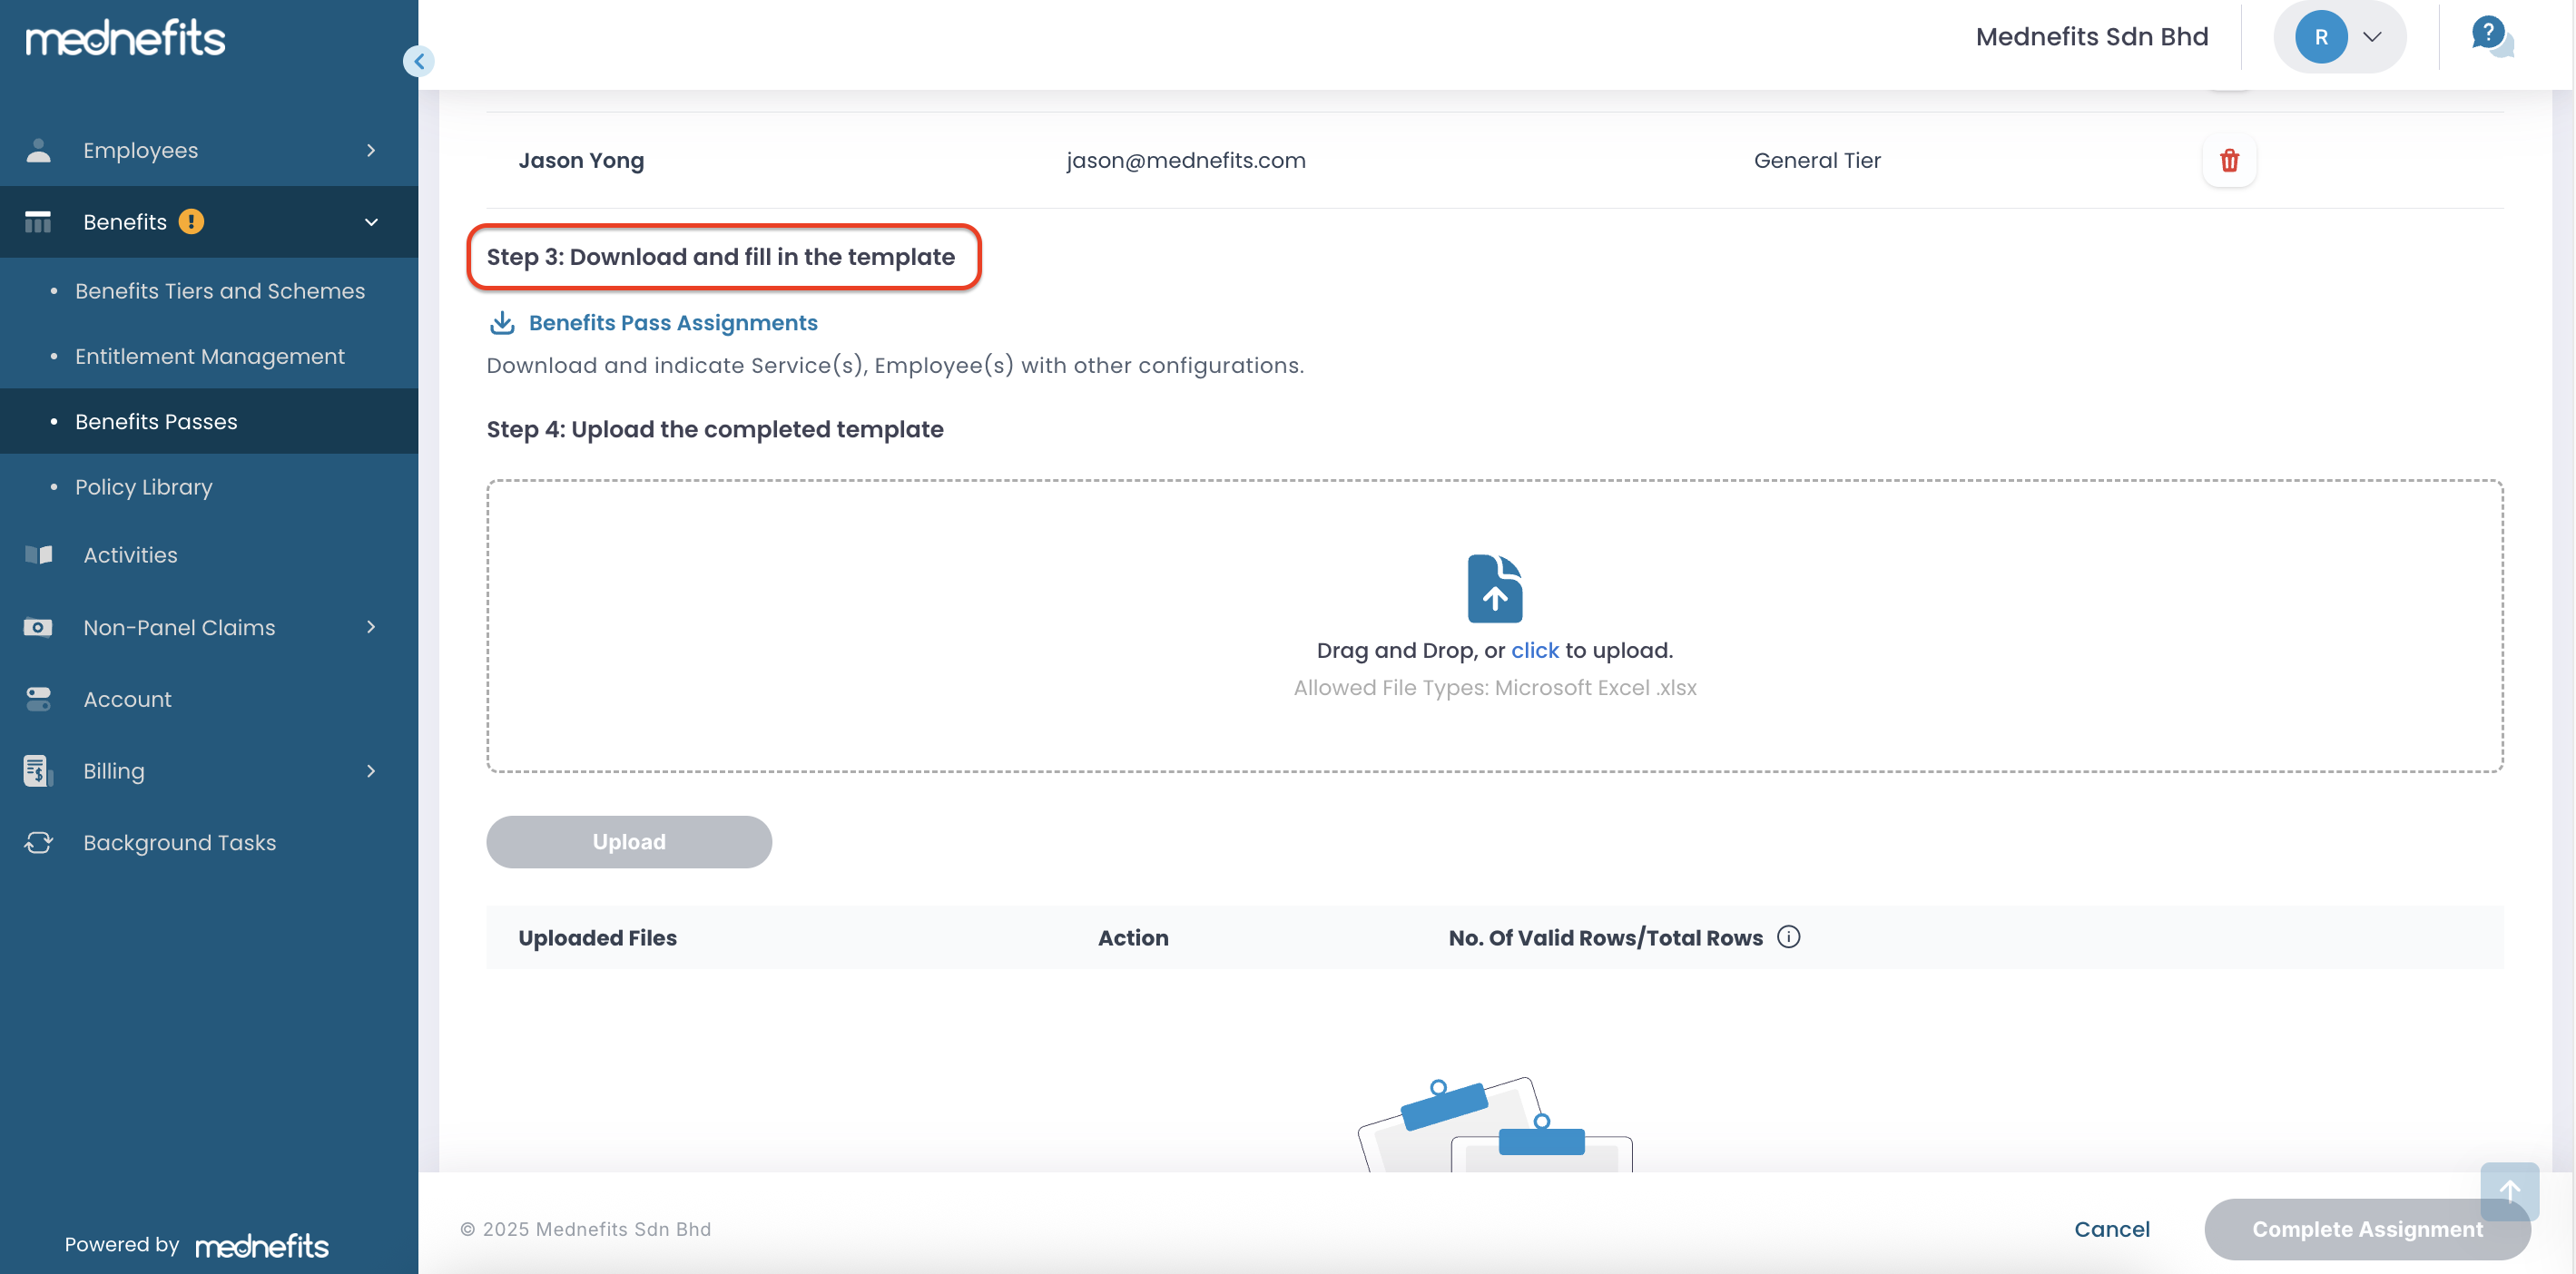
Step 3: Download the Benefits Pass template and fill it in.
Notes: Navigate to the Medical Examination Benefit Passes sheet to specify the provider(s) and other configurations. HR/admin is required to complete the following fields:
-
Provider ID: Refer to the Medical Examination Providers sheet. Only ONE Provider ID should be inputted.
-
Provider Name: Medical Examination Providers sheet. Only ONE Provider ID should be inputted.
-
Benefits Pass Start Date: dd/mm/yyyy.
-
Benefits Pass End Date: dd/mm/yyyy. Leave blank if there is no End Date.
-
Remarks (optional): Free text field. If inputted, the remarks will appear under the Information section on the Benefits Pass Details page in both the Member App and Member Portal.
-
Package ID: Indicate ONE Package ID the employee will take (refer to Medical Examination Packages sheet)
-
Report Dispatch Method: Indicate E if the report should be emailed to HR, or C if the employee will collect it in person (E= Email, C= Self Collection)
-
HR Email: Specify the HR recipient email when reports are dispatched via email to HR.
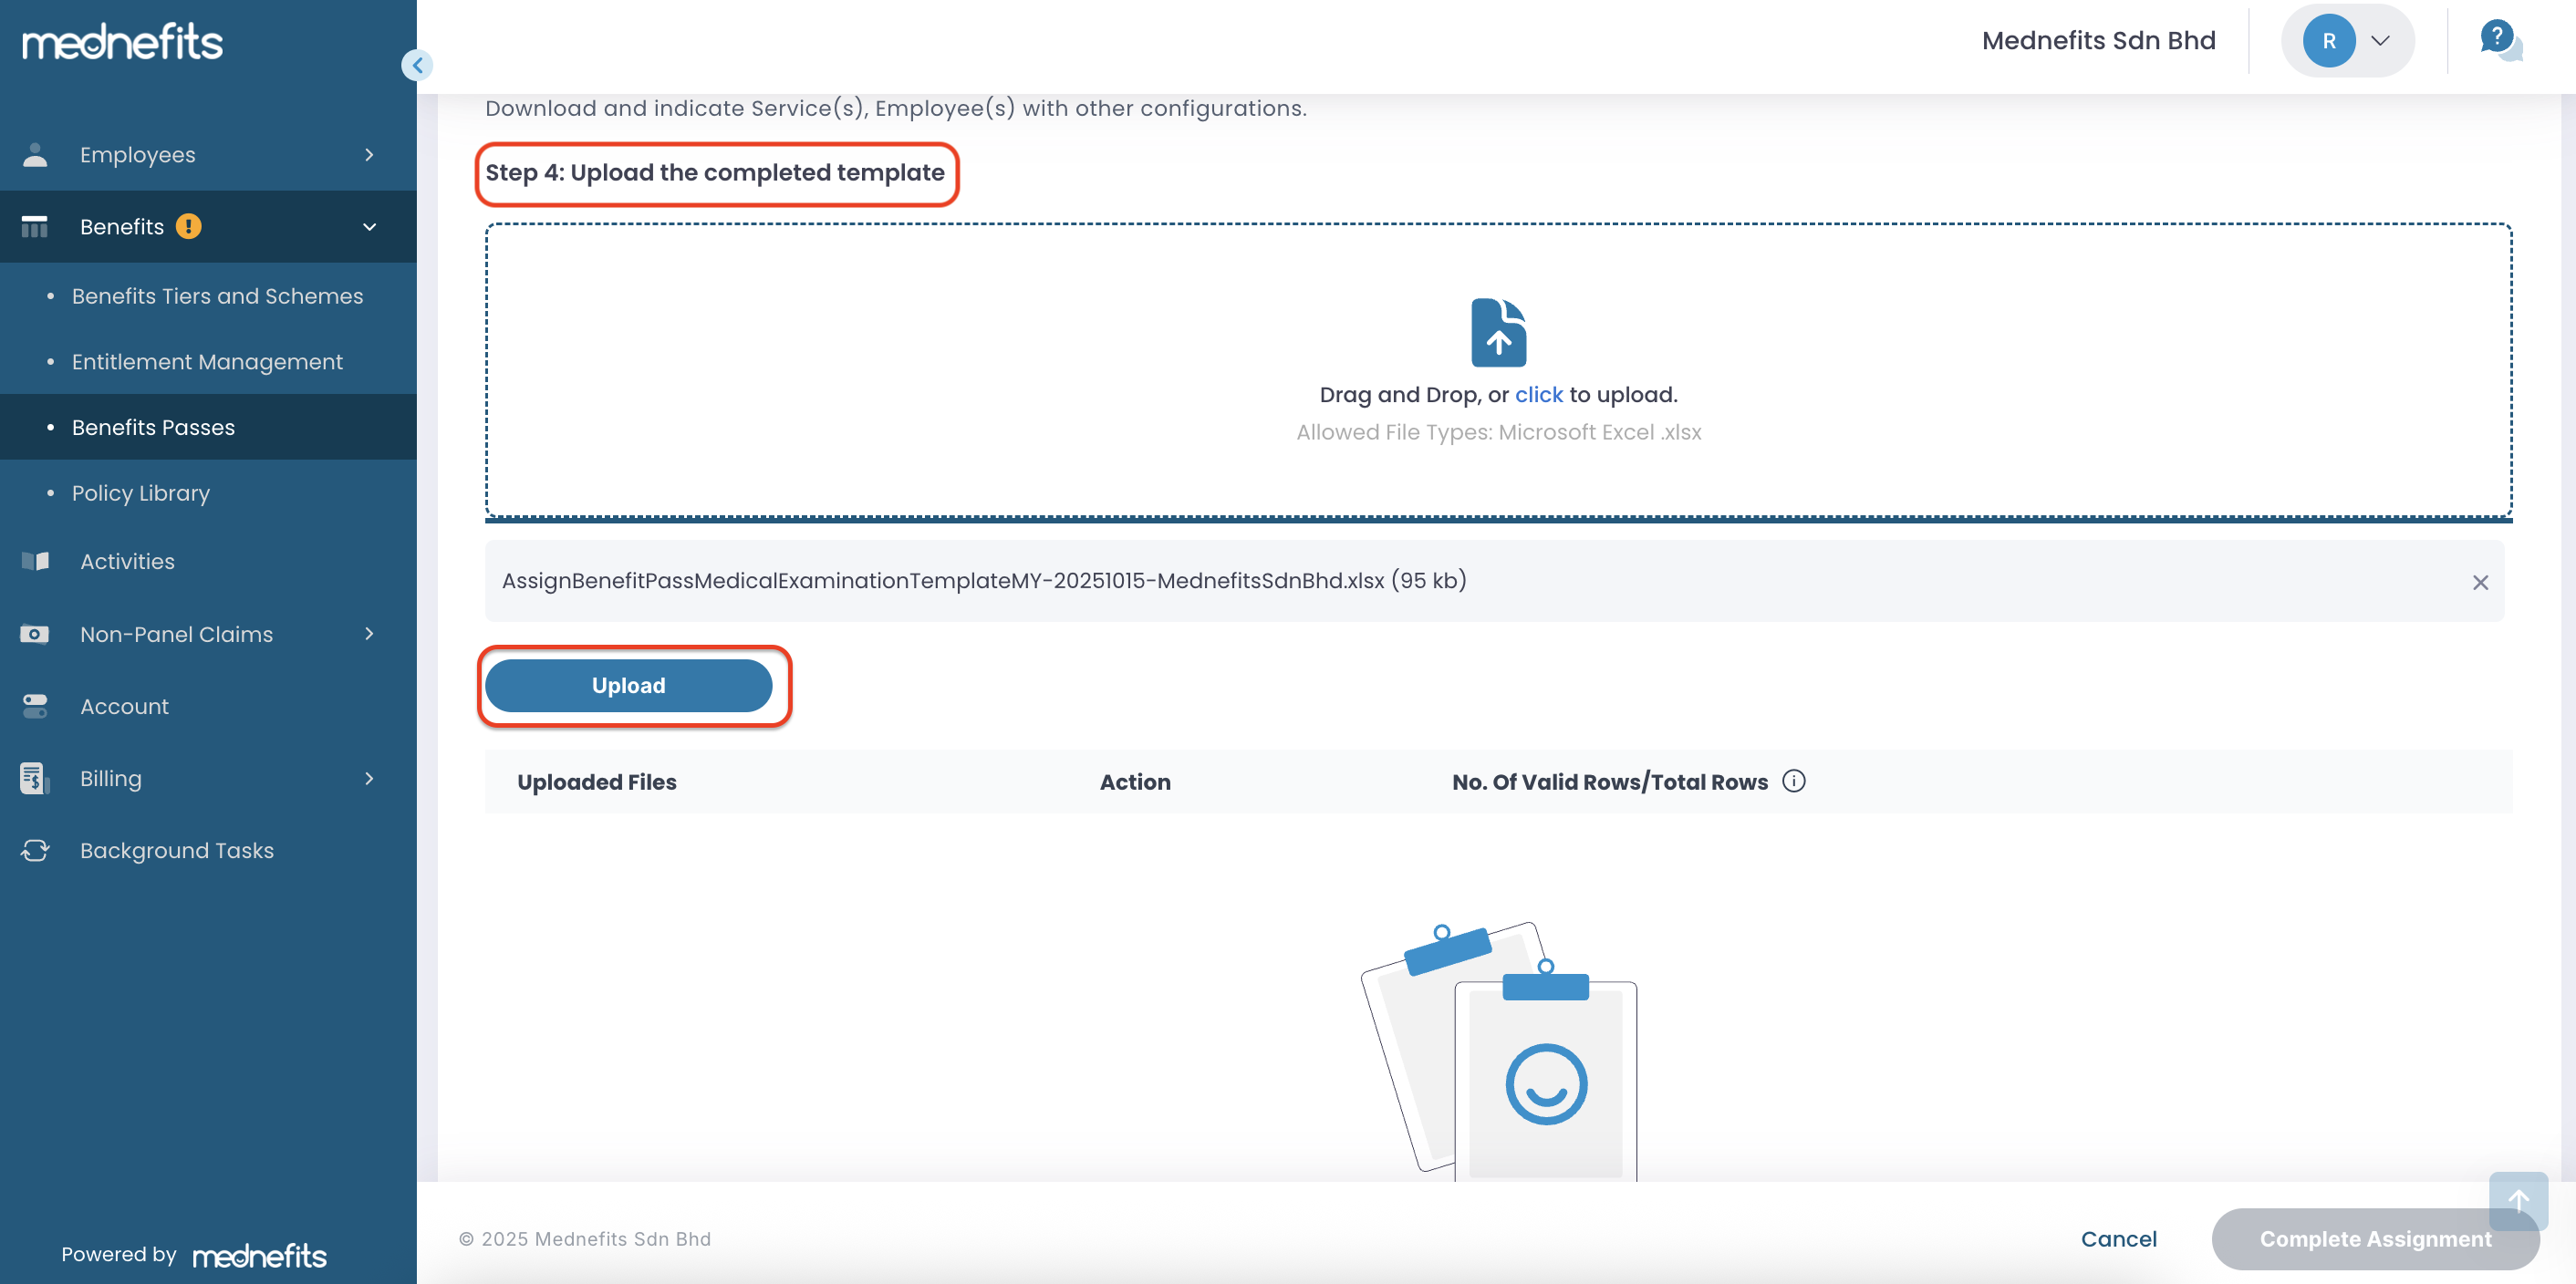
Step 4: Upload the completed template.
Once the template is completed, proceed with the upload. If the file contains no errors, proceed with completing the assignment.
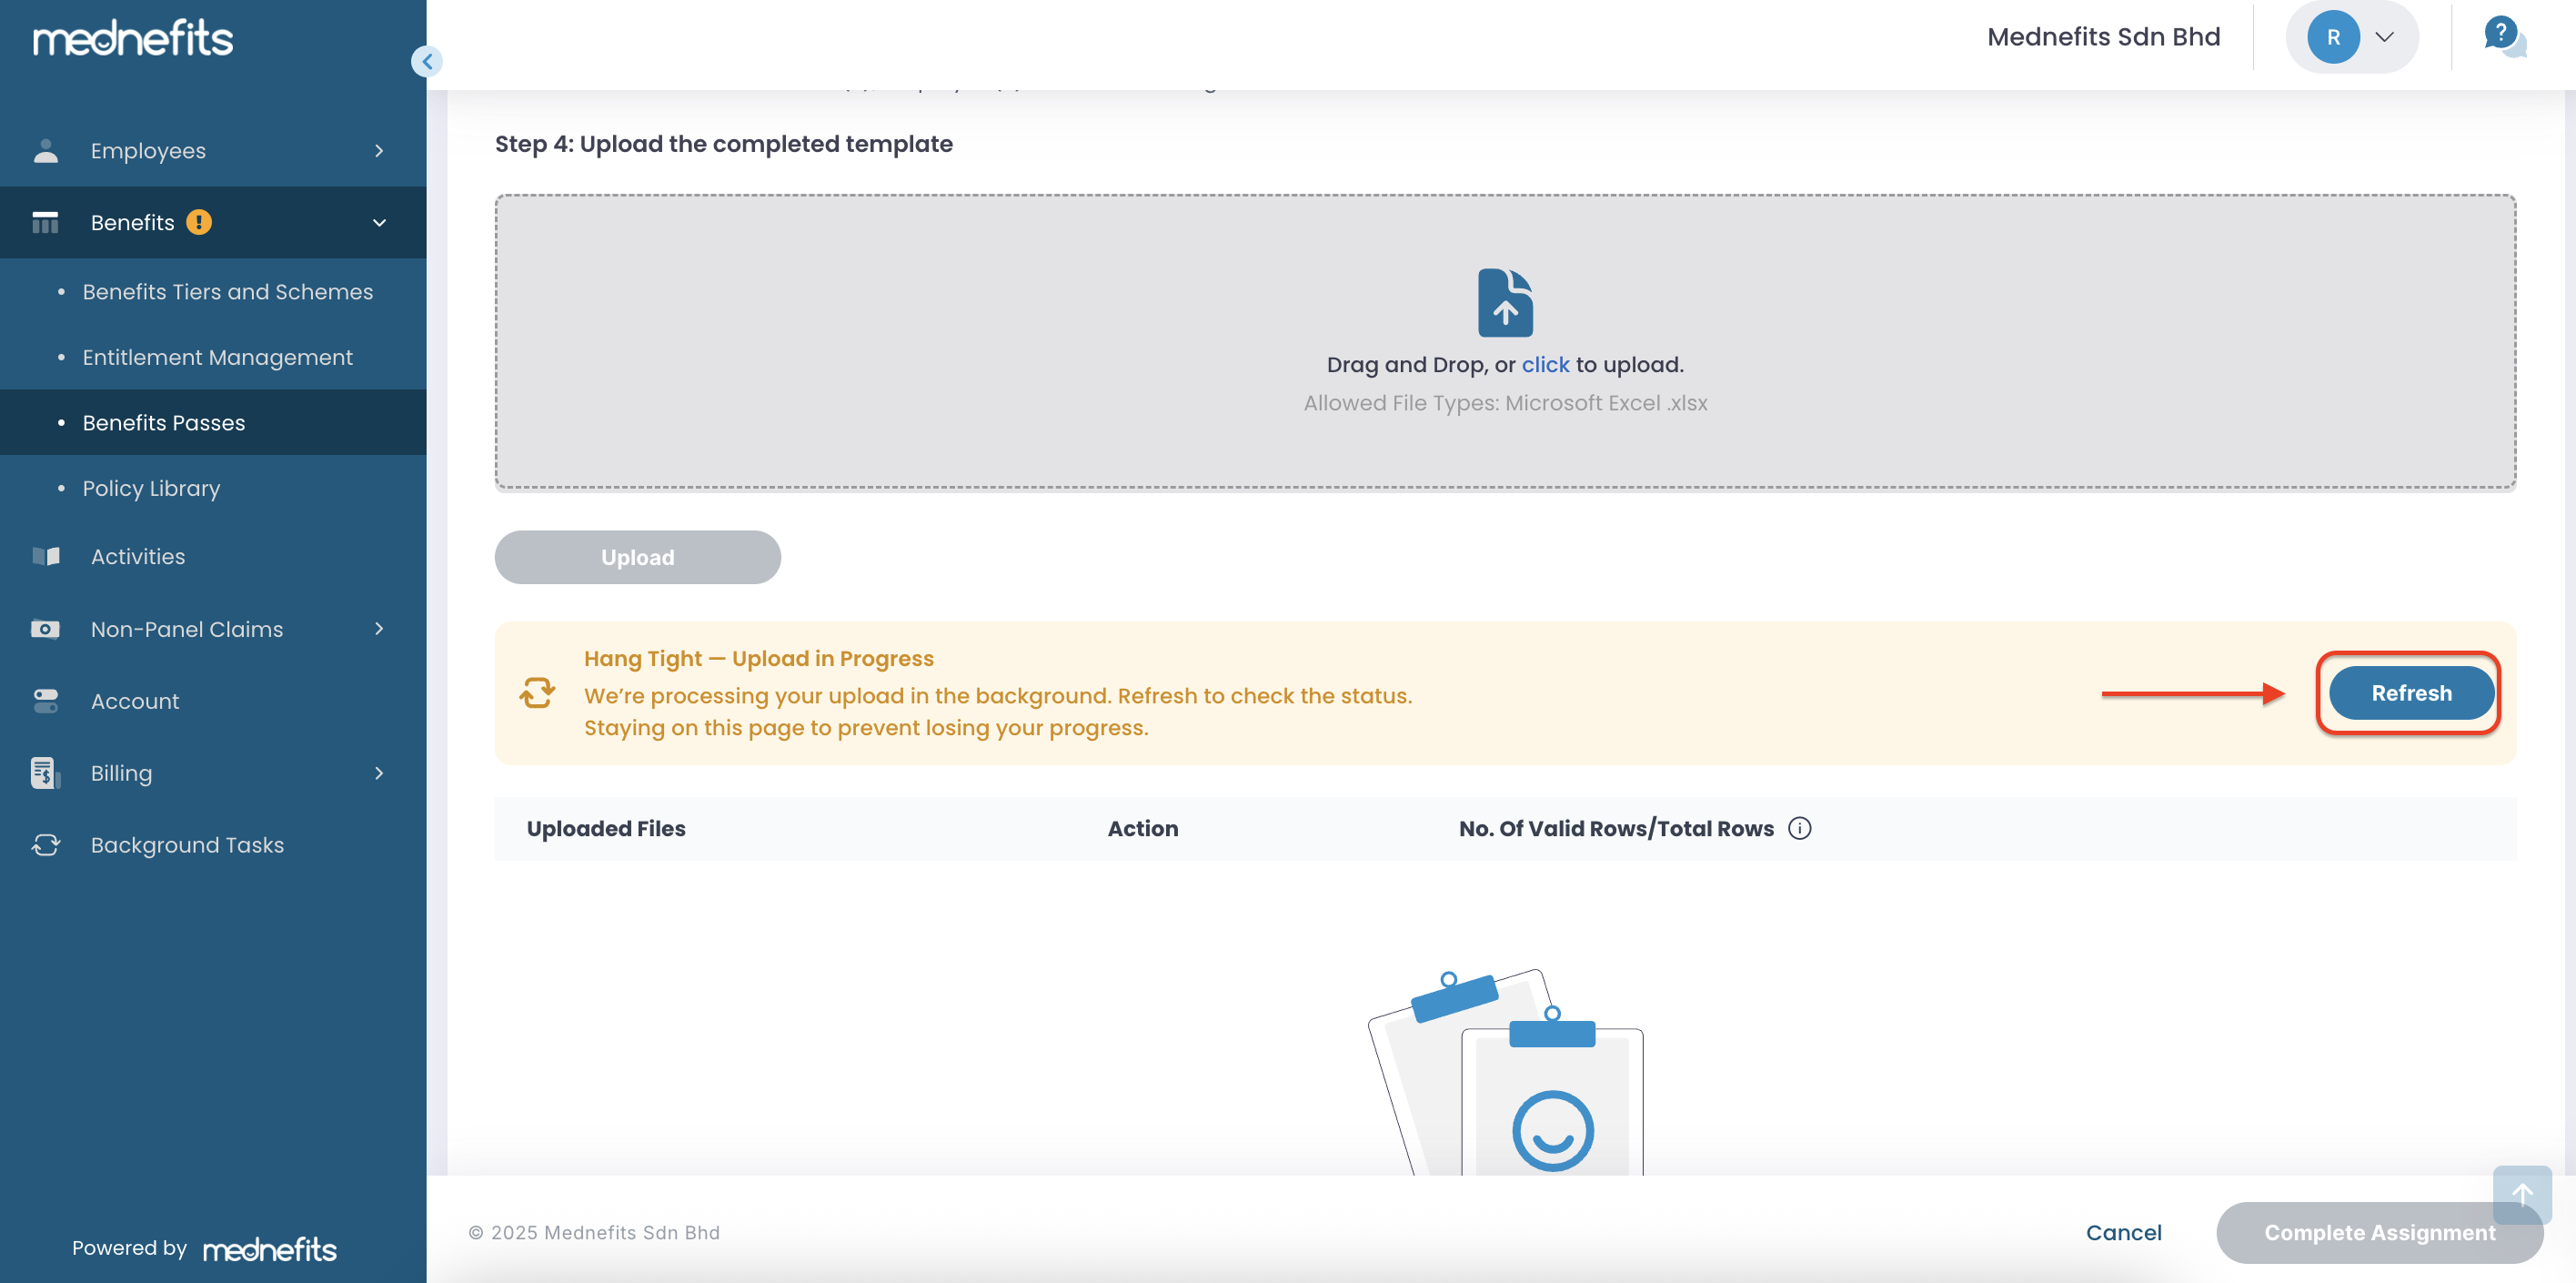
Step 5: After the upload, click Refresh to check the status.
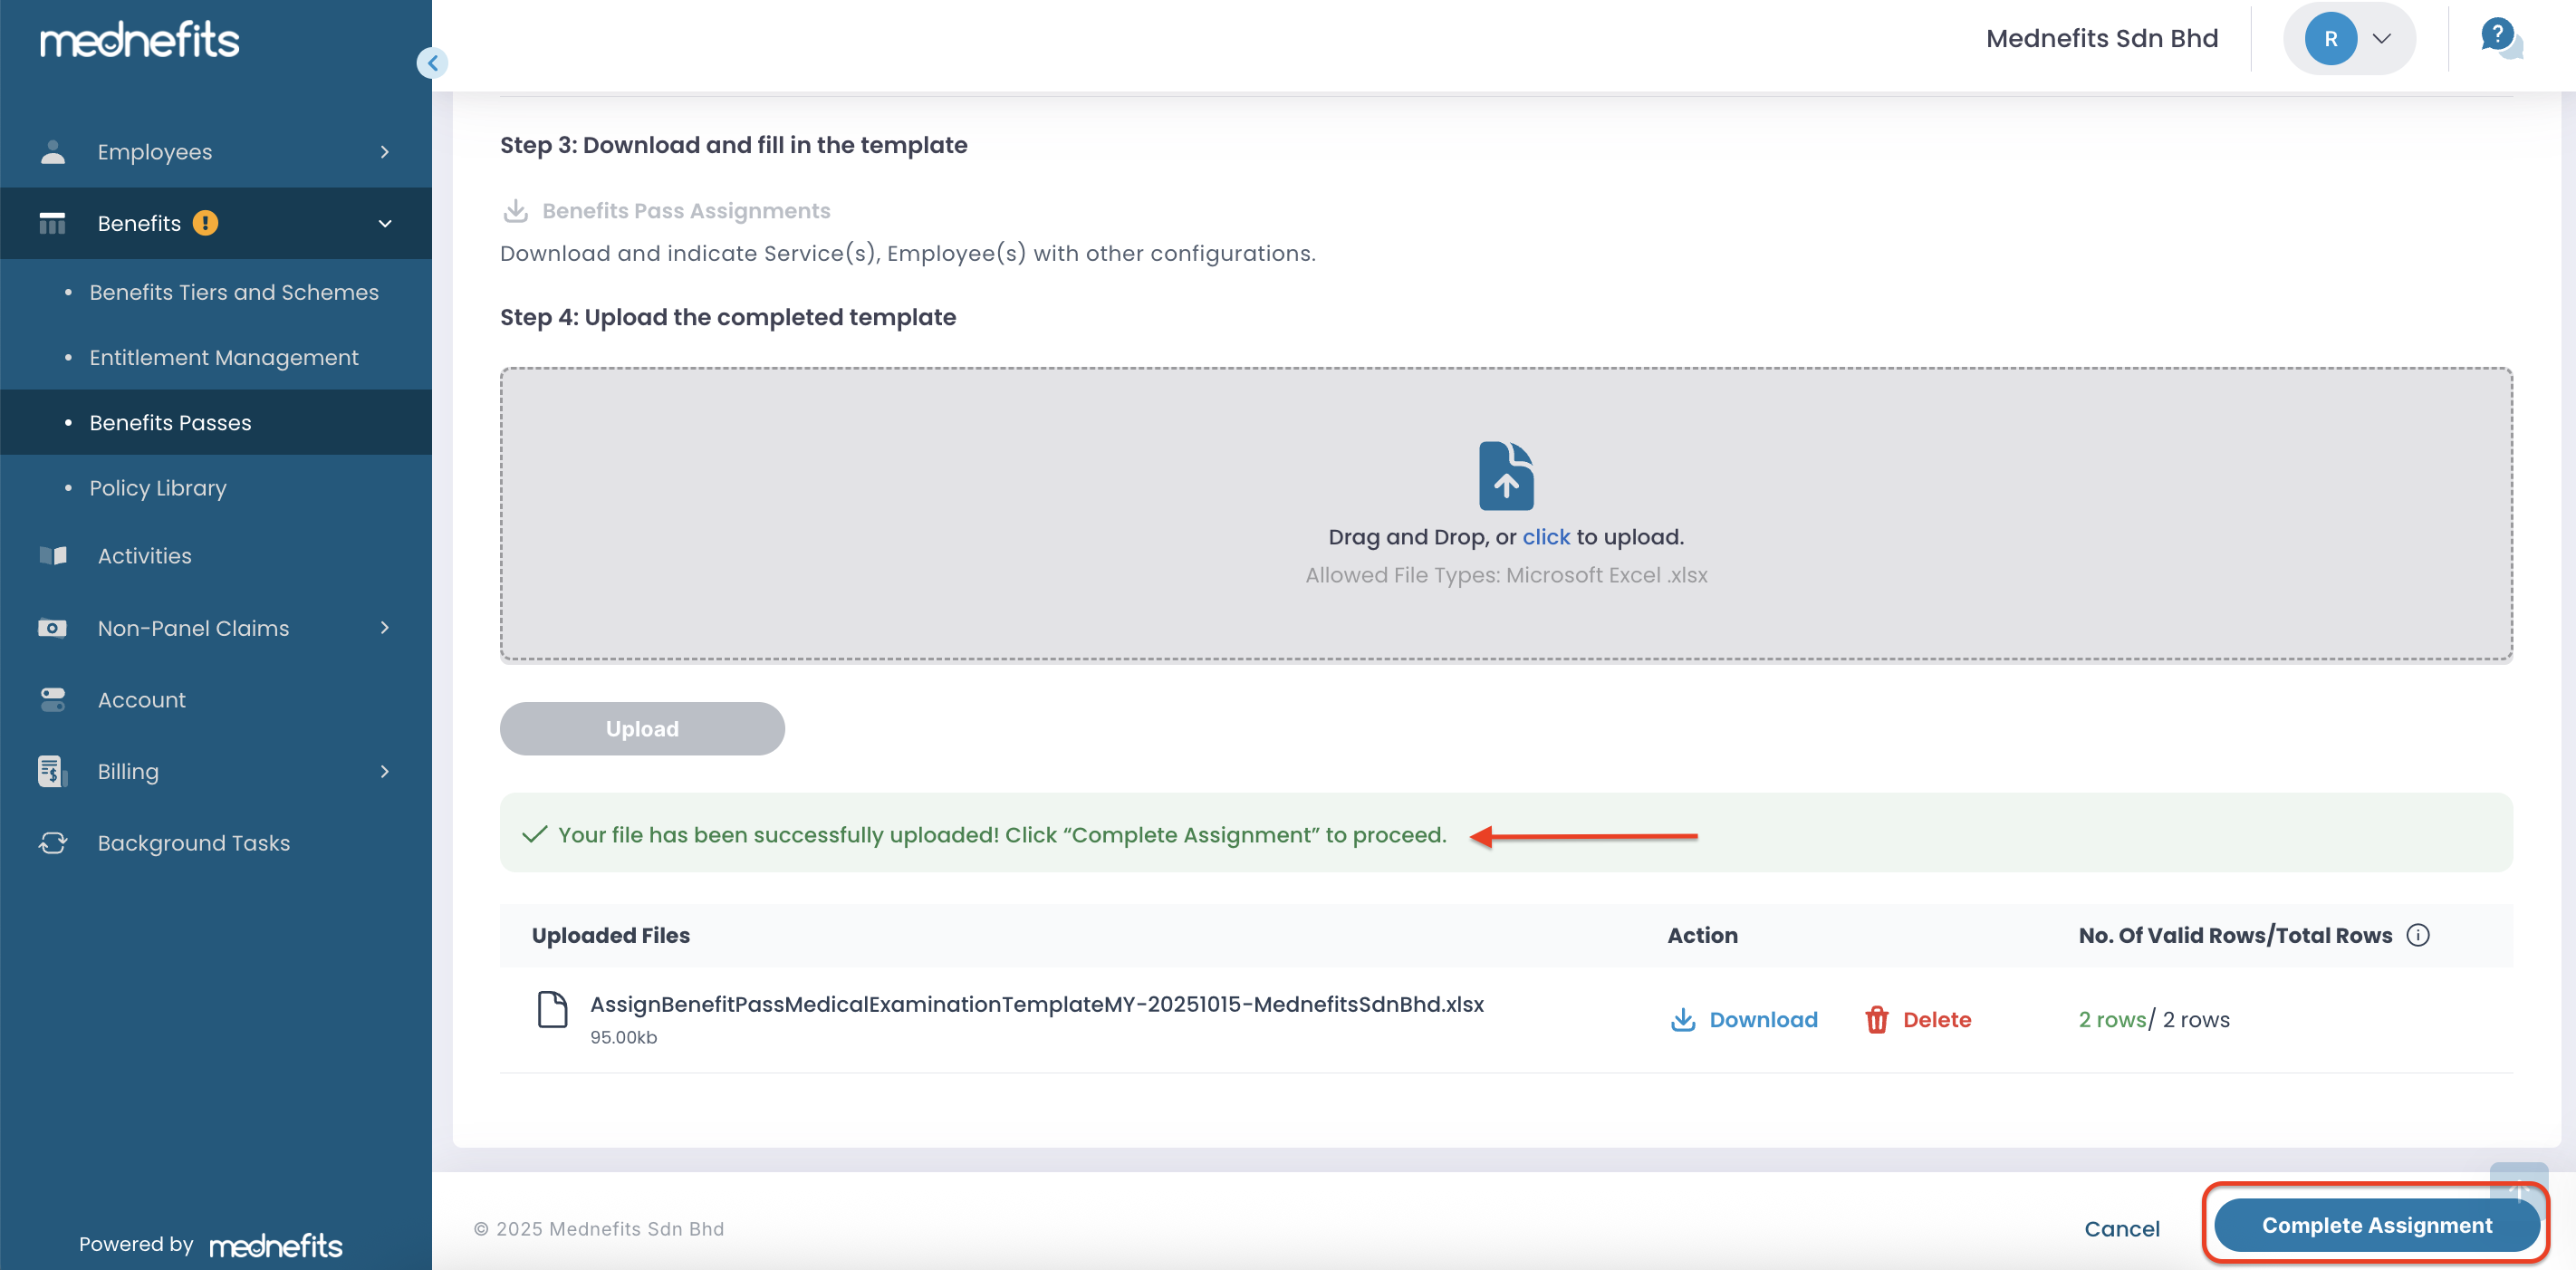
Step 6: Click "Complete Assignment" after the upload is complete.
Step 7: You will be directed to the Background Tasks page.

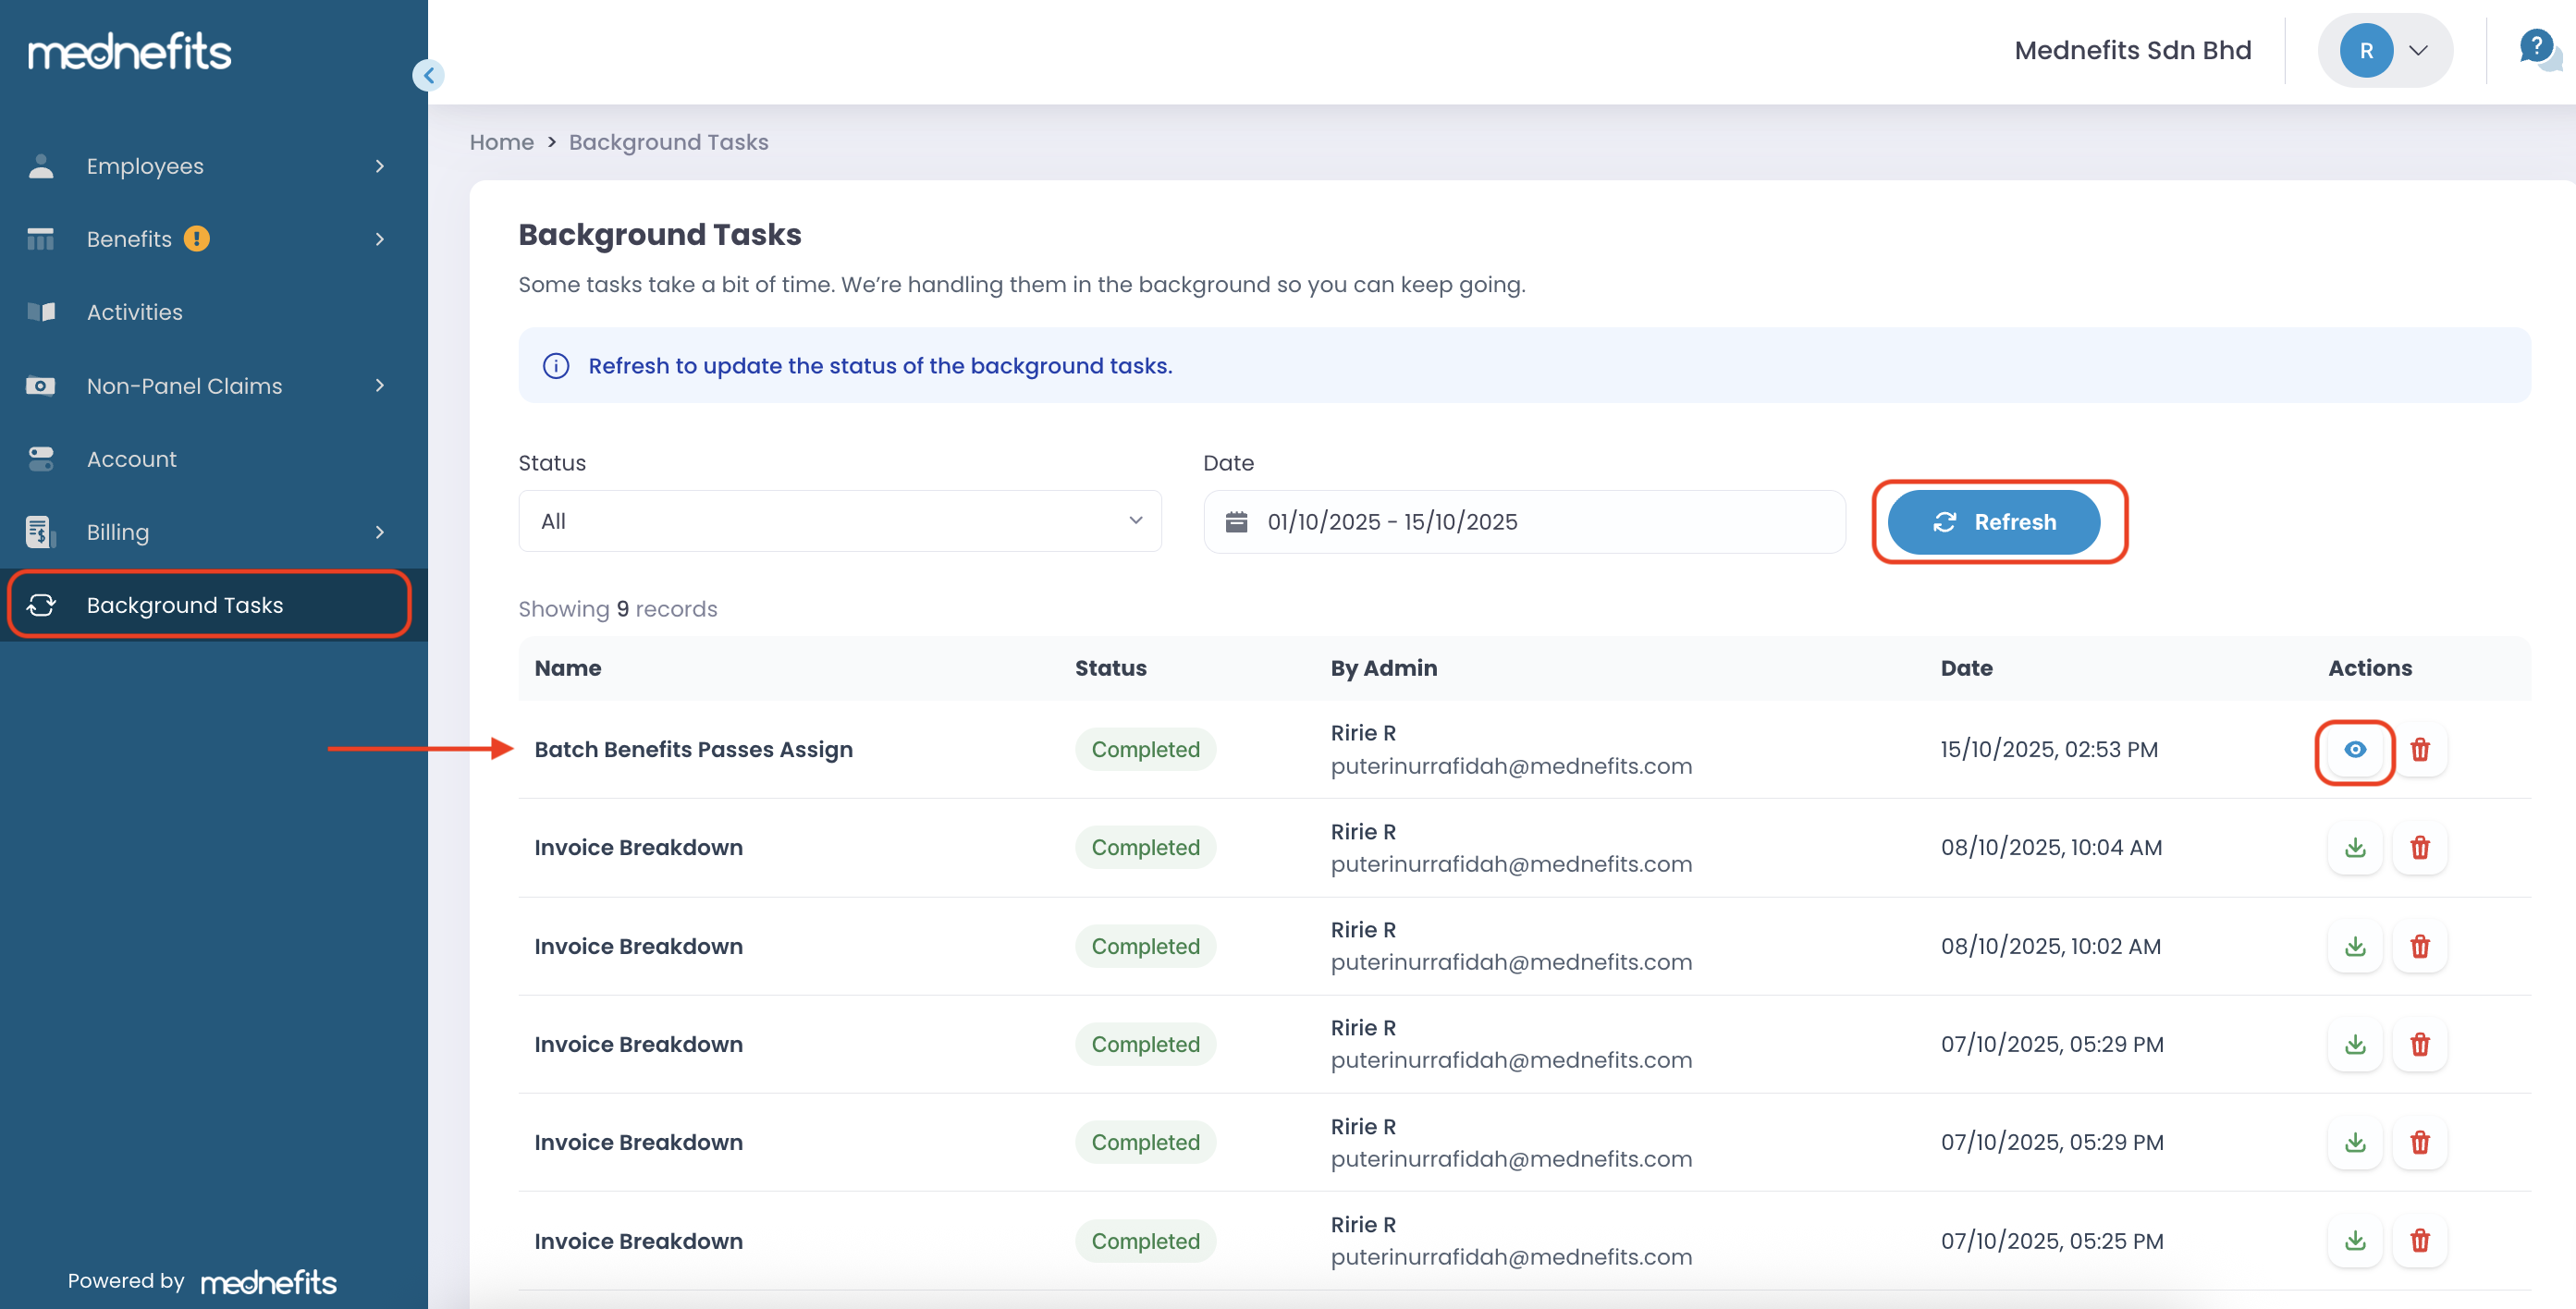
- Click Refresh to get the latest updates.
- Click View Page to navigate to the Benefits Passes Overview table and verify if the assignments were successful.
If you need to edit any existing Benefits Passes, please visit this helpdesk article: How to Modify Existing Benefits Passes

