When employees leave the organisation, they will need to be removed from your company's Mednefits account.
You may remove employee(s) manually using either Single Removal or by Batch Removal, whether the departure is backdated or scheduled for a future date. To do so, follow the steps below:
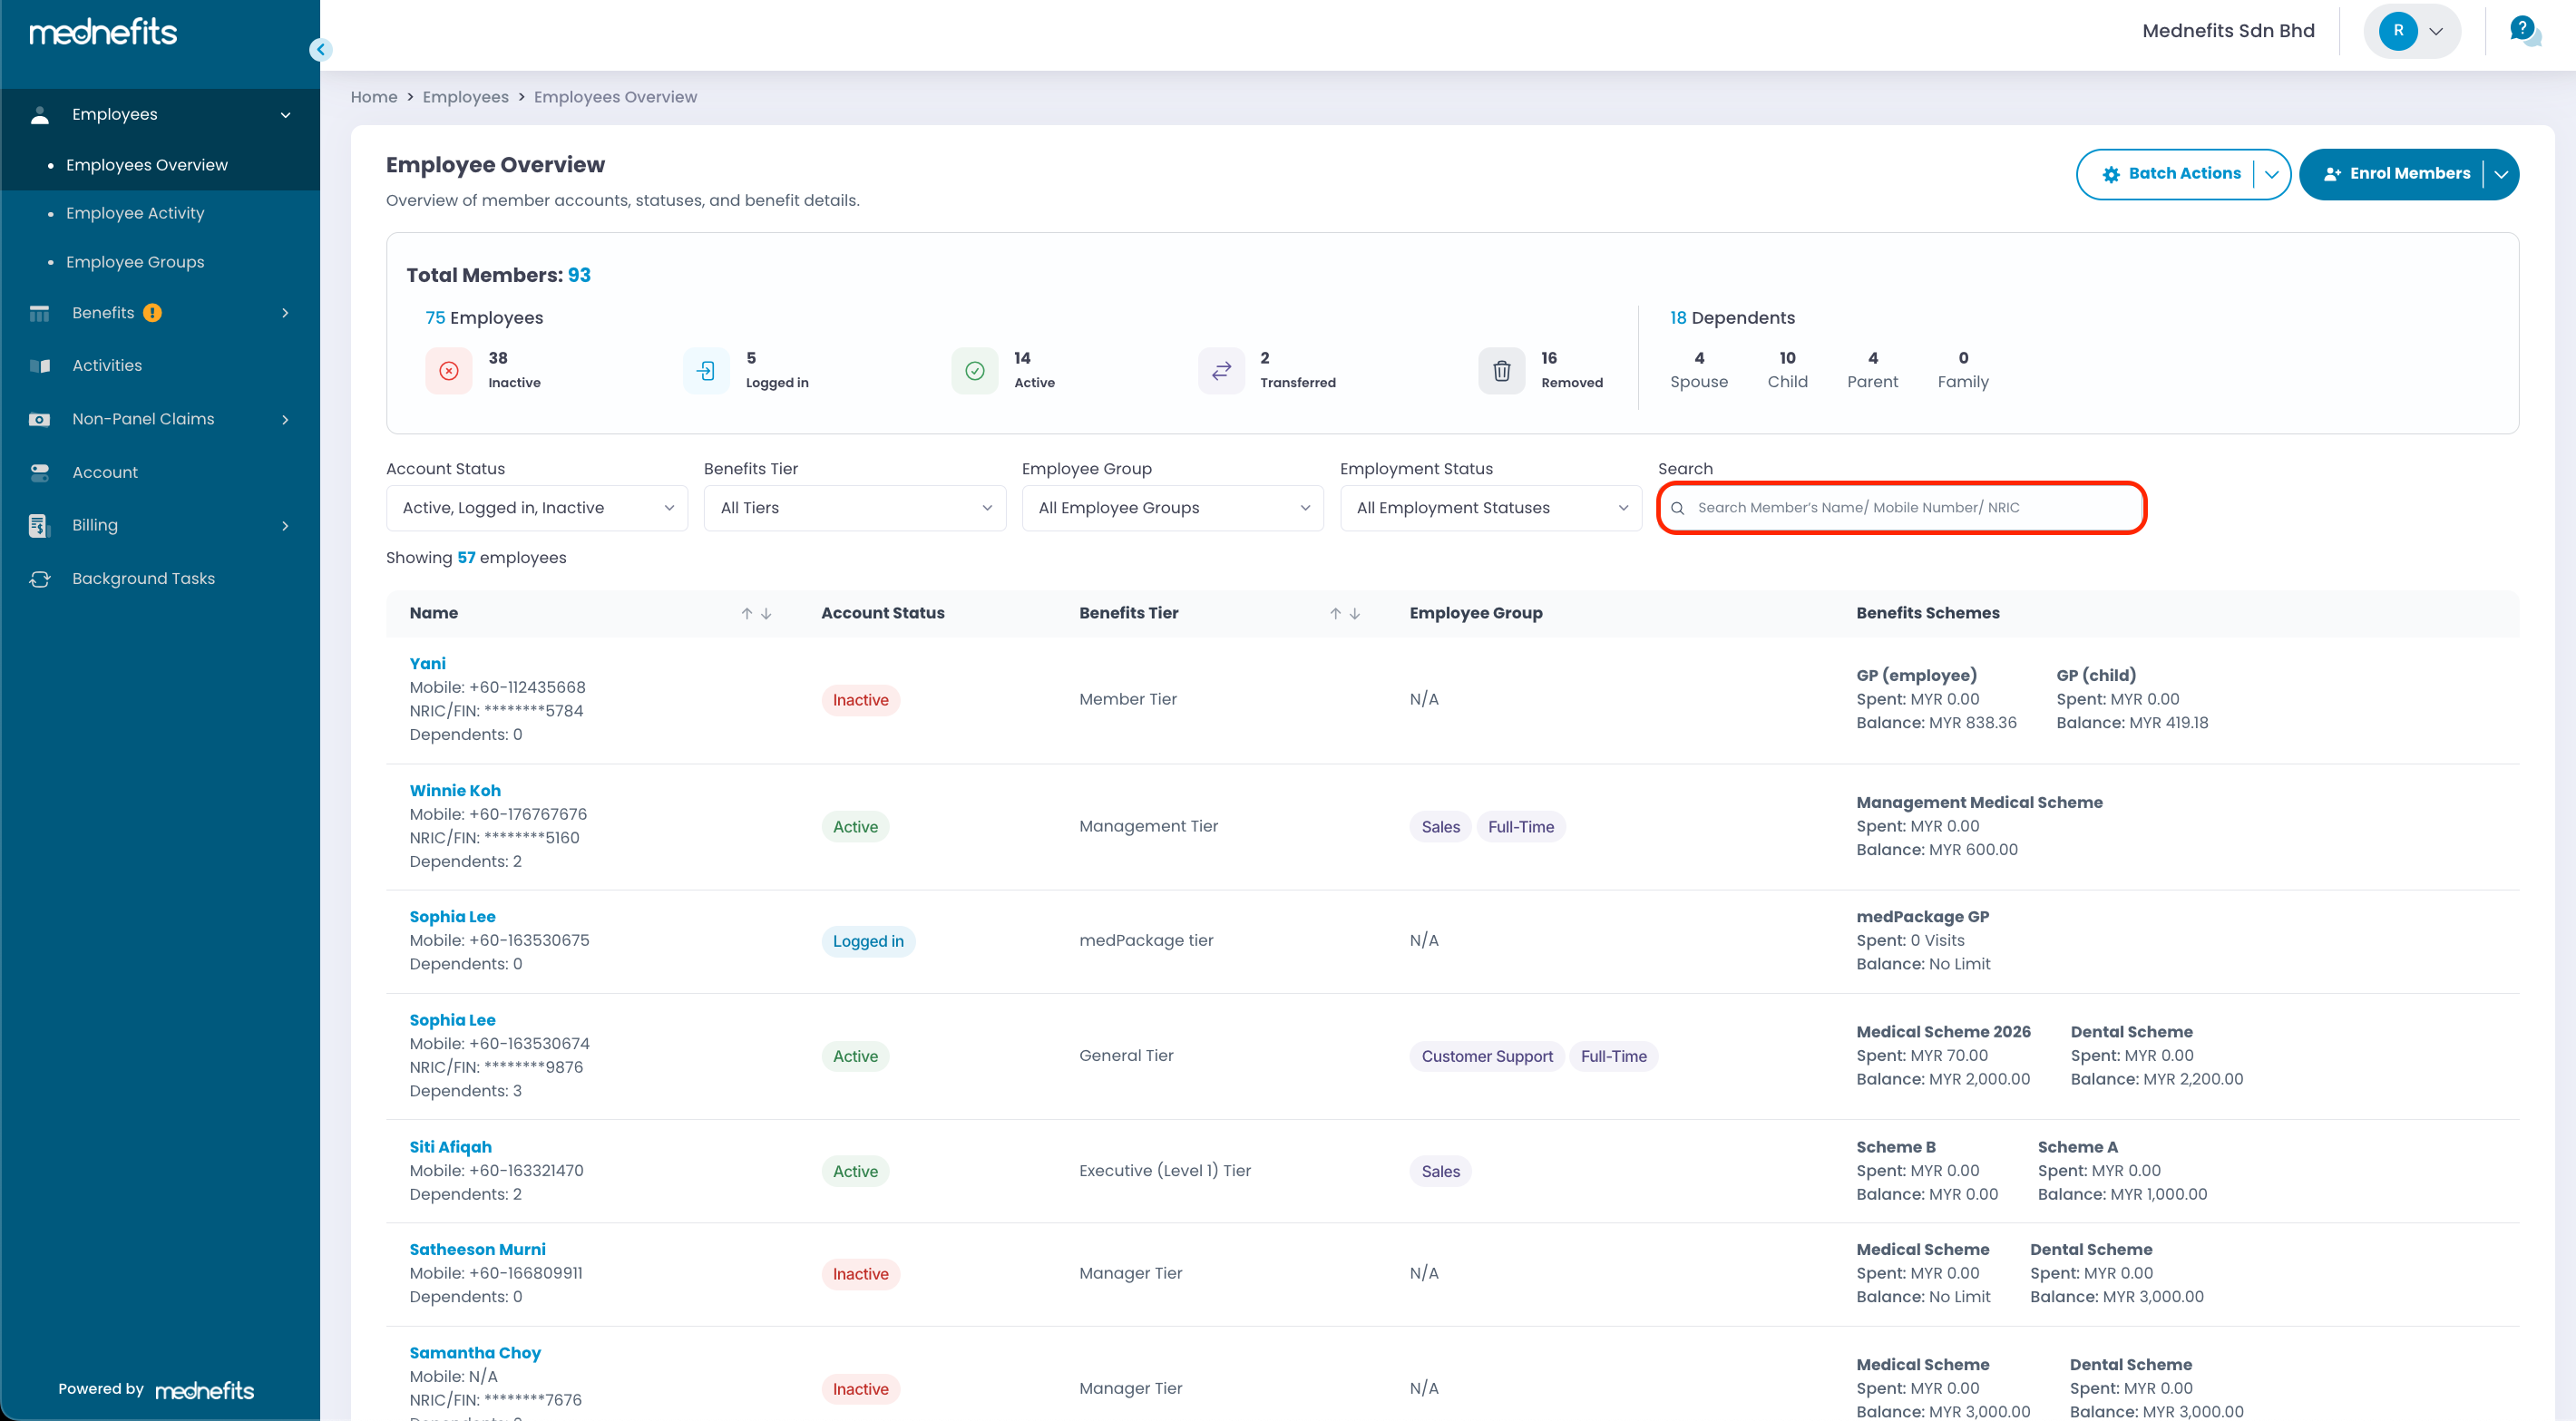
Step 1: Navigate to the Employees Overview page, and search for the employee you wish to remove in the search bar.
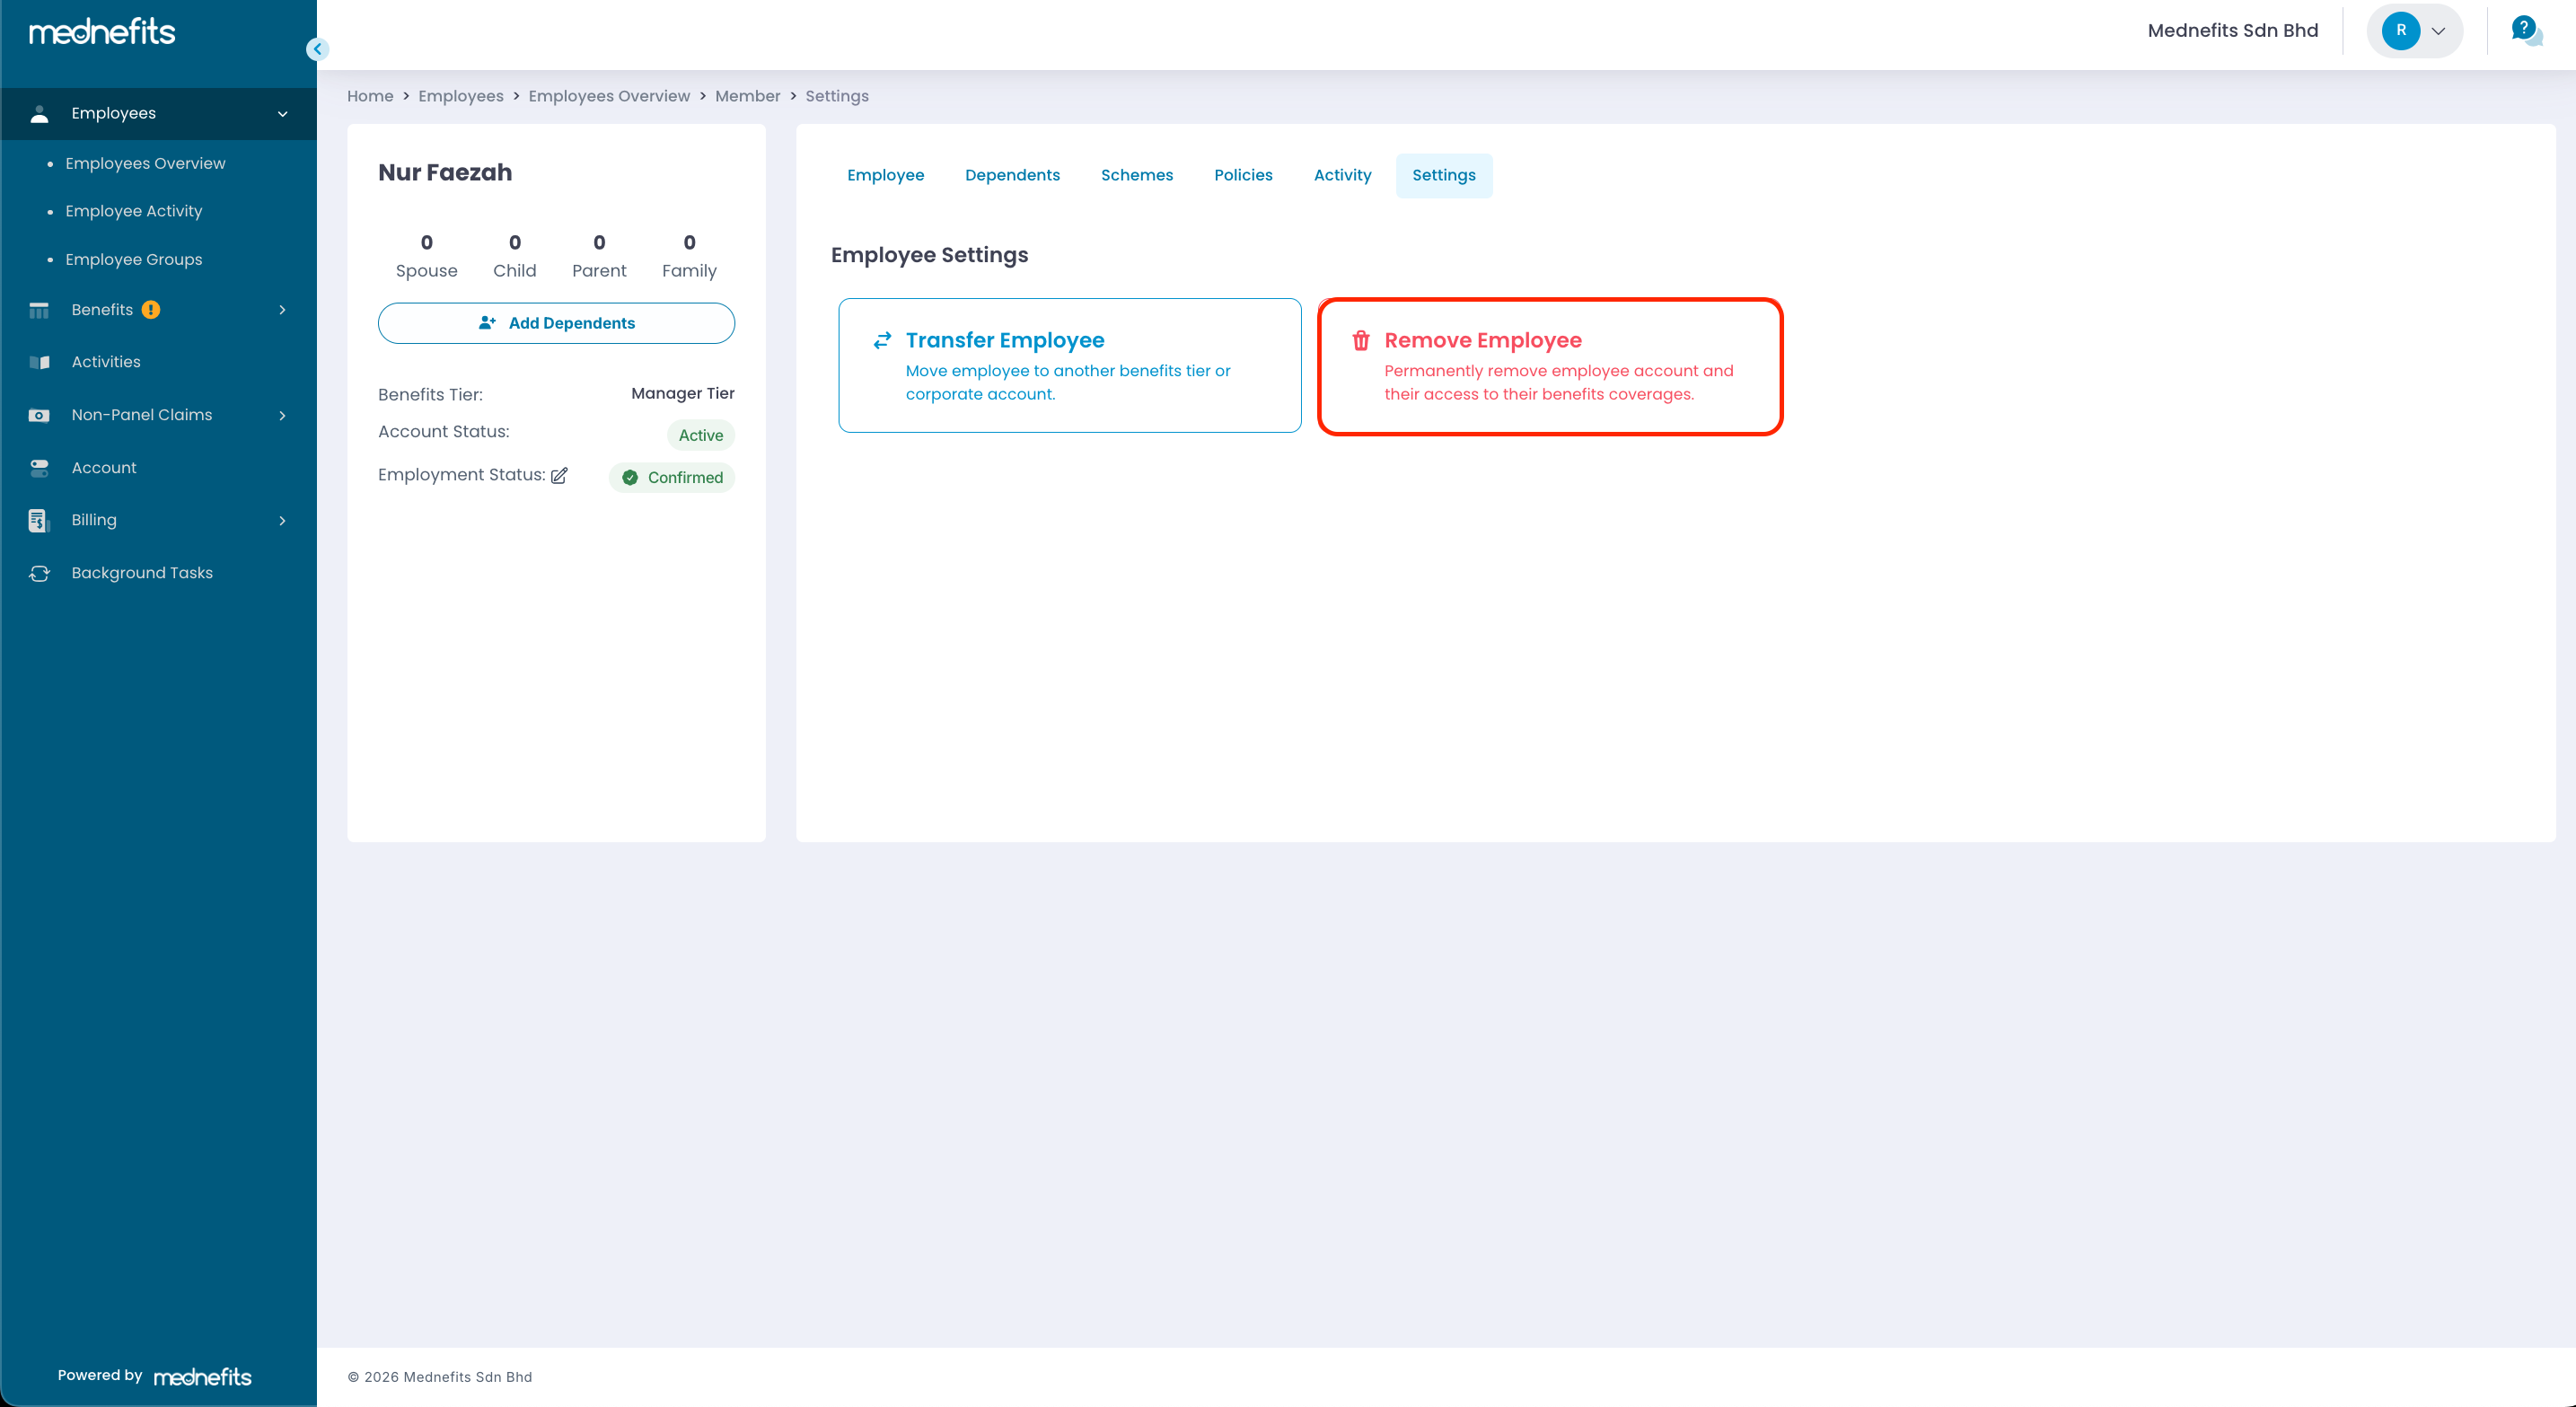
Step 2: Under the Settings tab, click the Remove Employee button.
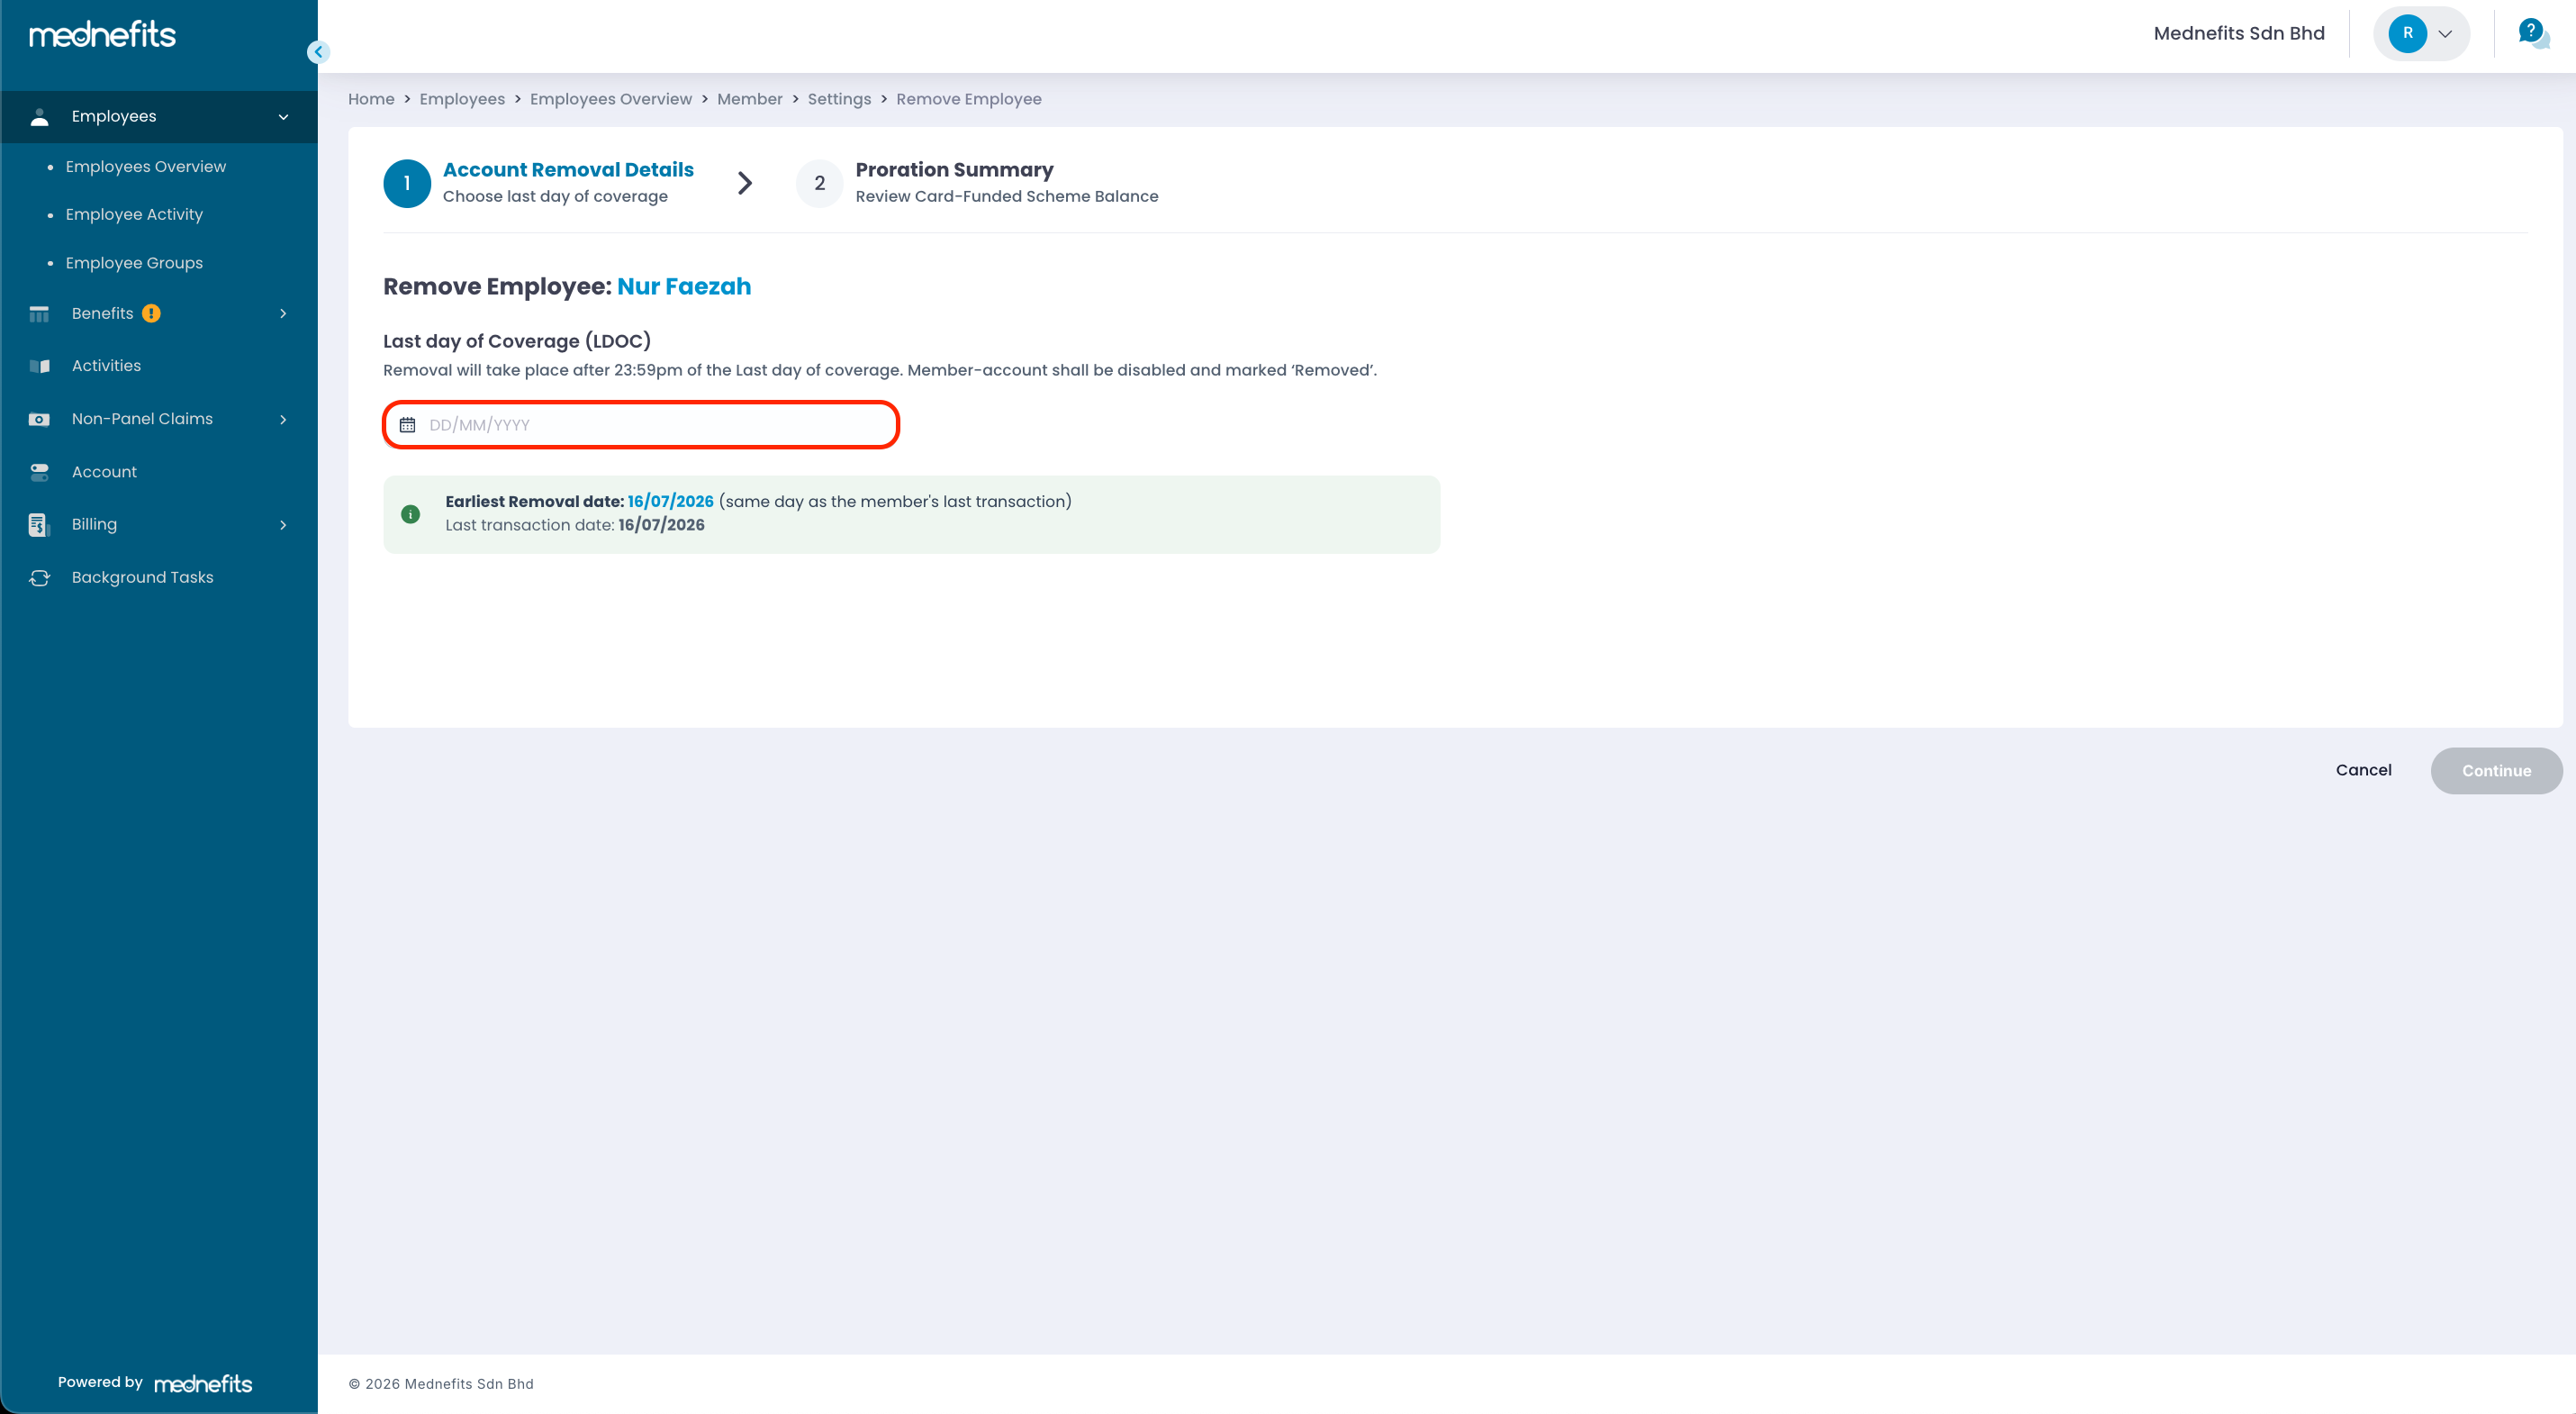
Step 3: Select the employee's last day of coverage and click Continue.
-
You can select a backdate or future date.
-
For a member who has not made any transactions yet, you can select any dates before the scheme's end date.
-
For a member who has made at least 1 successful panel/non-panel transaction, the earliest last day of coverage is the same day as the latest transaction (including any successful transactions made by the dependent). The last day of coverage cannot be backdated to a date before the latest transaction.
Step 4: On the Proration Summary page, you may choose to continue the Recurring Allocations (RA) until the last applicable date, or to exclude future RA by ticking the box.
Note: Last RA is to indicate the last time that the RA will be applied to that employee scheme.
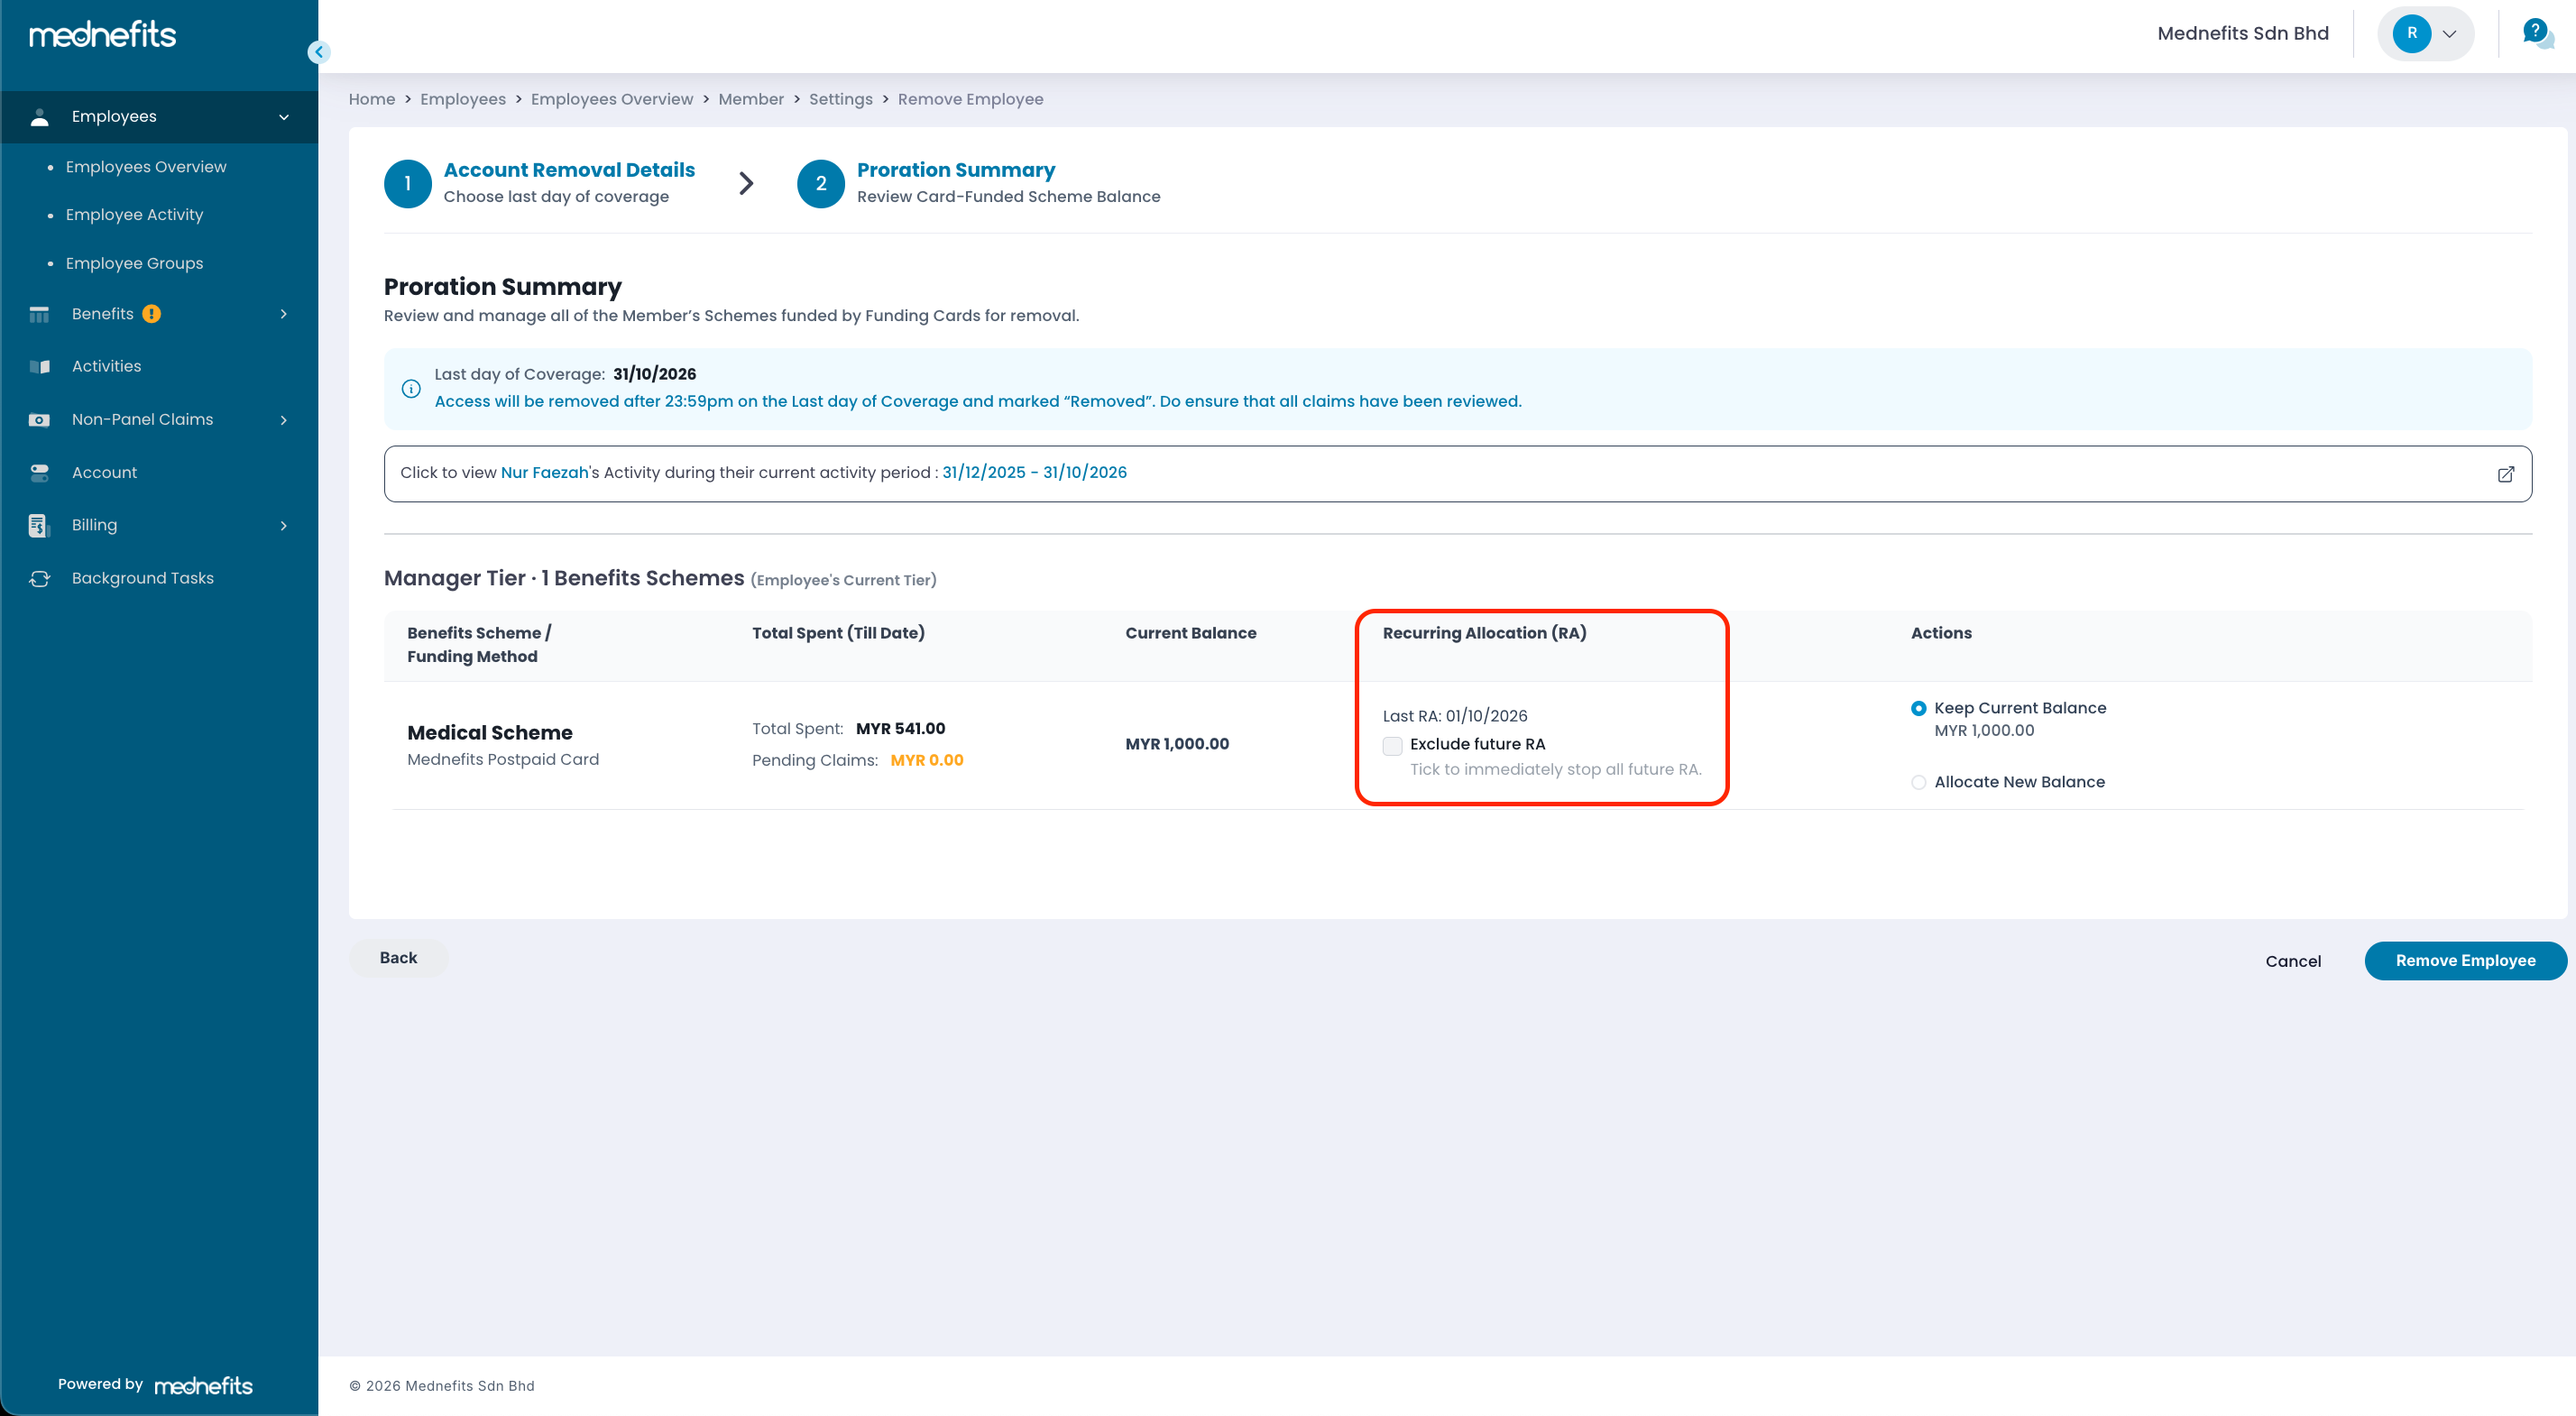
Step 5: Under Actions, choose how you would like to manage the employee's remaining benefit balance after the removal:
- Keep Current Balance – Retains the employee's existing benefit balance up to the selected last day of coverage.
- Allocate New Balance – Recalculates and allocates a new benefit balance based on the selected last day of coverage and the company's benefit settings.
If you select Allocate New Balance, you can either enter a new benefit balance manually or use the Suggested Amount provided by the system. To view the benefit parameters used to calculate the suggested amount, click View Details.
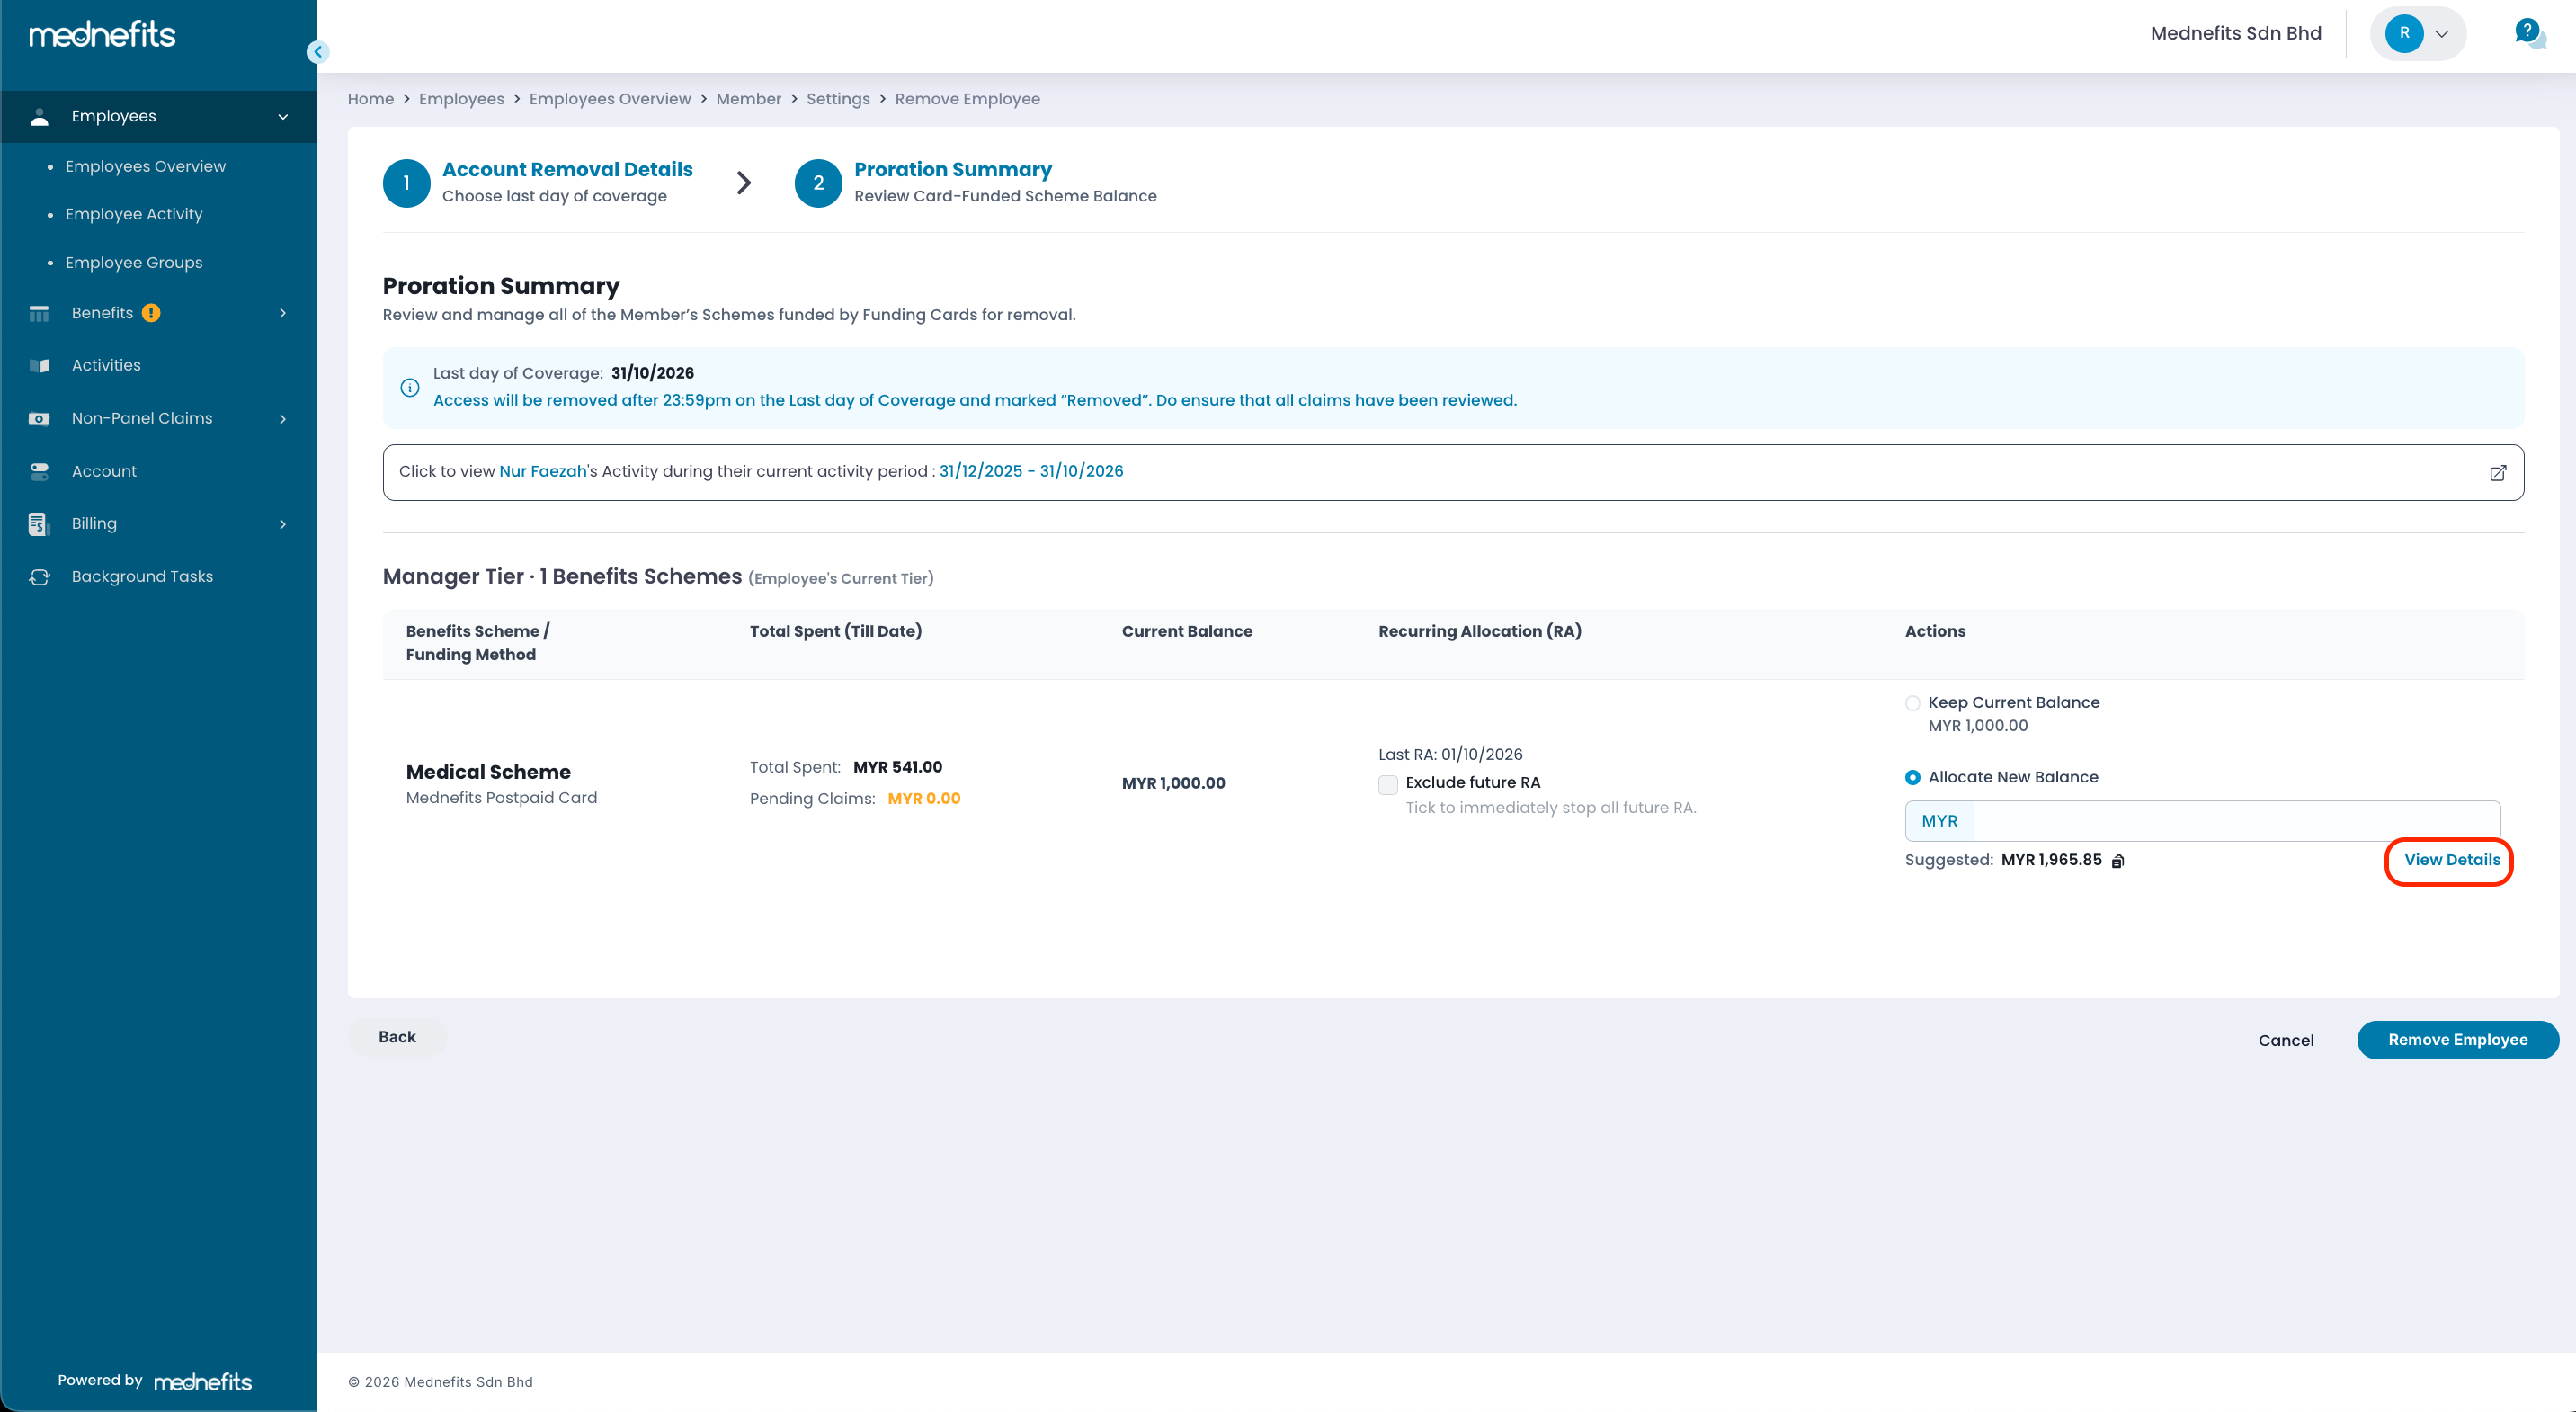
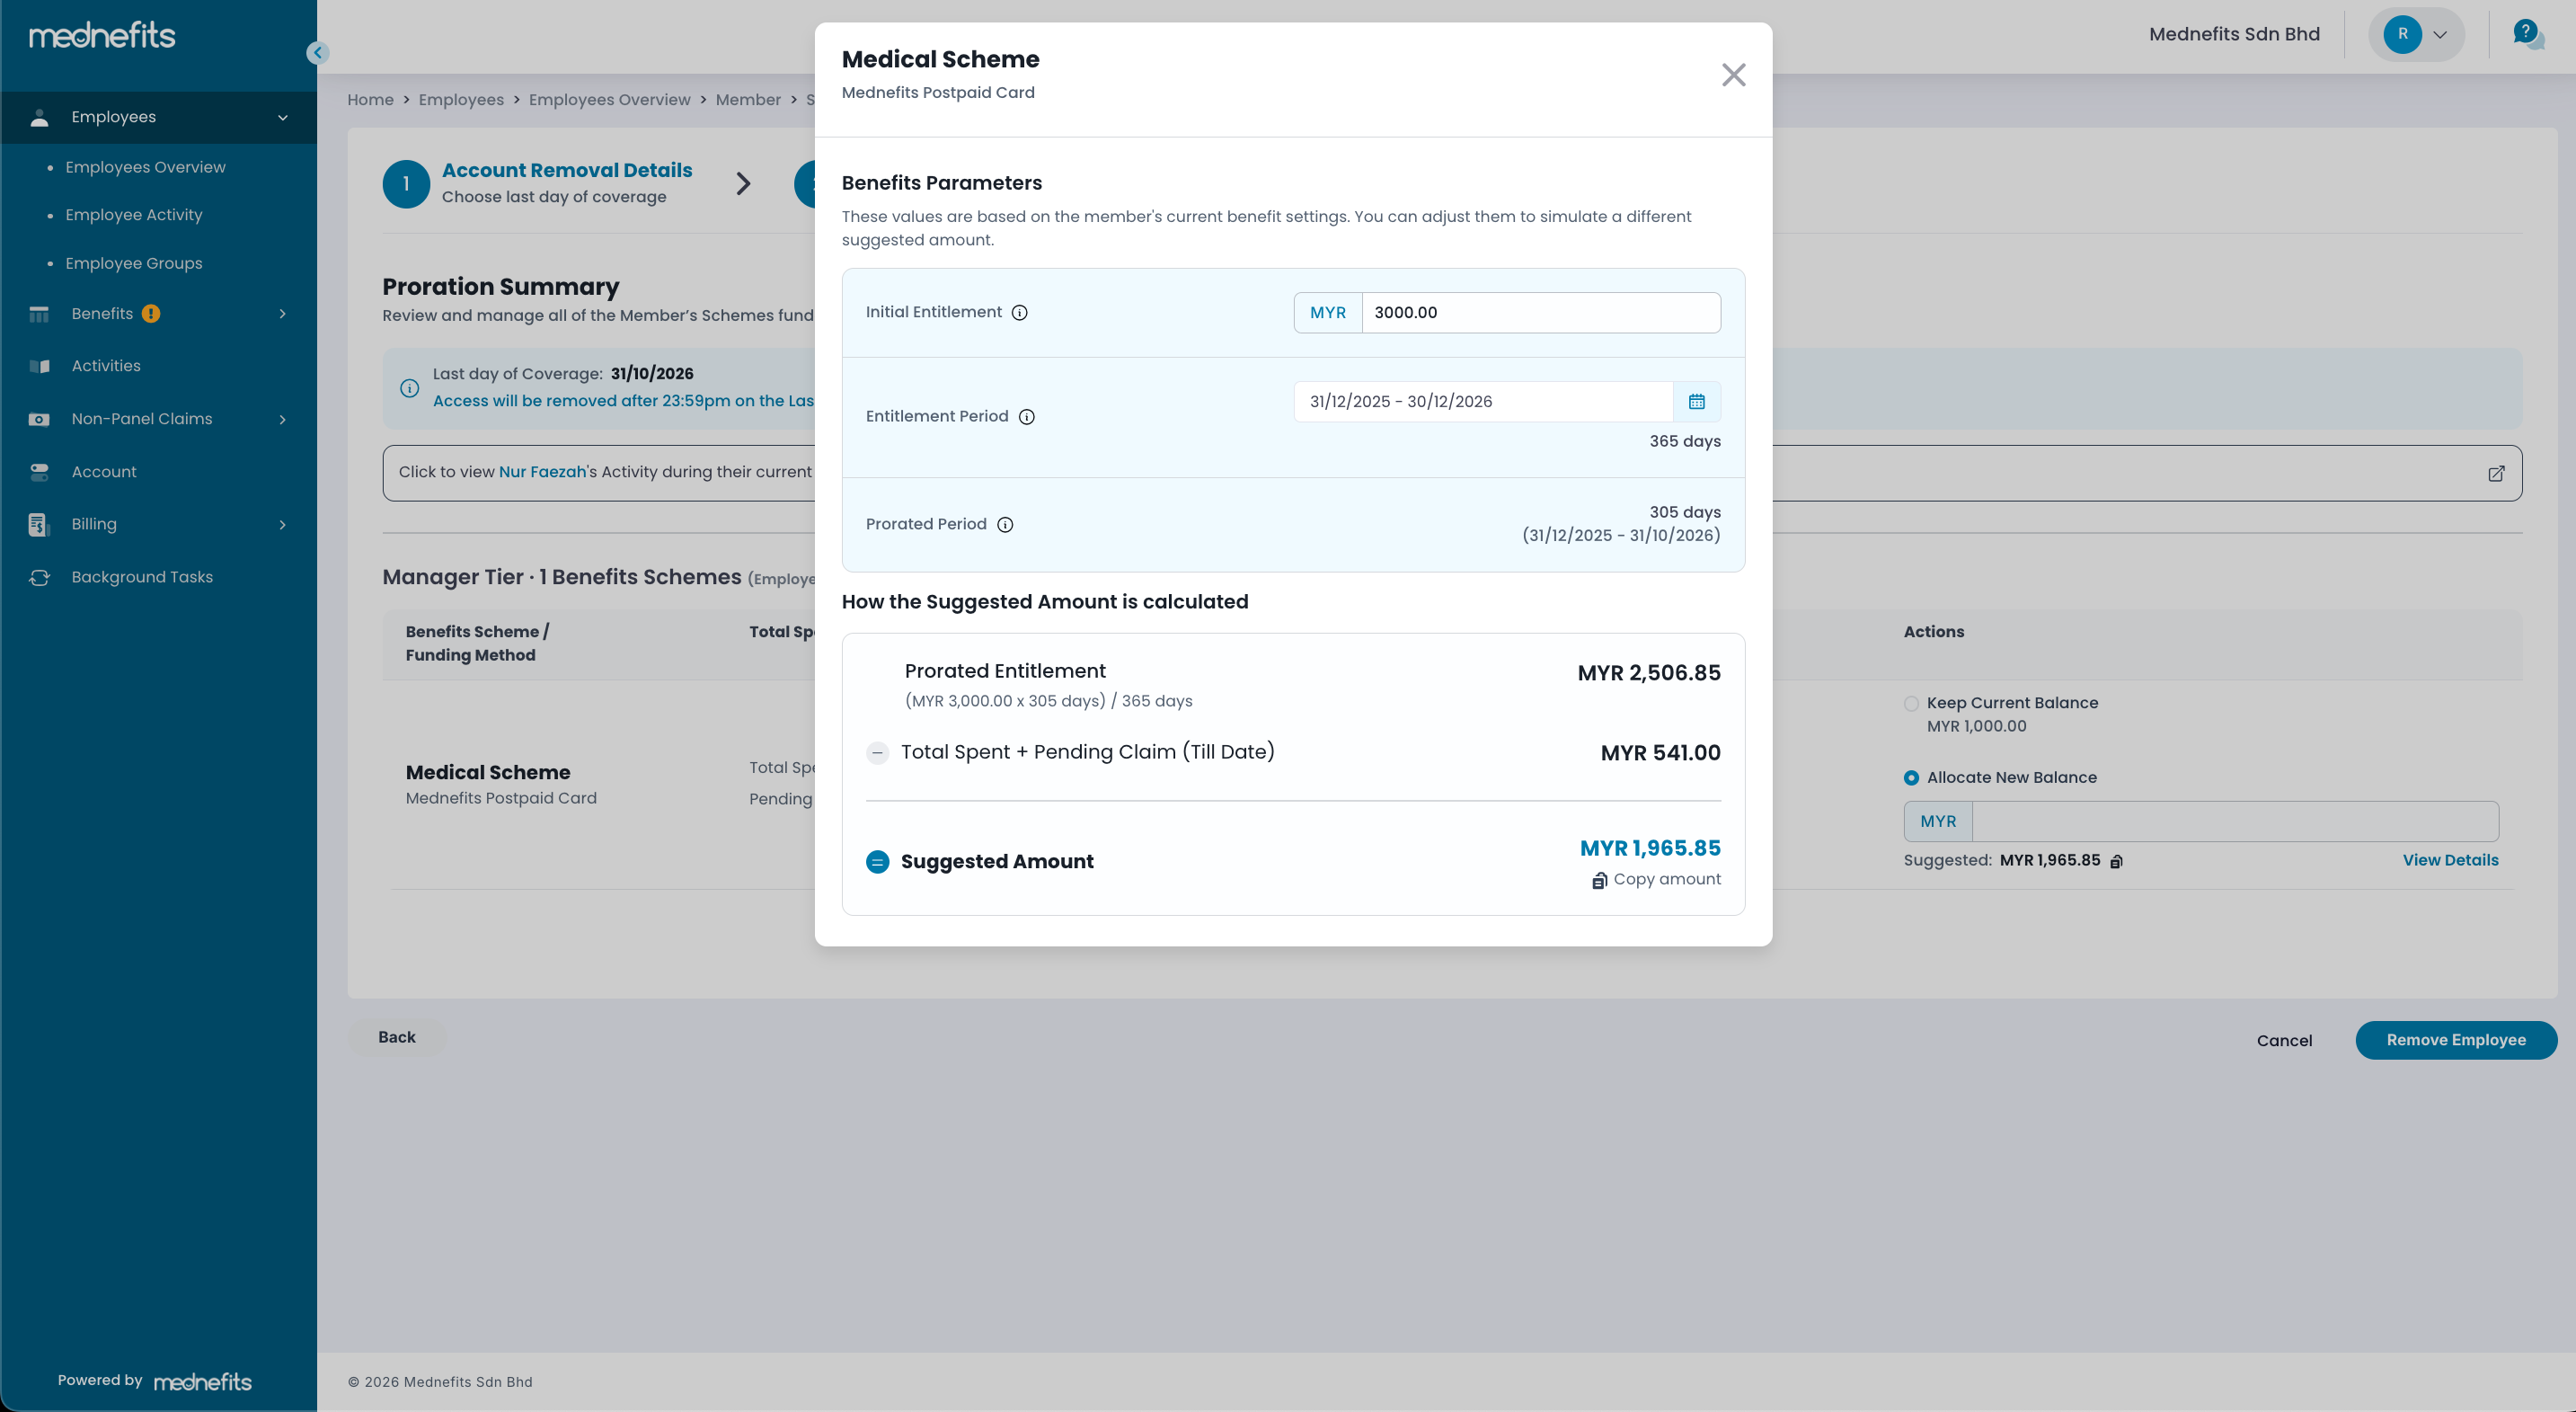
ℹ️ Suggested Amount – The system automatically suggests a scheme balance based on the employee's prorated entitlement and total spending + pending claim (Till date).
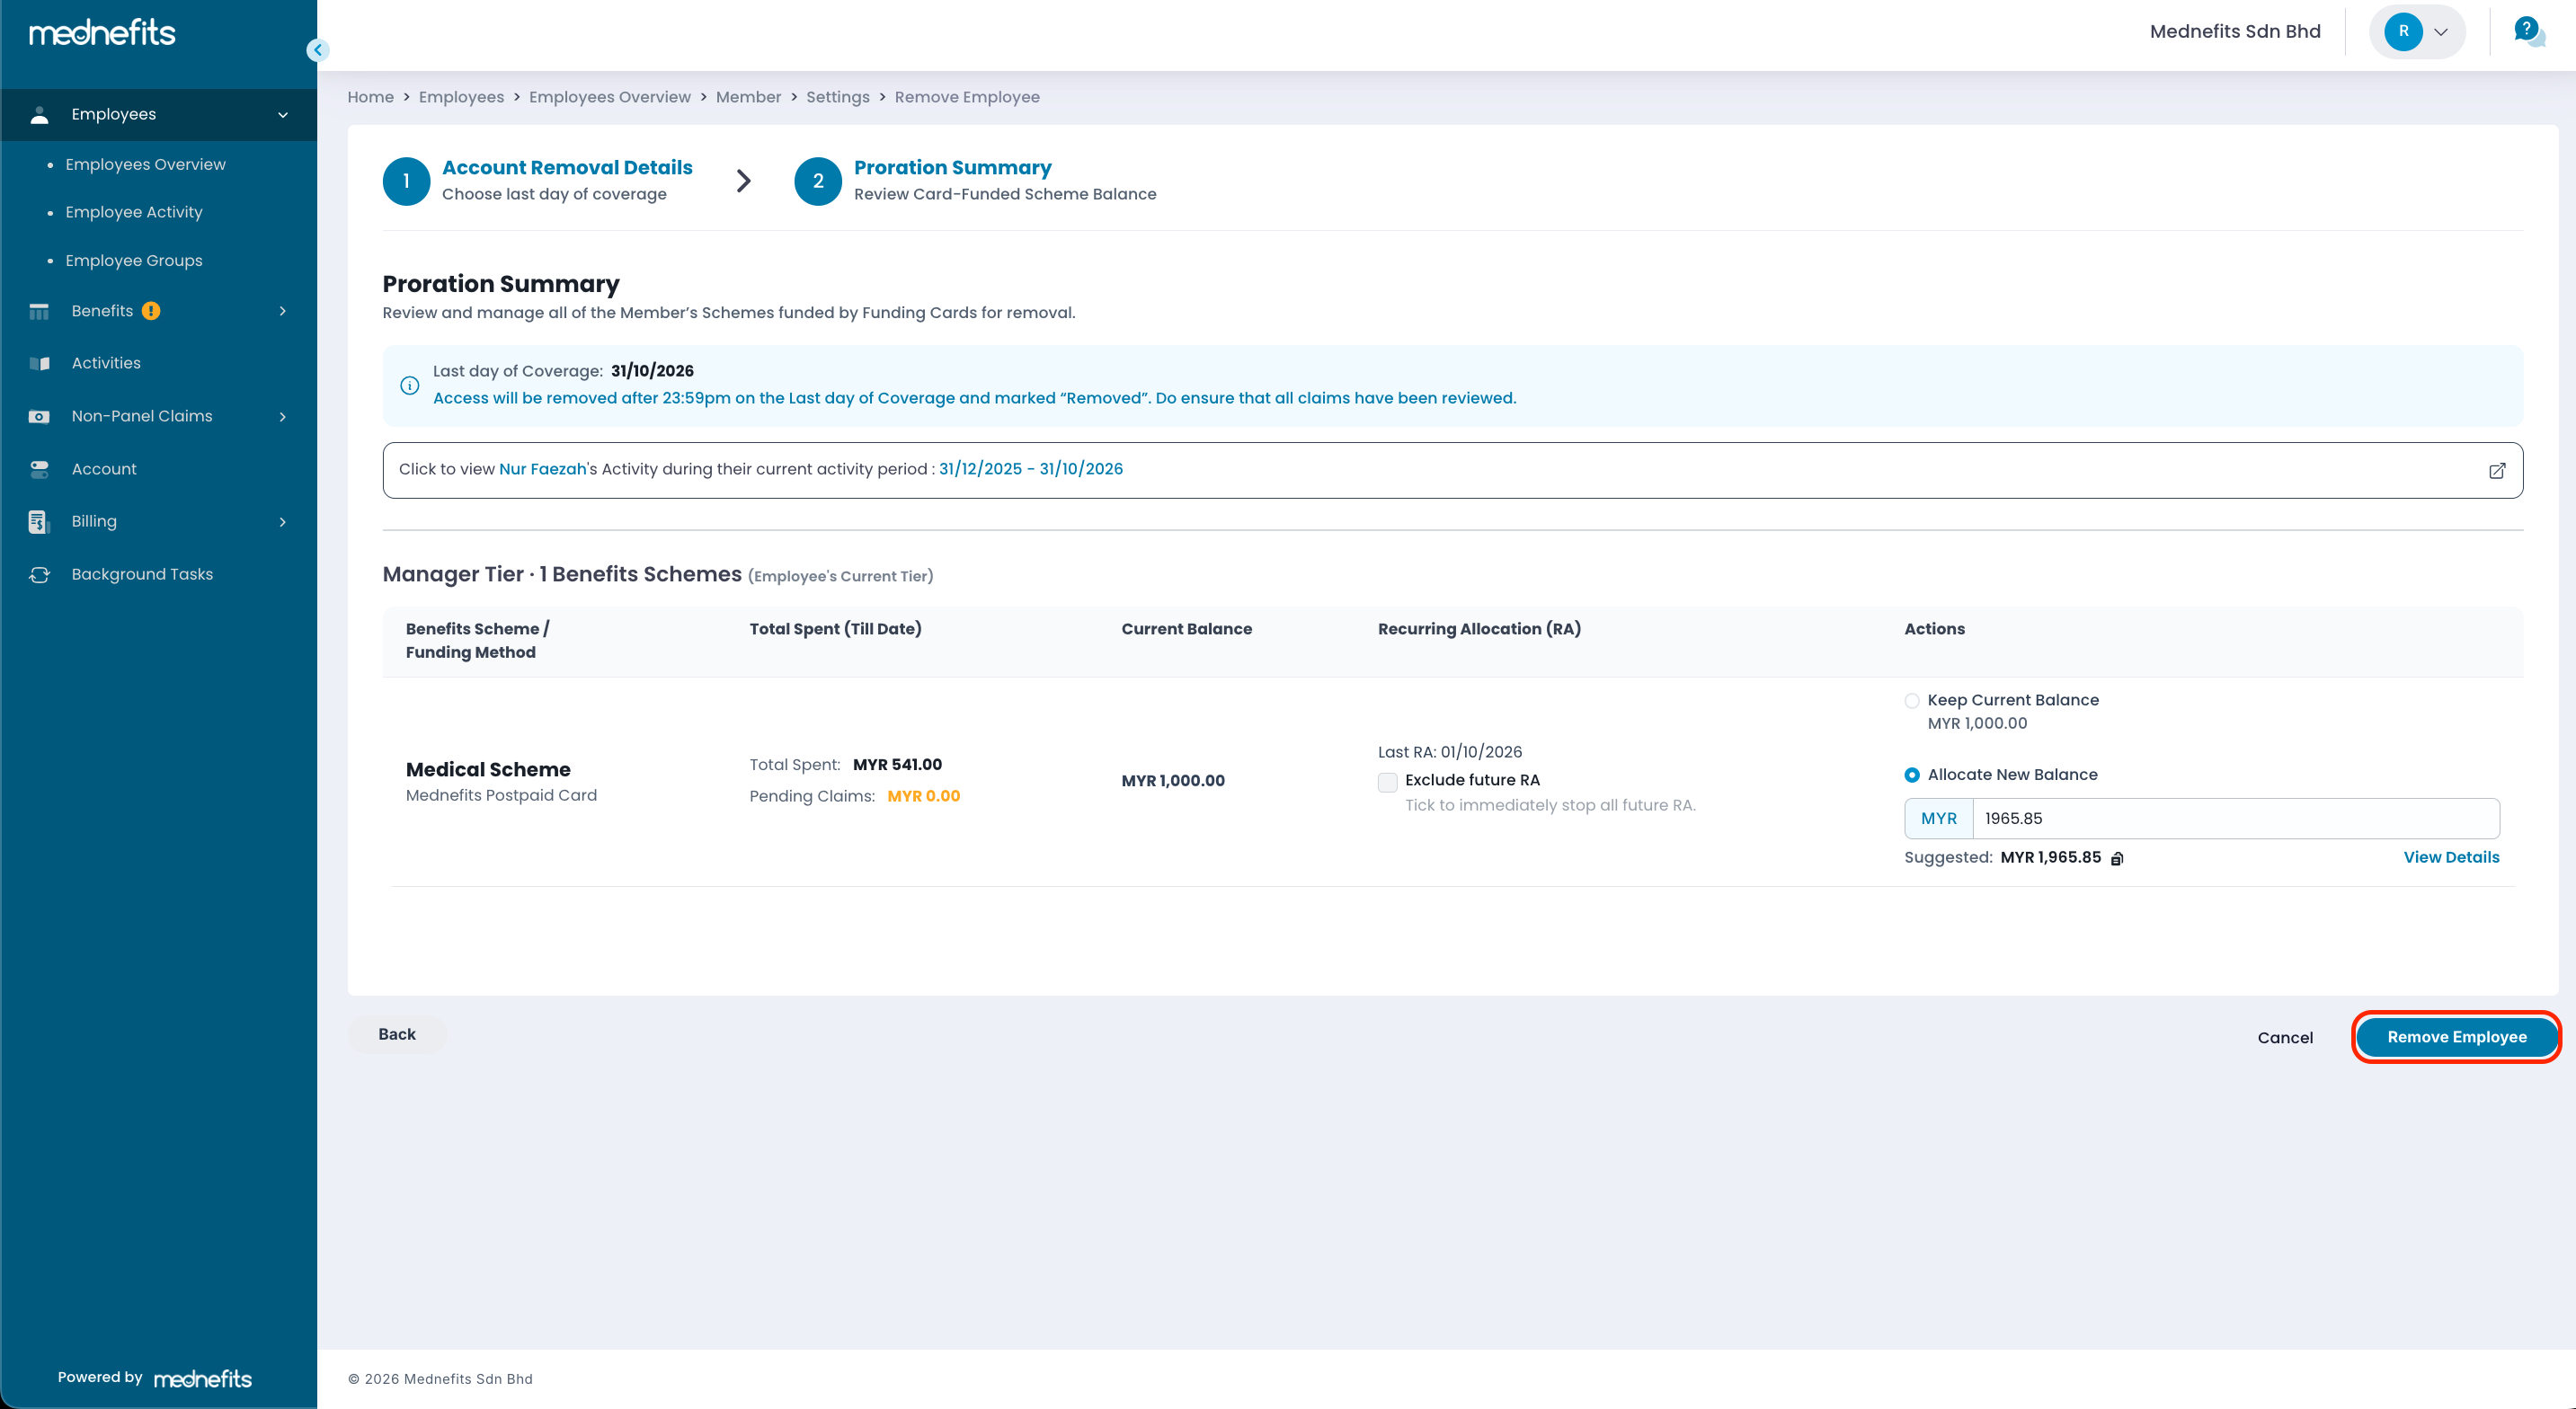
Click Copy to apply the suggested amount.
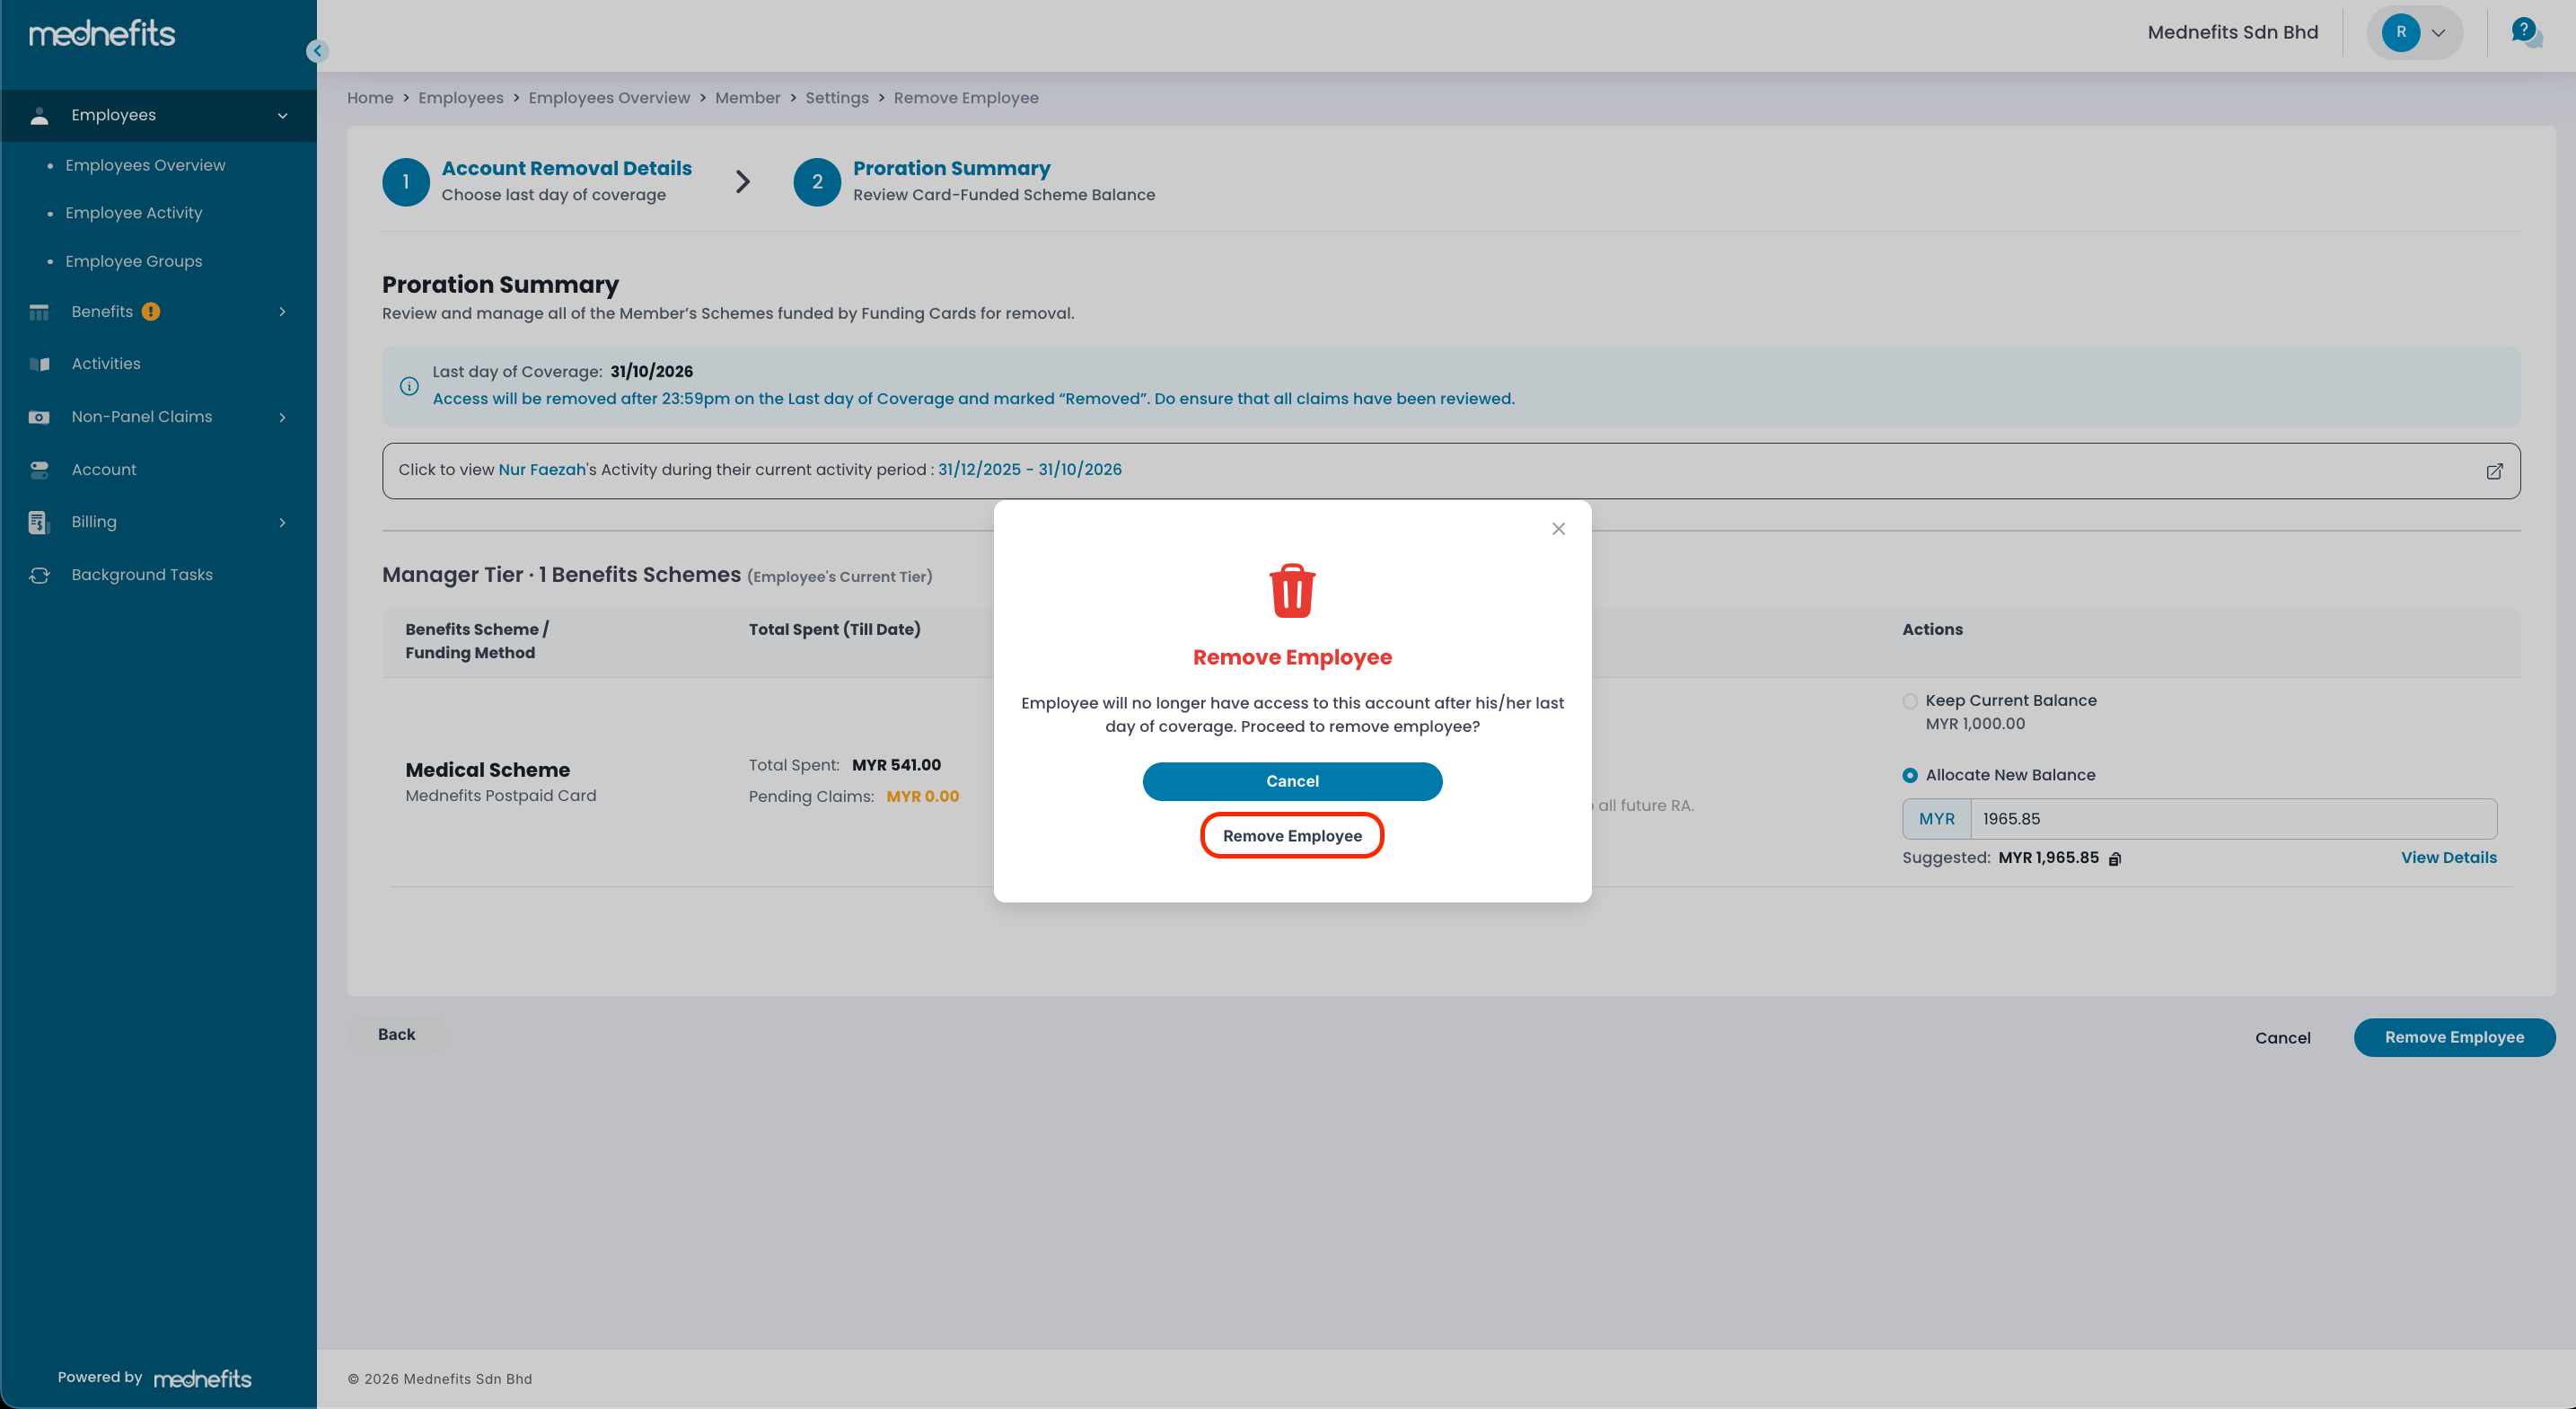
Step 6: Lastly, click on Remove Employee to proceed.
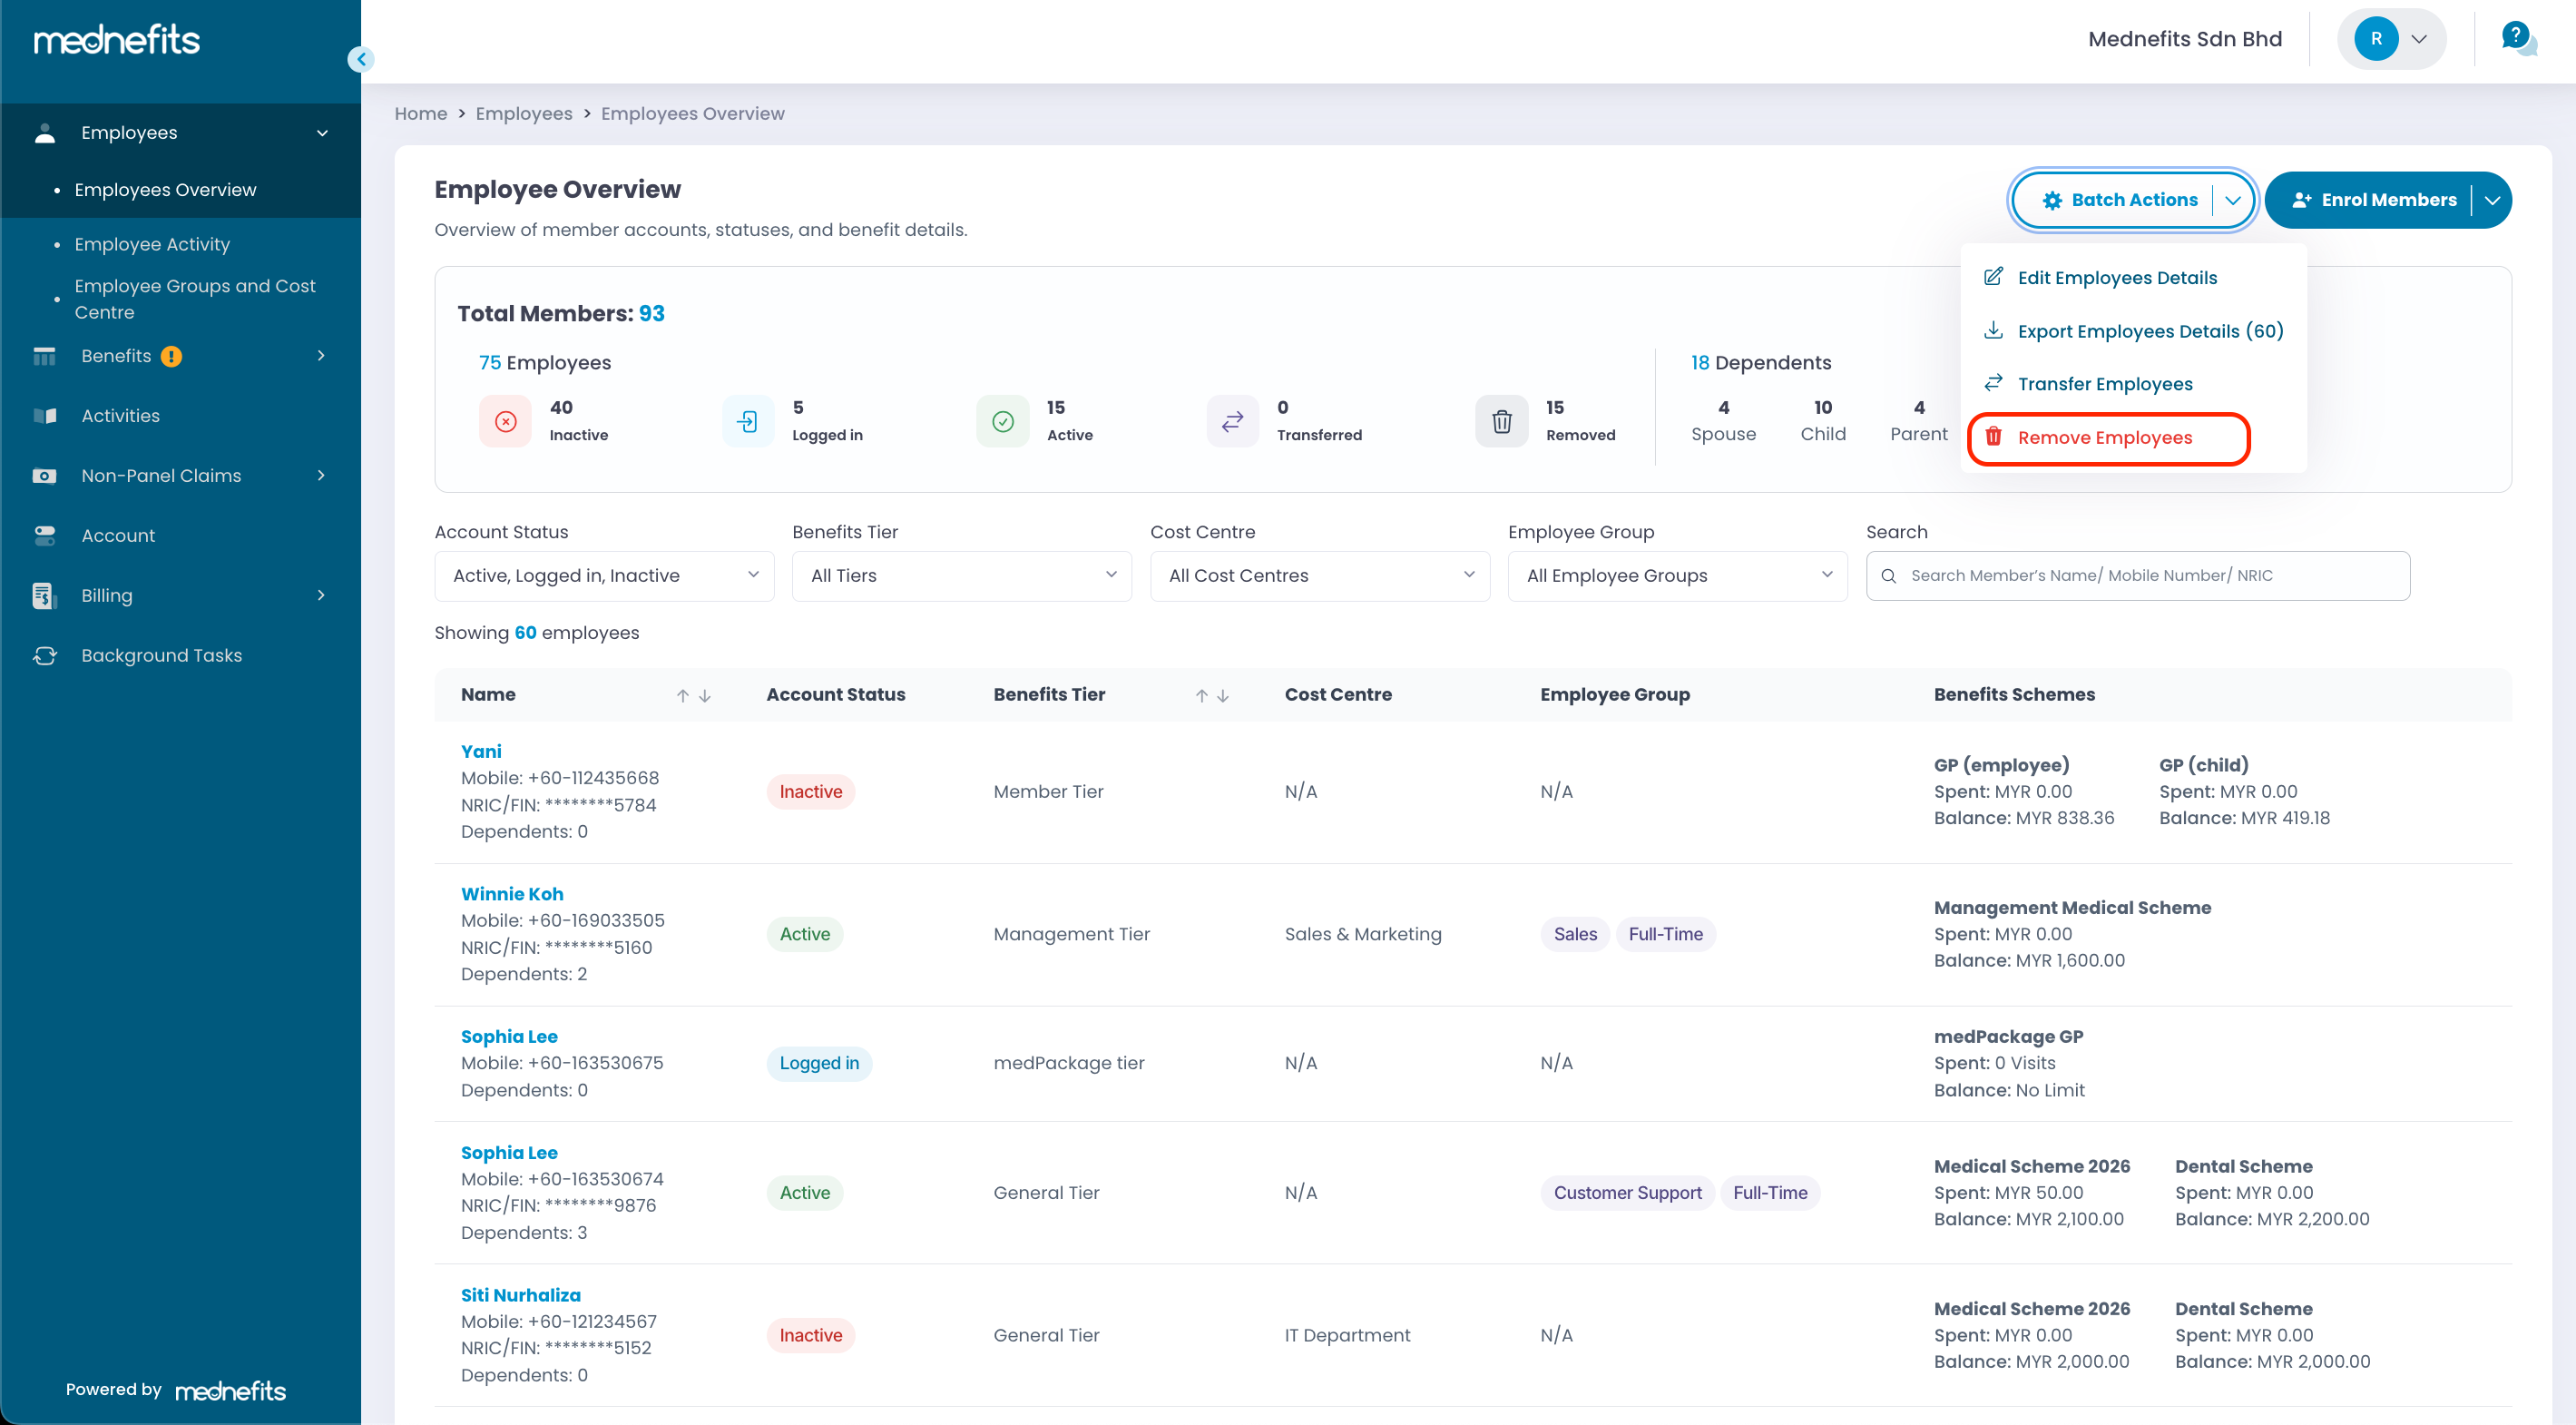
Step 1: On the Employees Overview page, select Remove Employees under Batch Actions
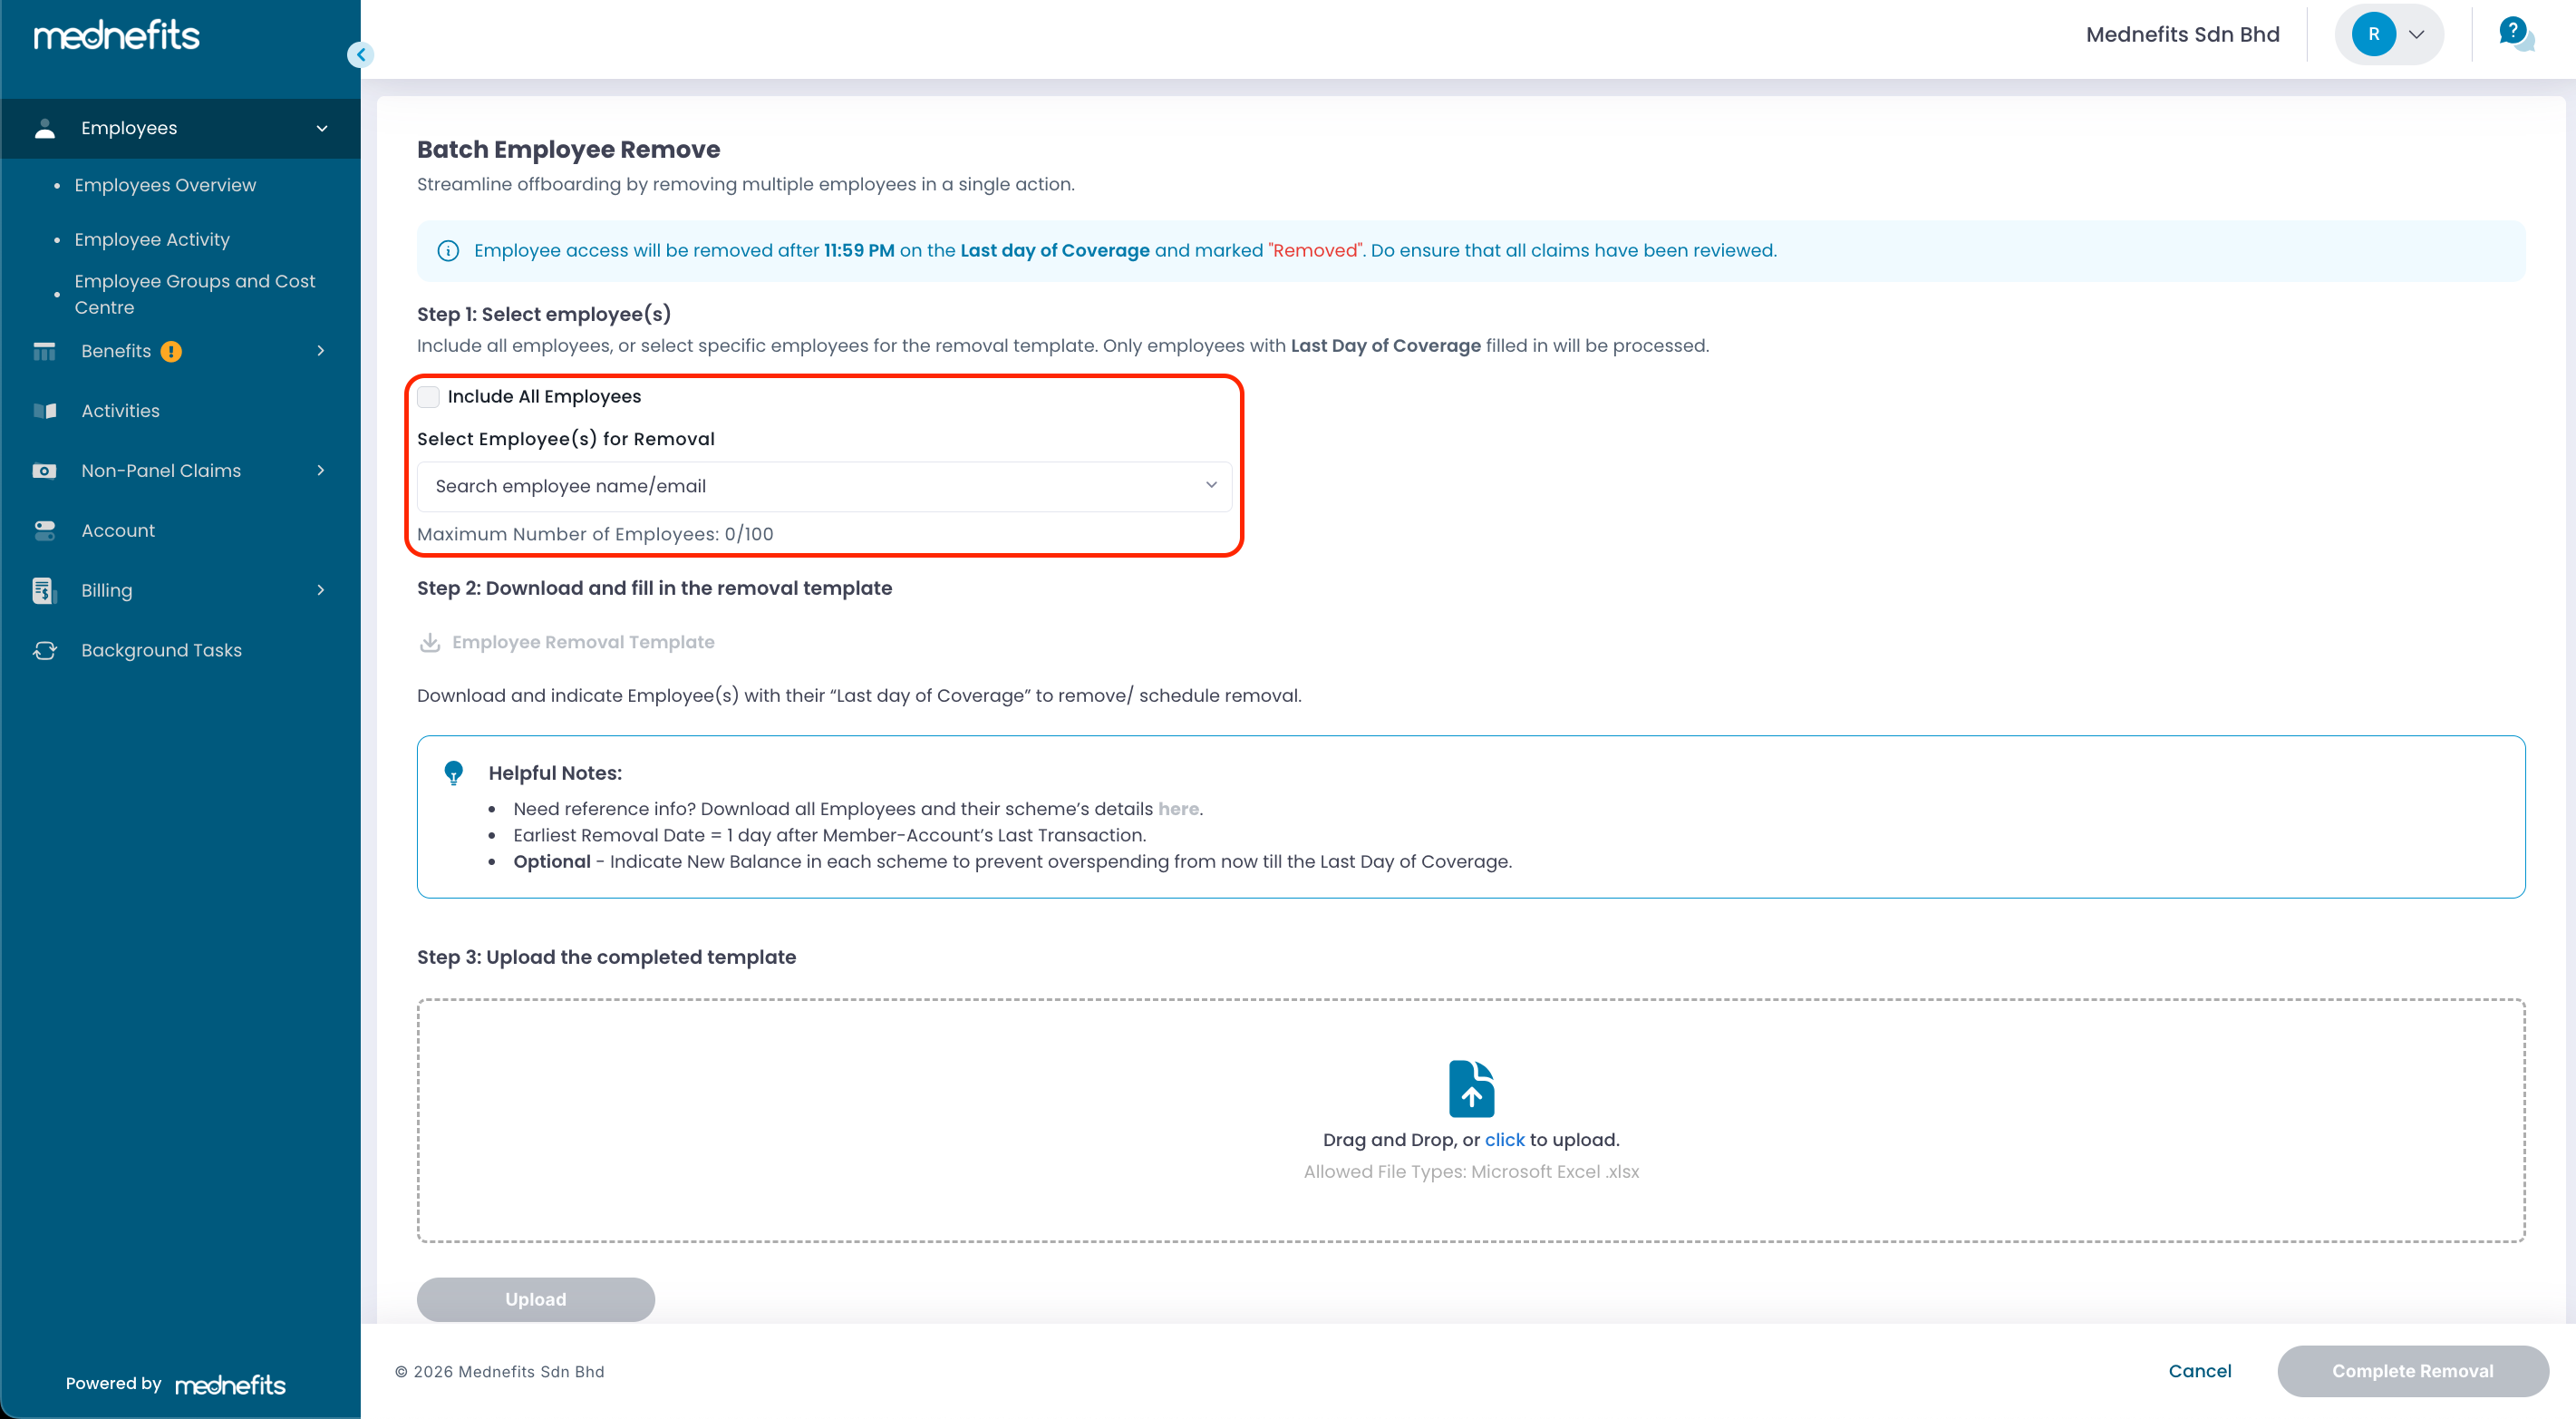
Step 2: Select employee removal method
You may choose one of the following options before proceeding with the employee removal process:
- Include All Employees – Select this option to remove all employees in bulk.
- Select Employee(s) for Removal – Select this option to choose specific employee(s) you wish to remove individually. You may select up to 100 employees at a time.
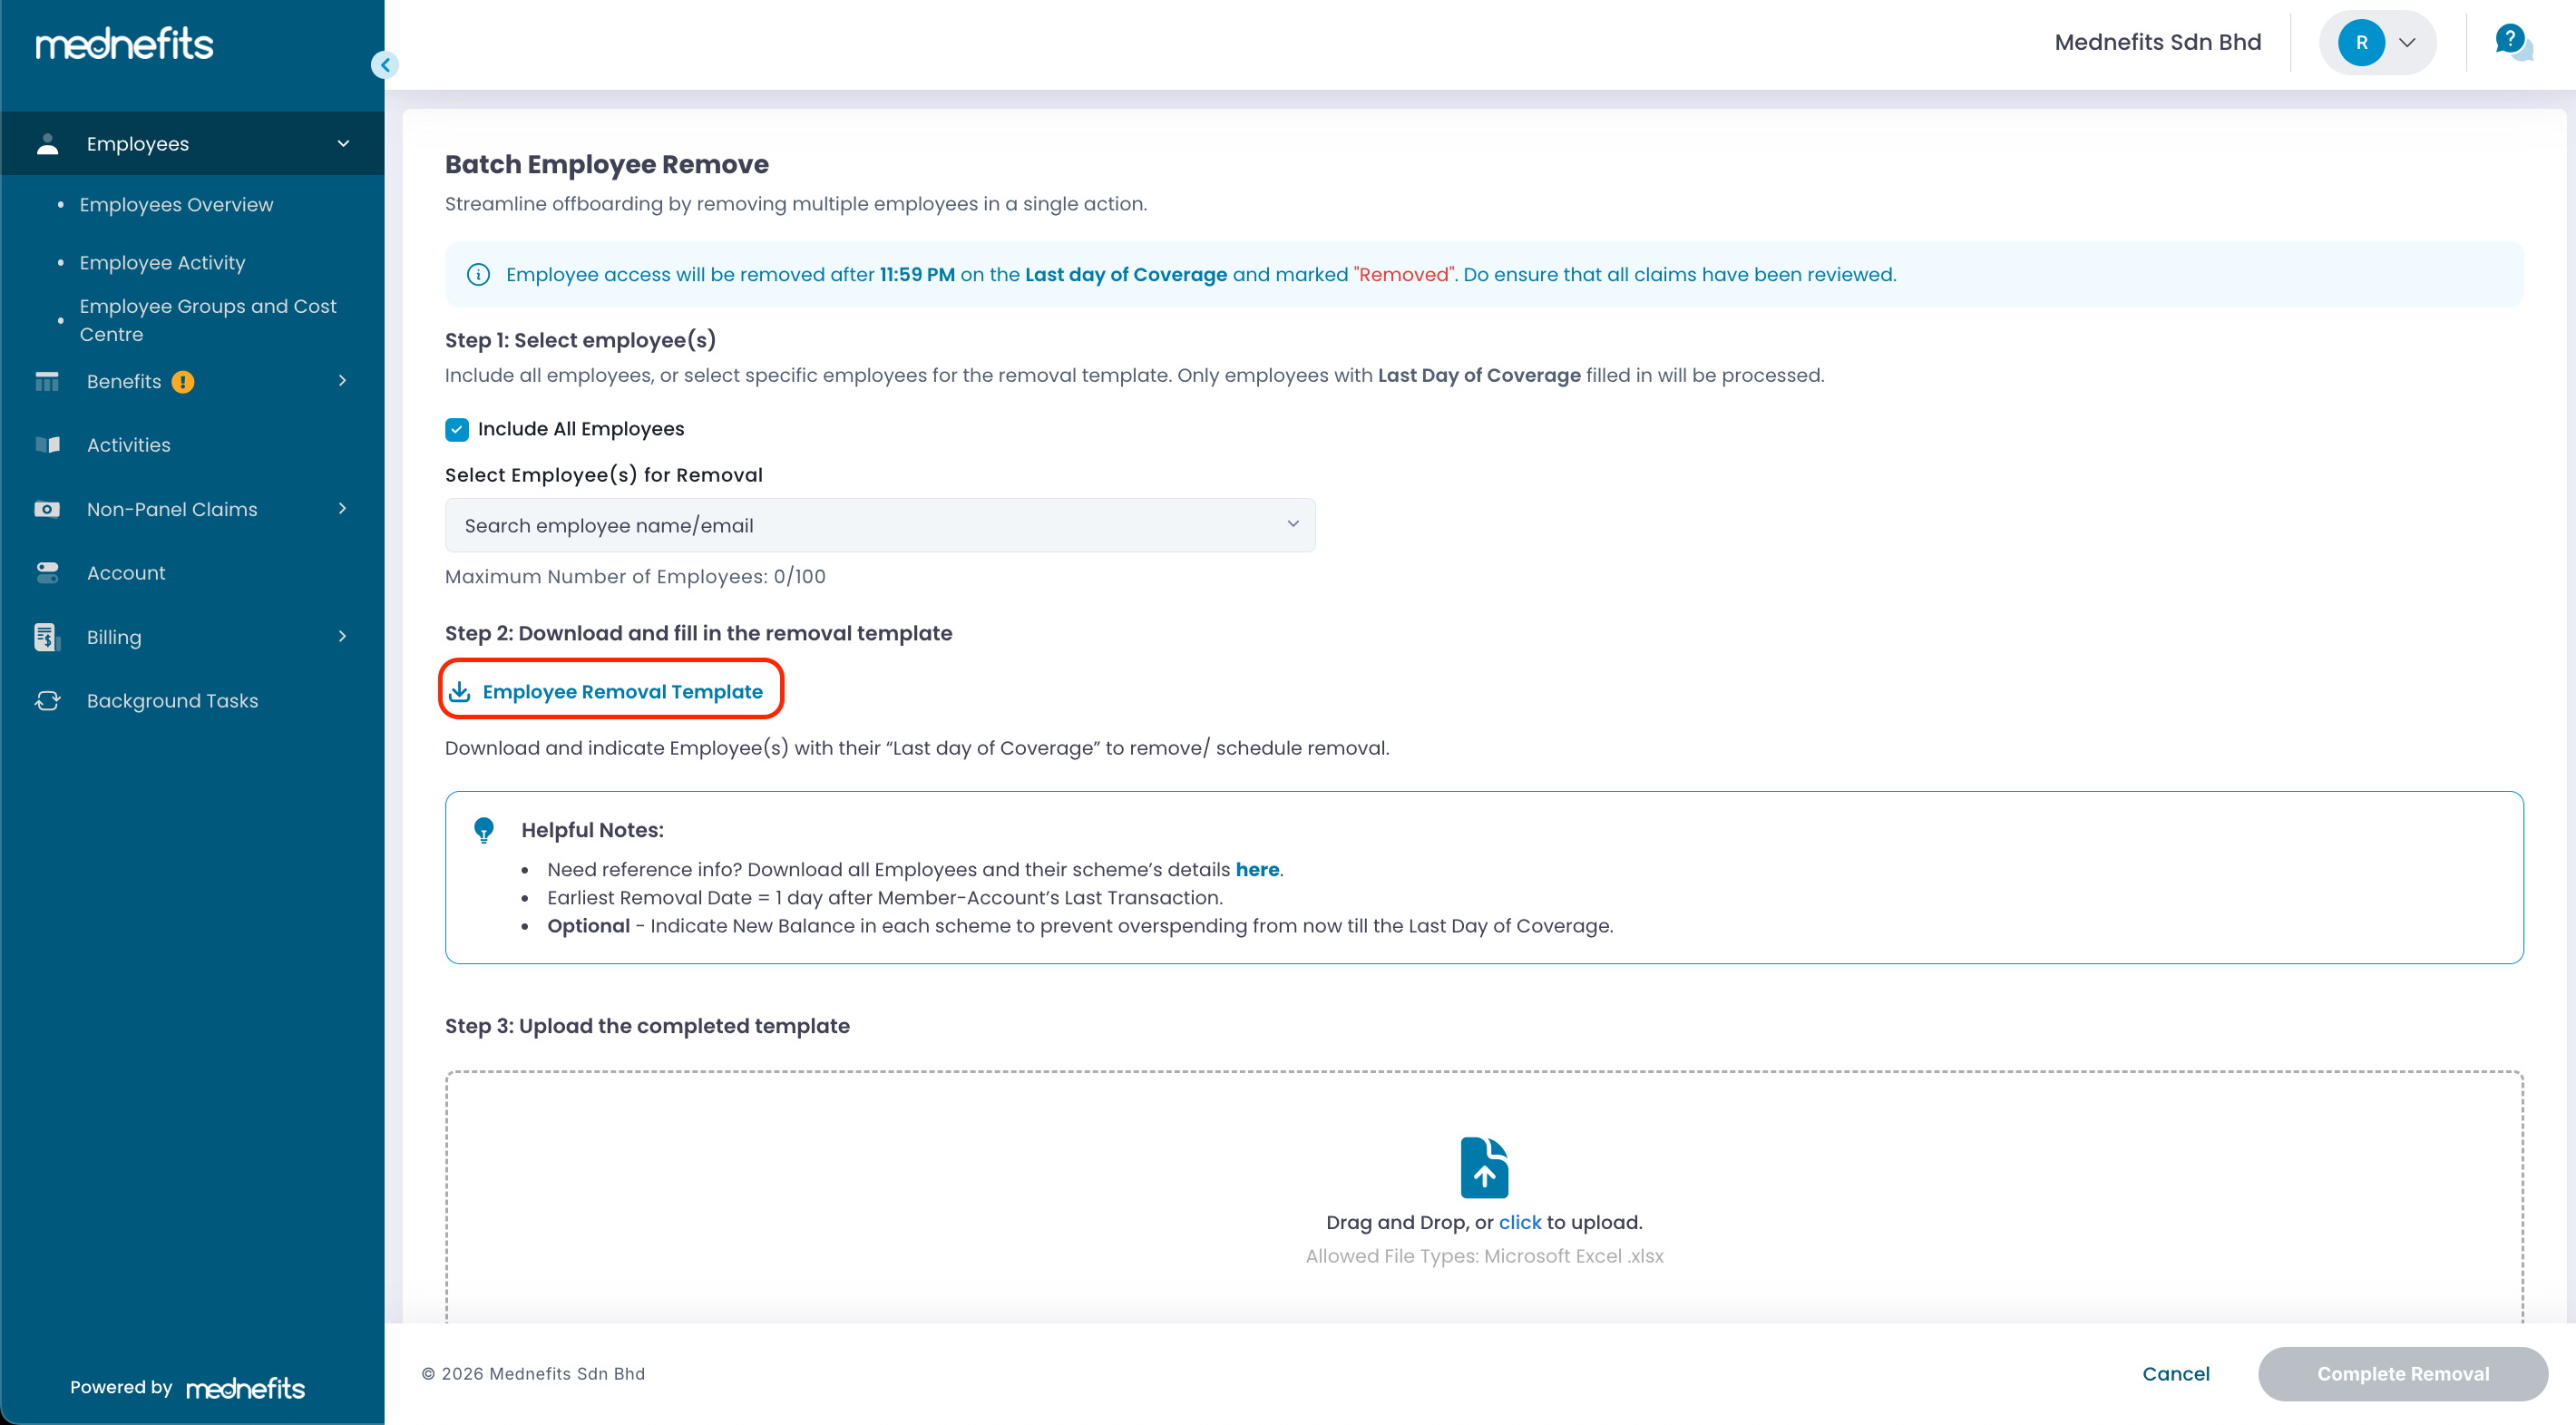
Step 3: Click on Employee Removal Template to download the template provided.
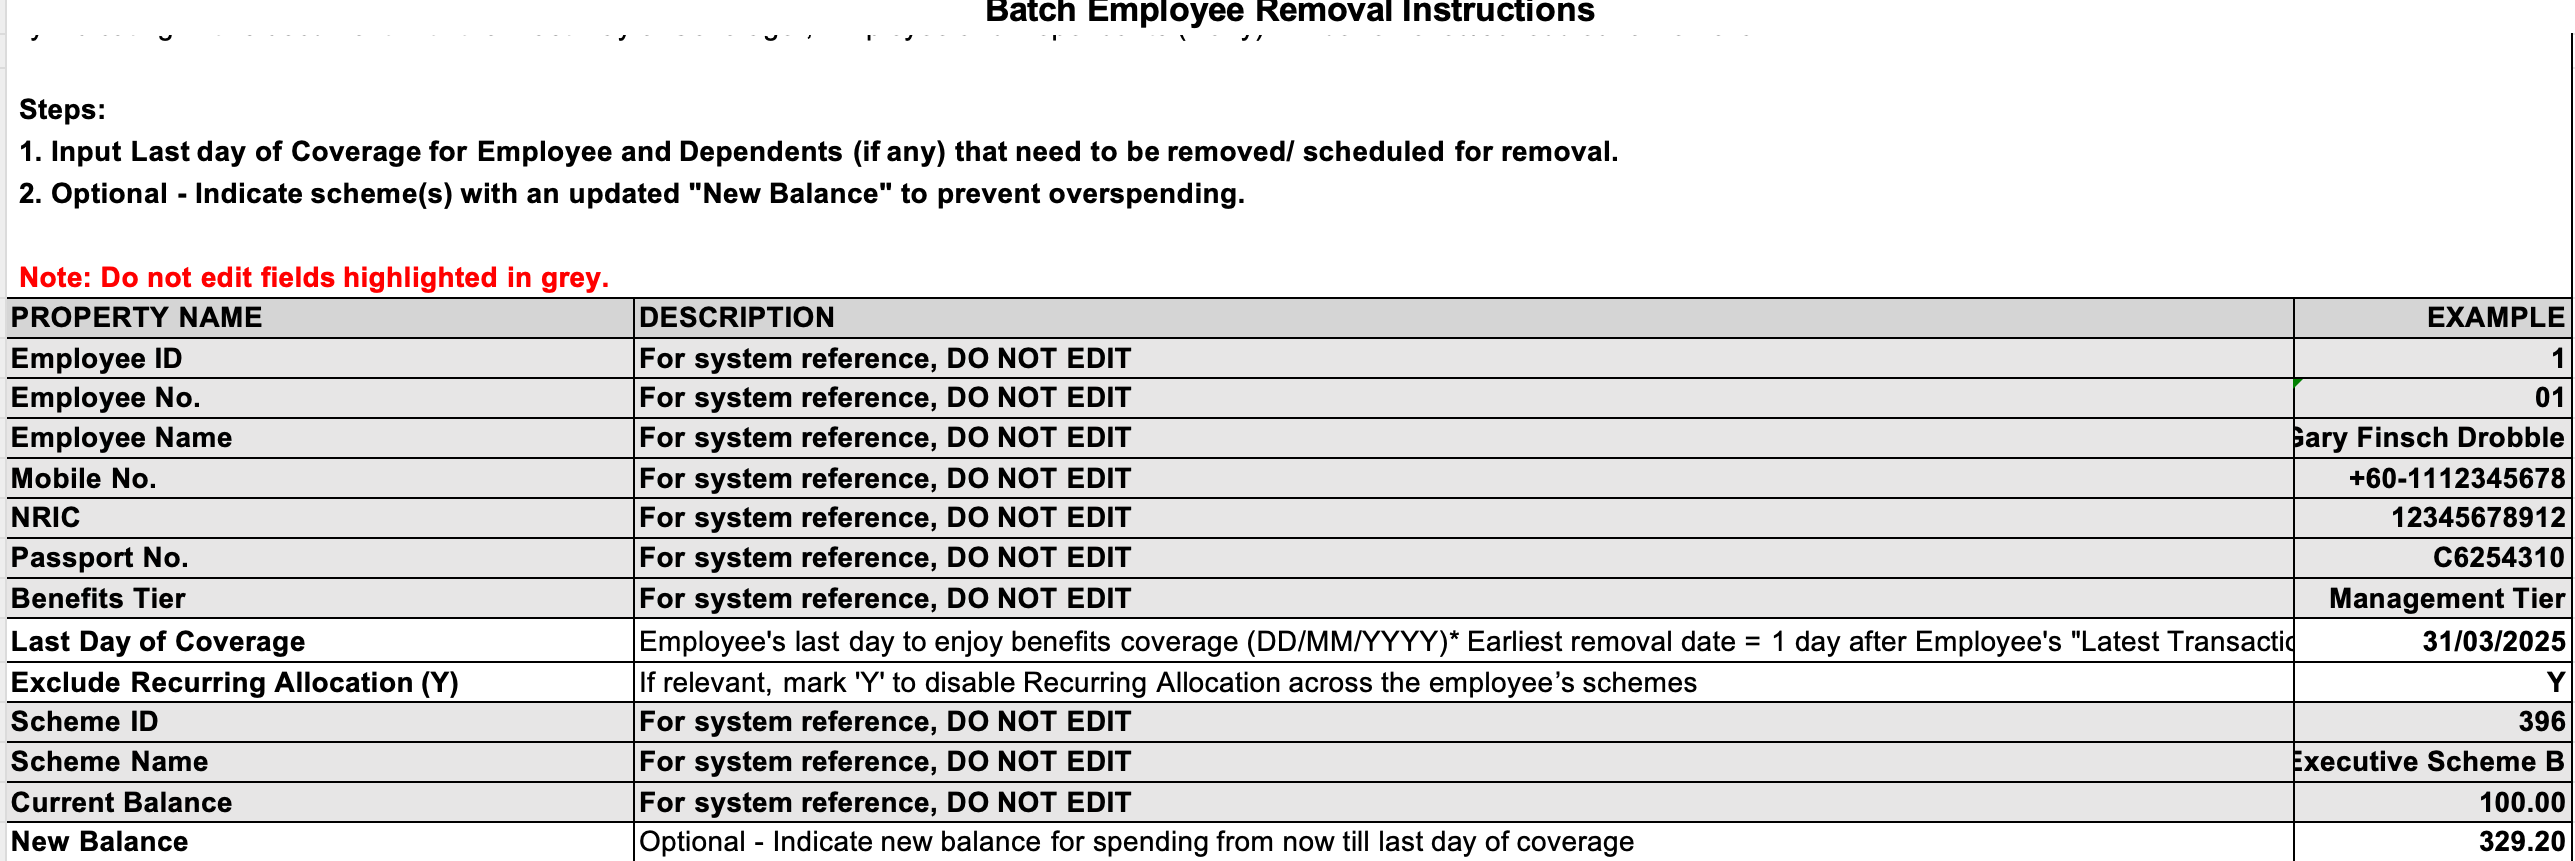
❗Open the template in Excel and follow the formatting instructions provided (this is important).
Kindly note that only the details in white can be edited, such as below:
- Last Day of Coverage (LDOC) (required) - You can input a backdate or future date
- Exclude Recurring Allocation (Y) (if applicable)
- New Balance (optional)
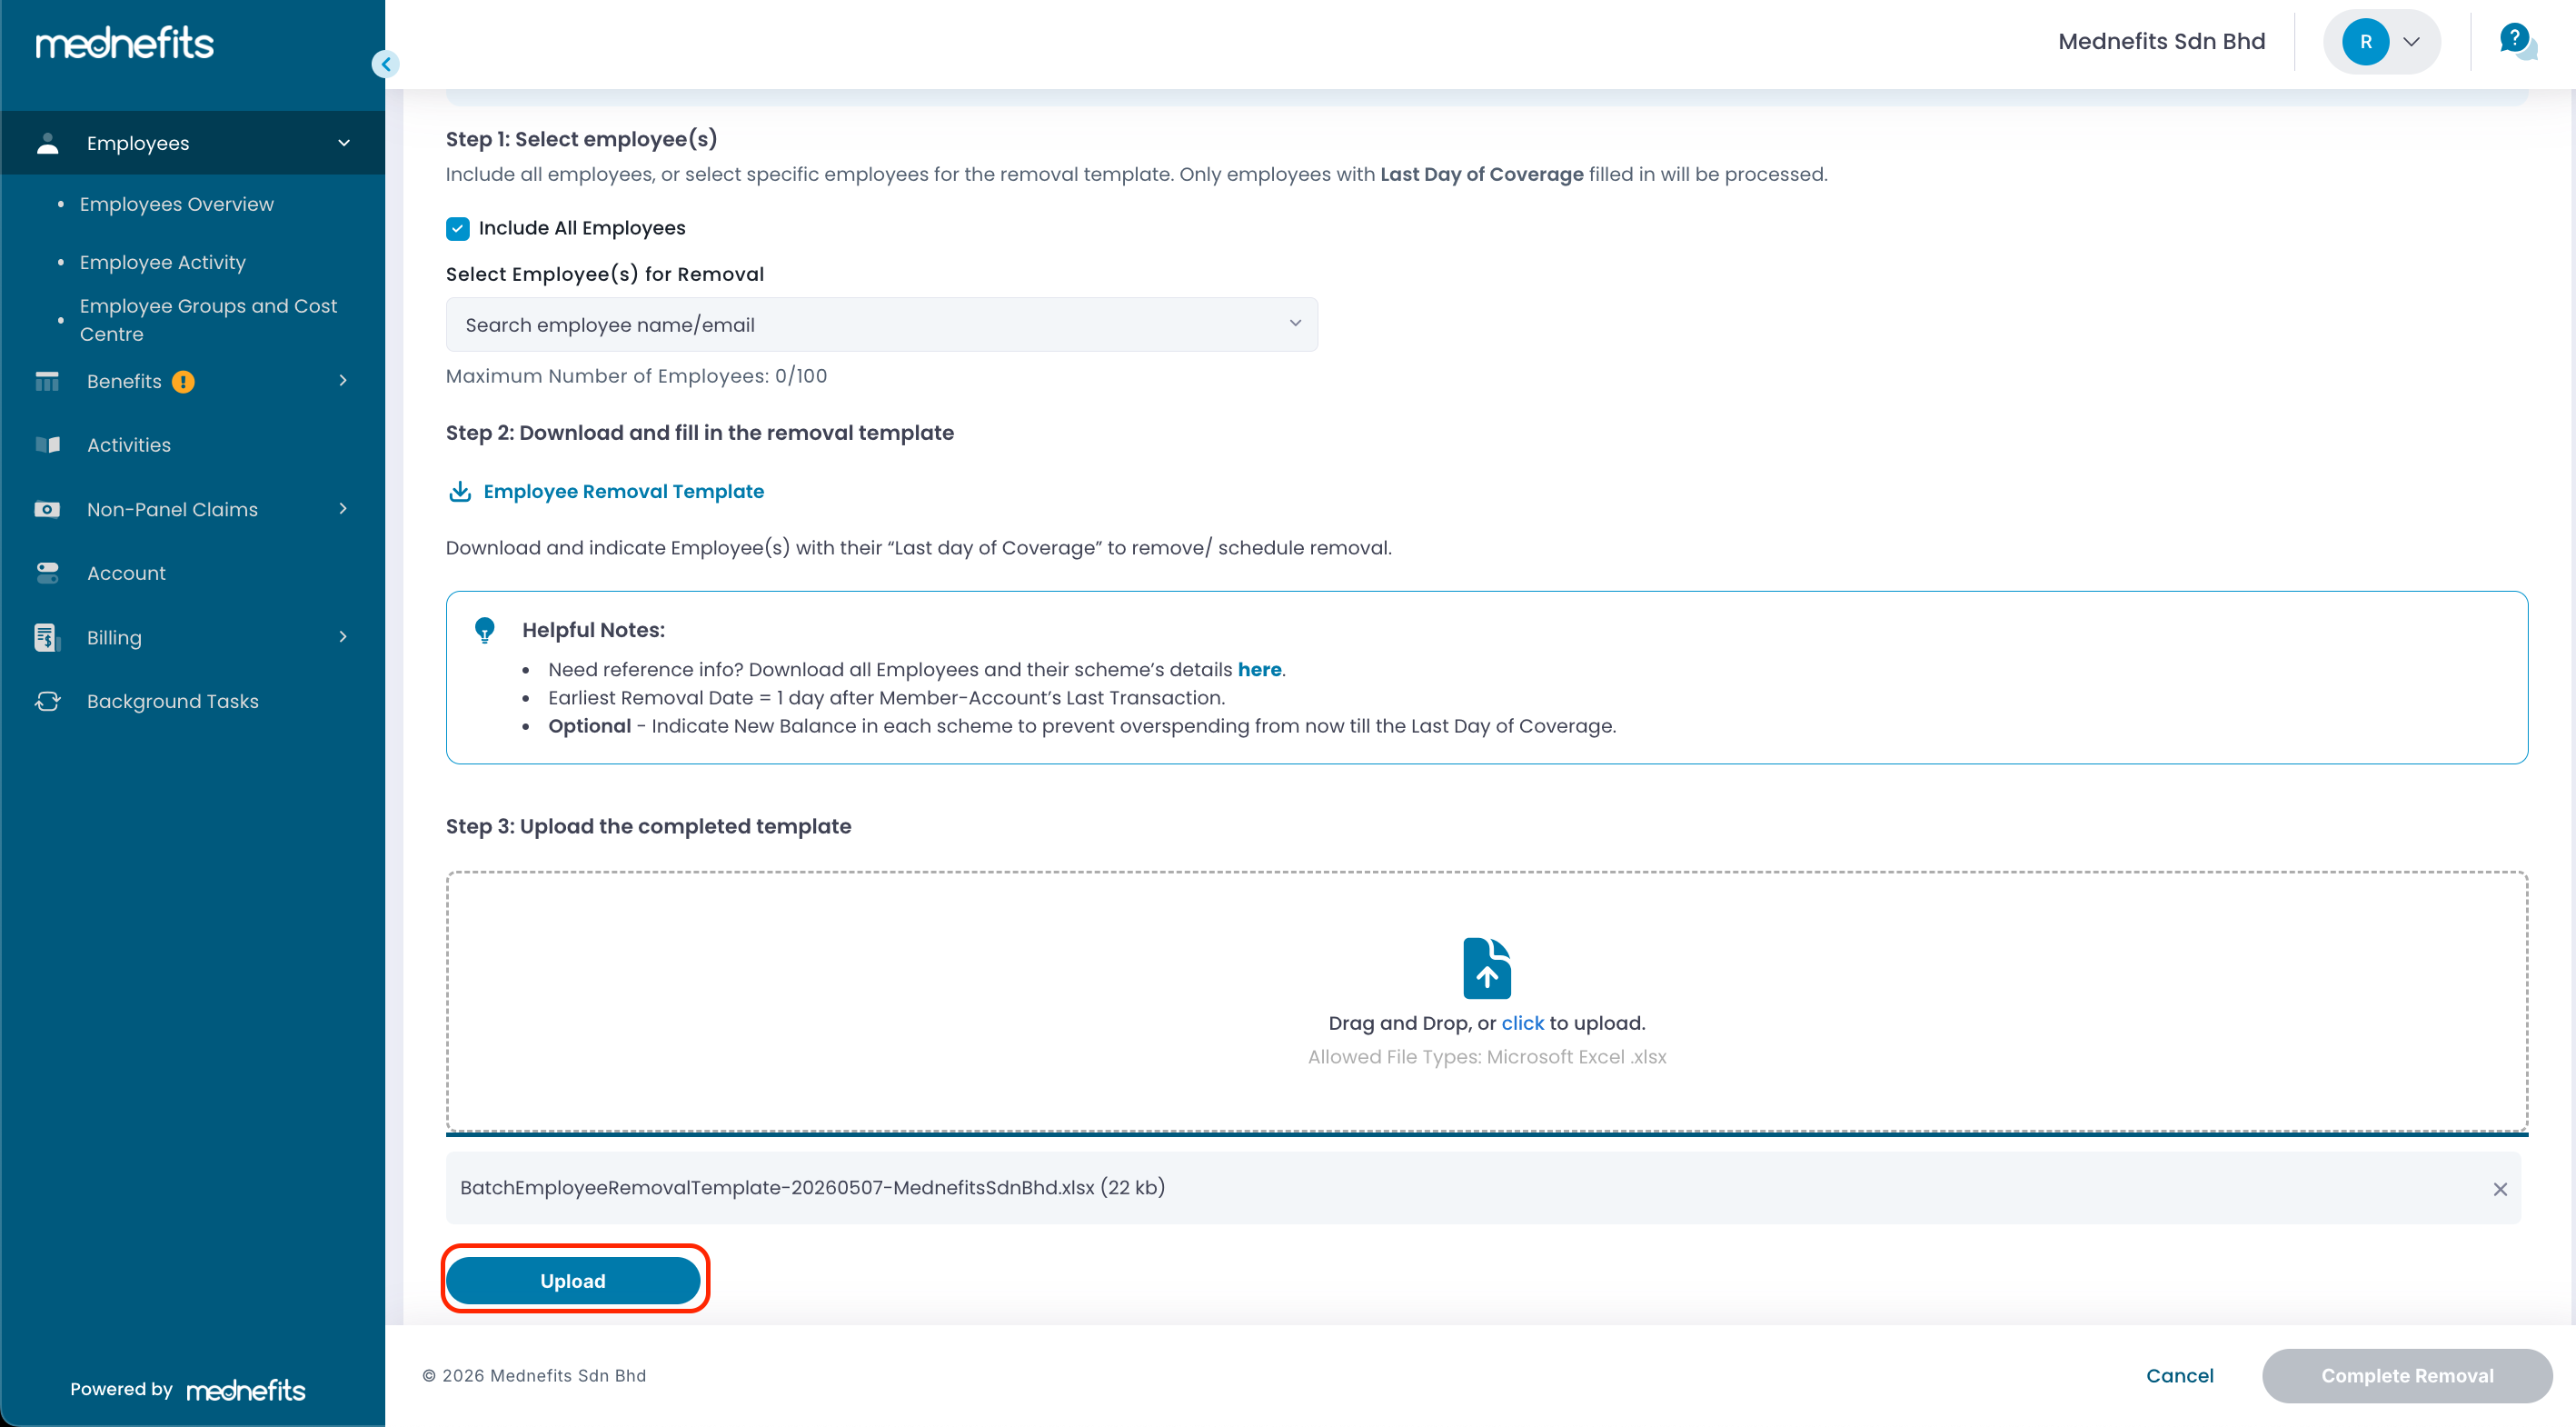
Step 4: After completing the removal in excel, Drag and Drop or Click to upload the excel. Select Upload to proceed.
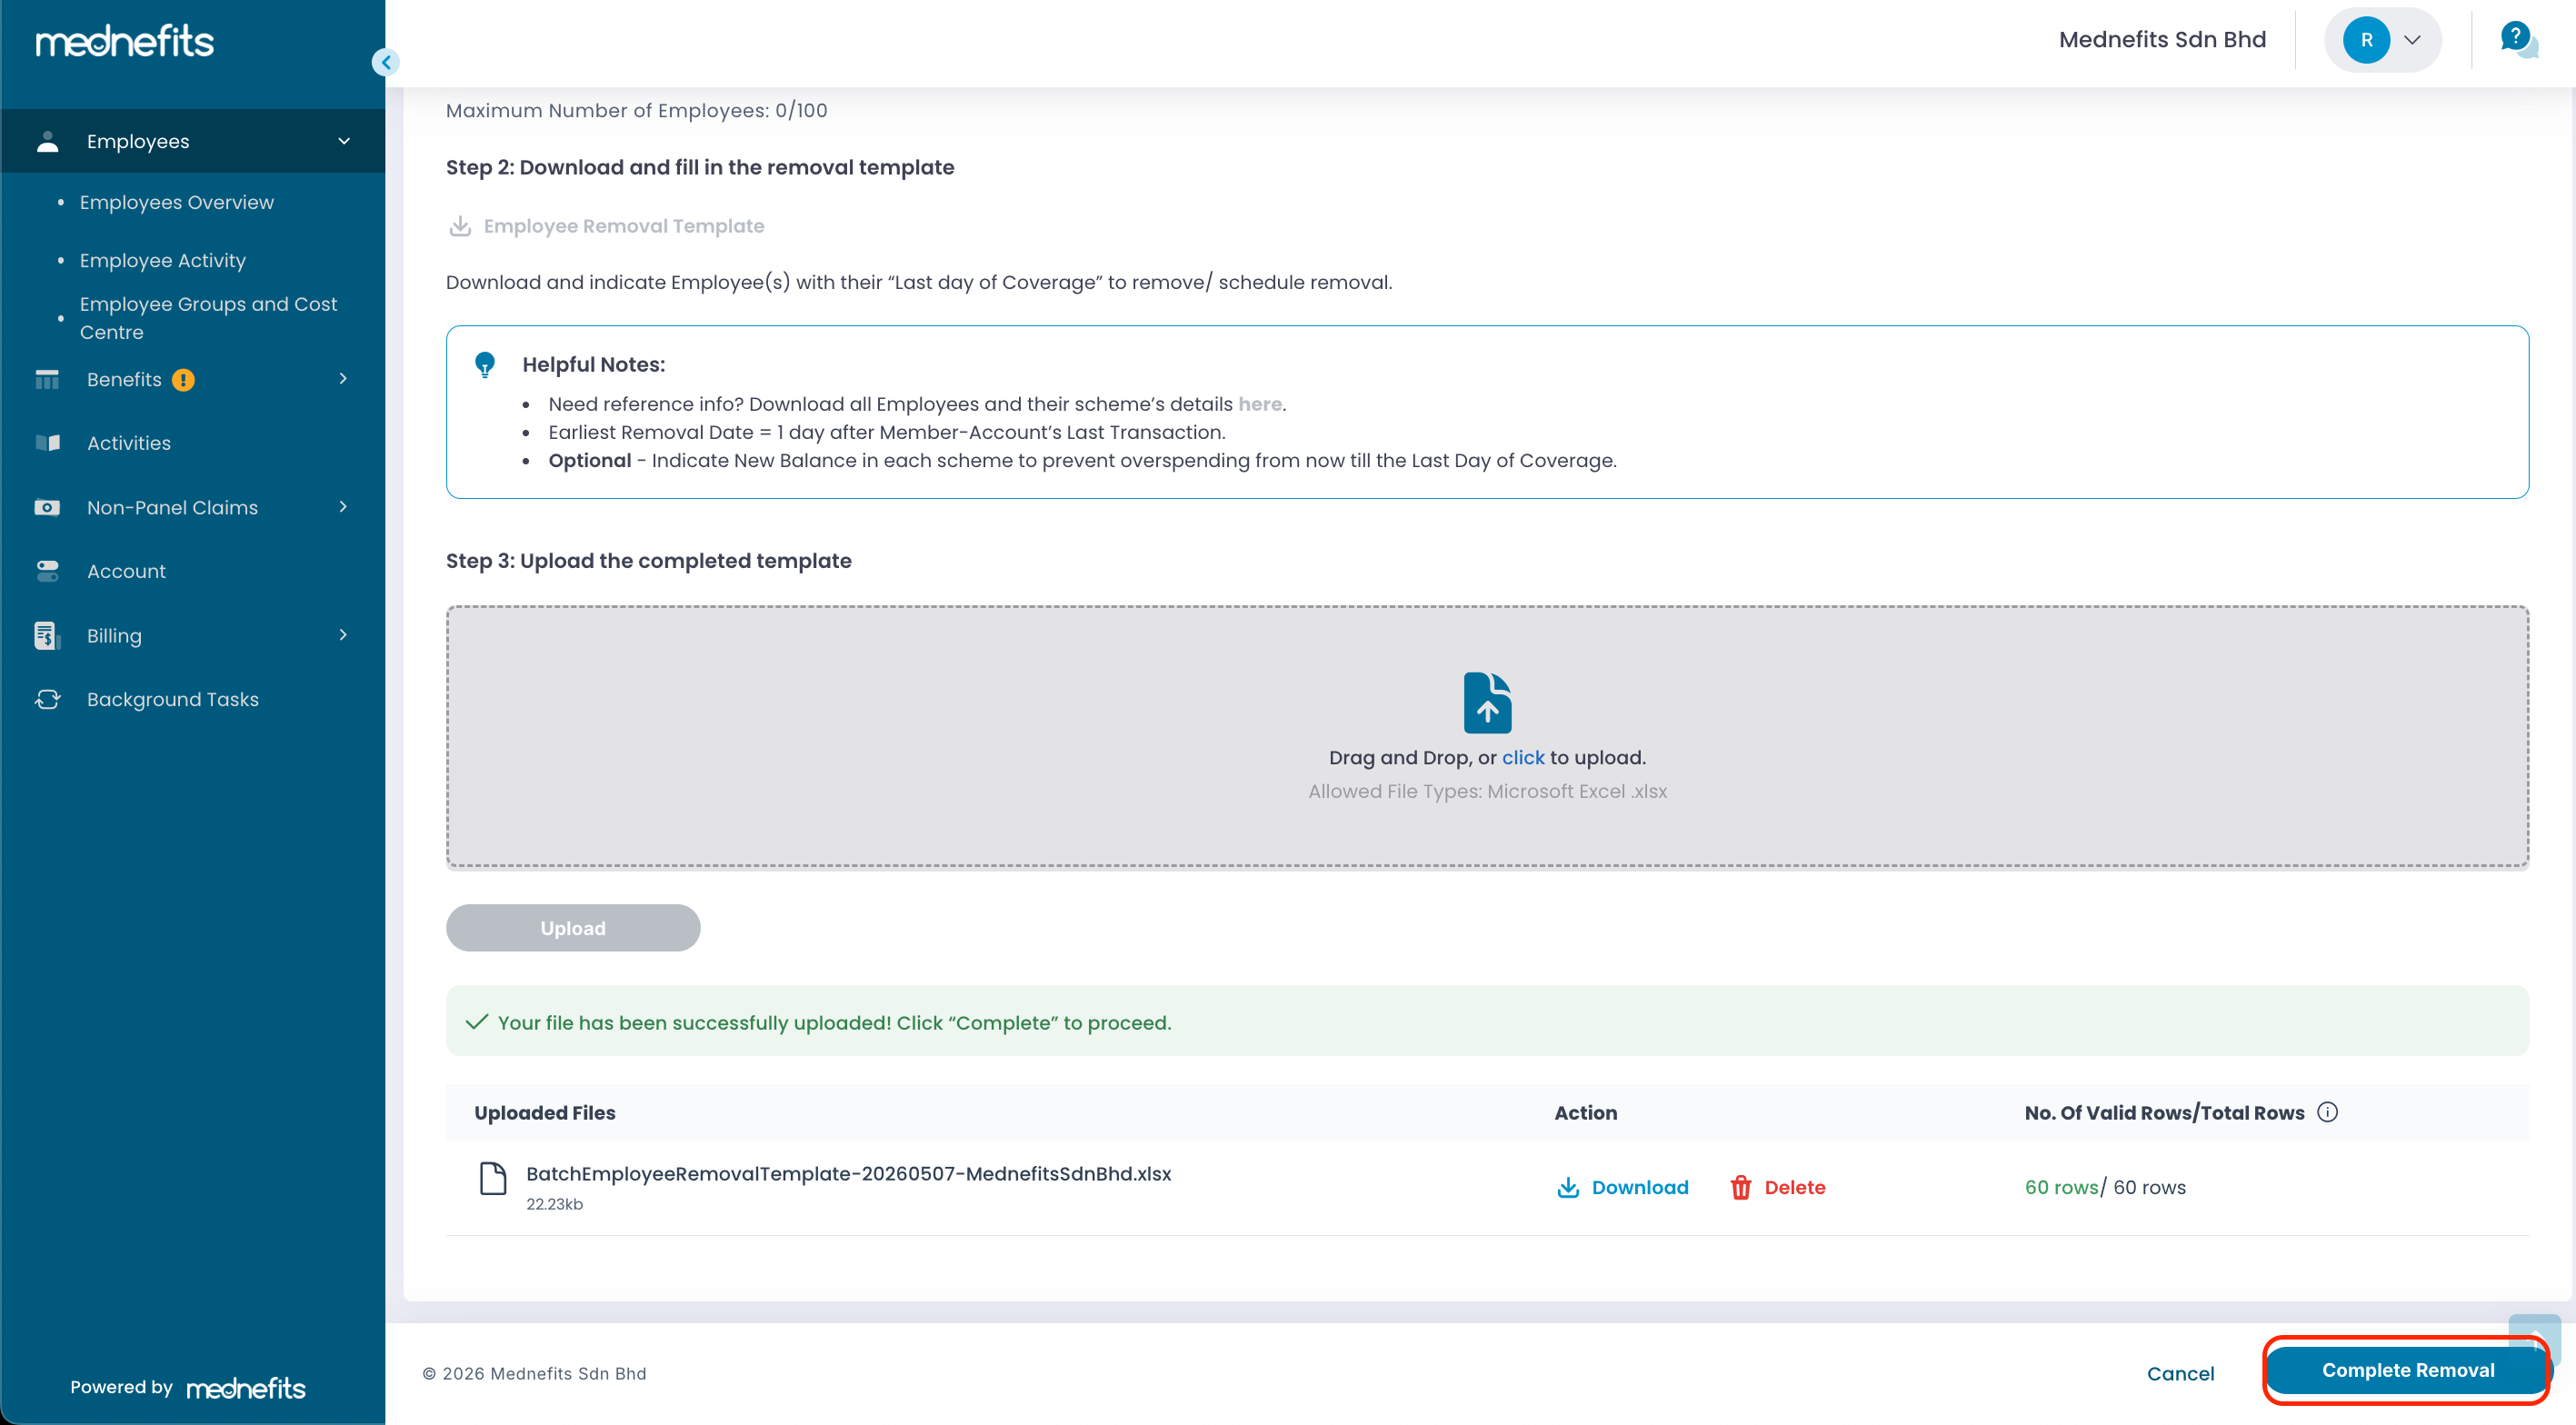
✅ At the bottom, you will be notified of the file being uploaded successfully. Click on Complete Removal to continue.
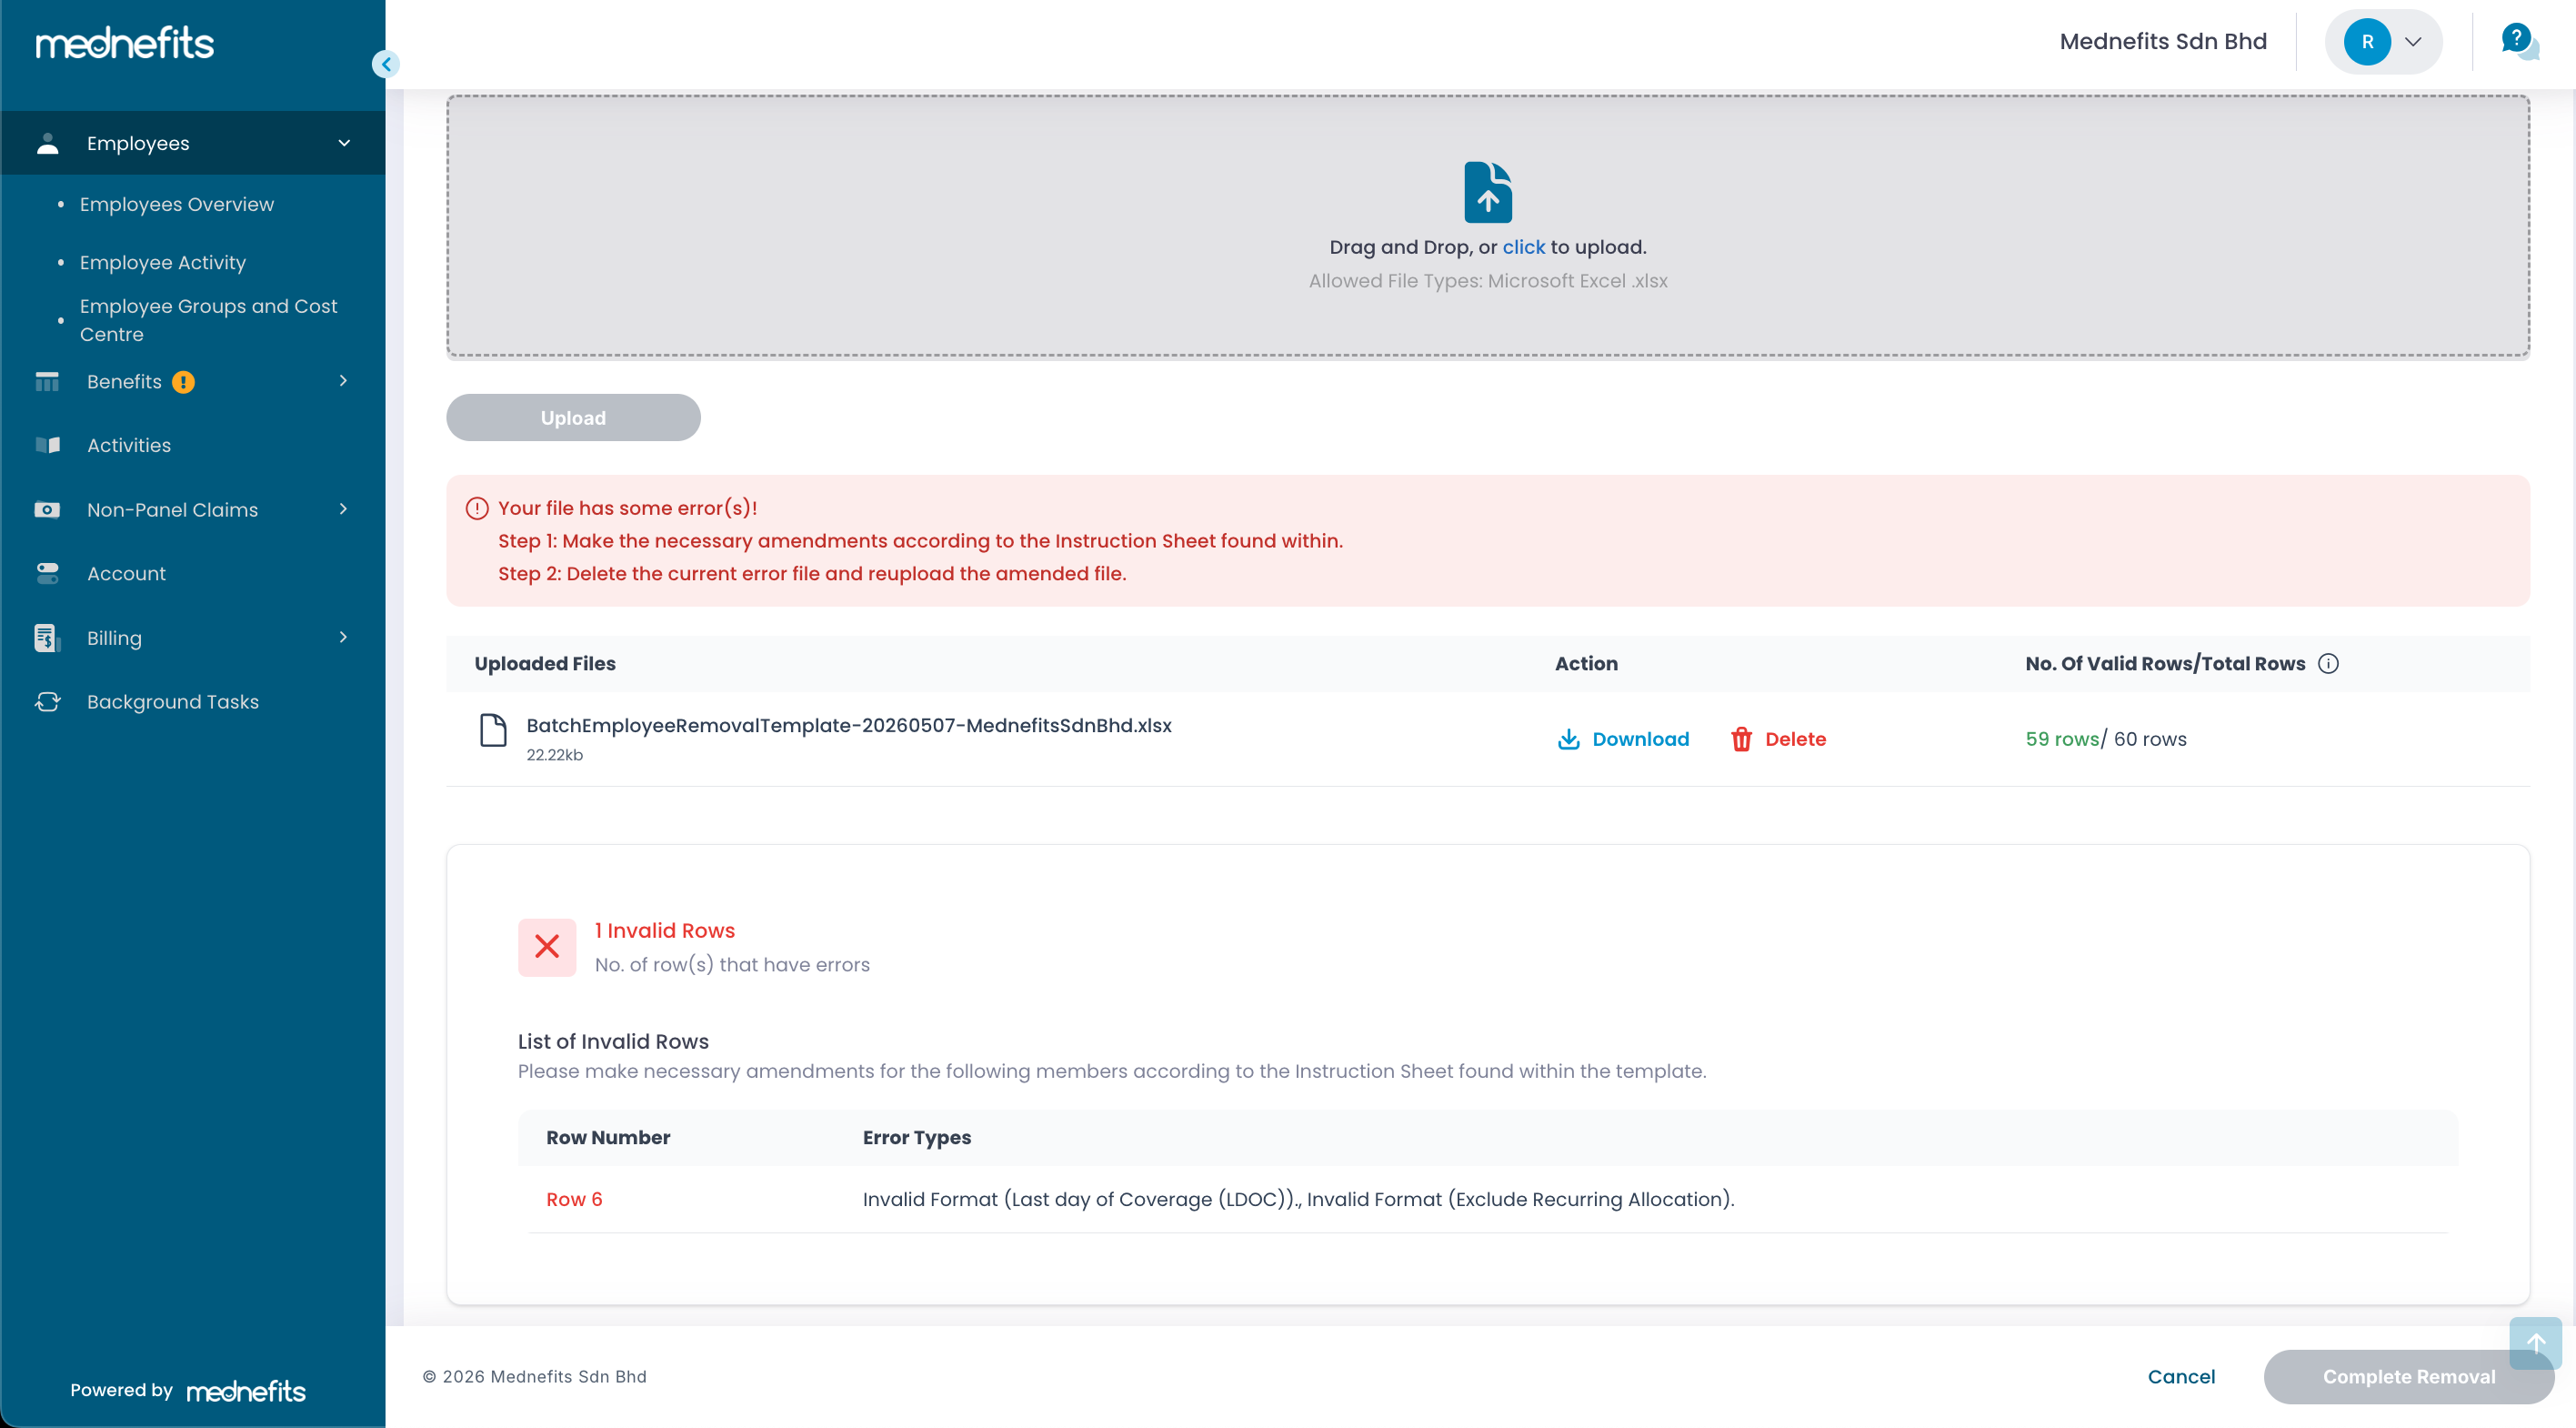
❗ Error! Unable to proceed (if any)
- Please Download and review the Error Types.
- Click on Delete to remove the previously uploaded document and then click to Upload the amended document for validation.
Step 5: Click Complete Removal to finish the process.
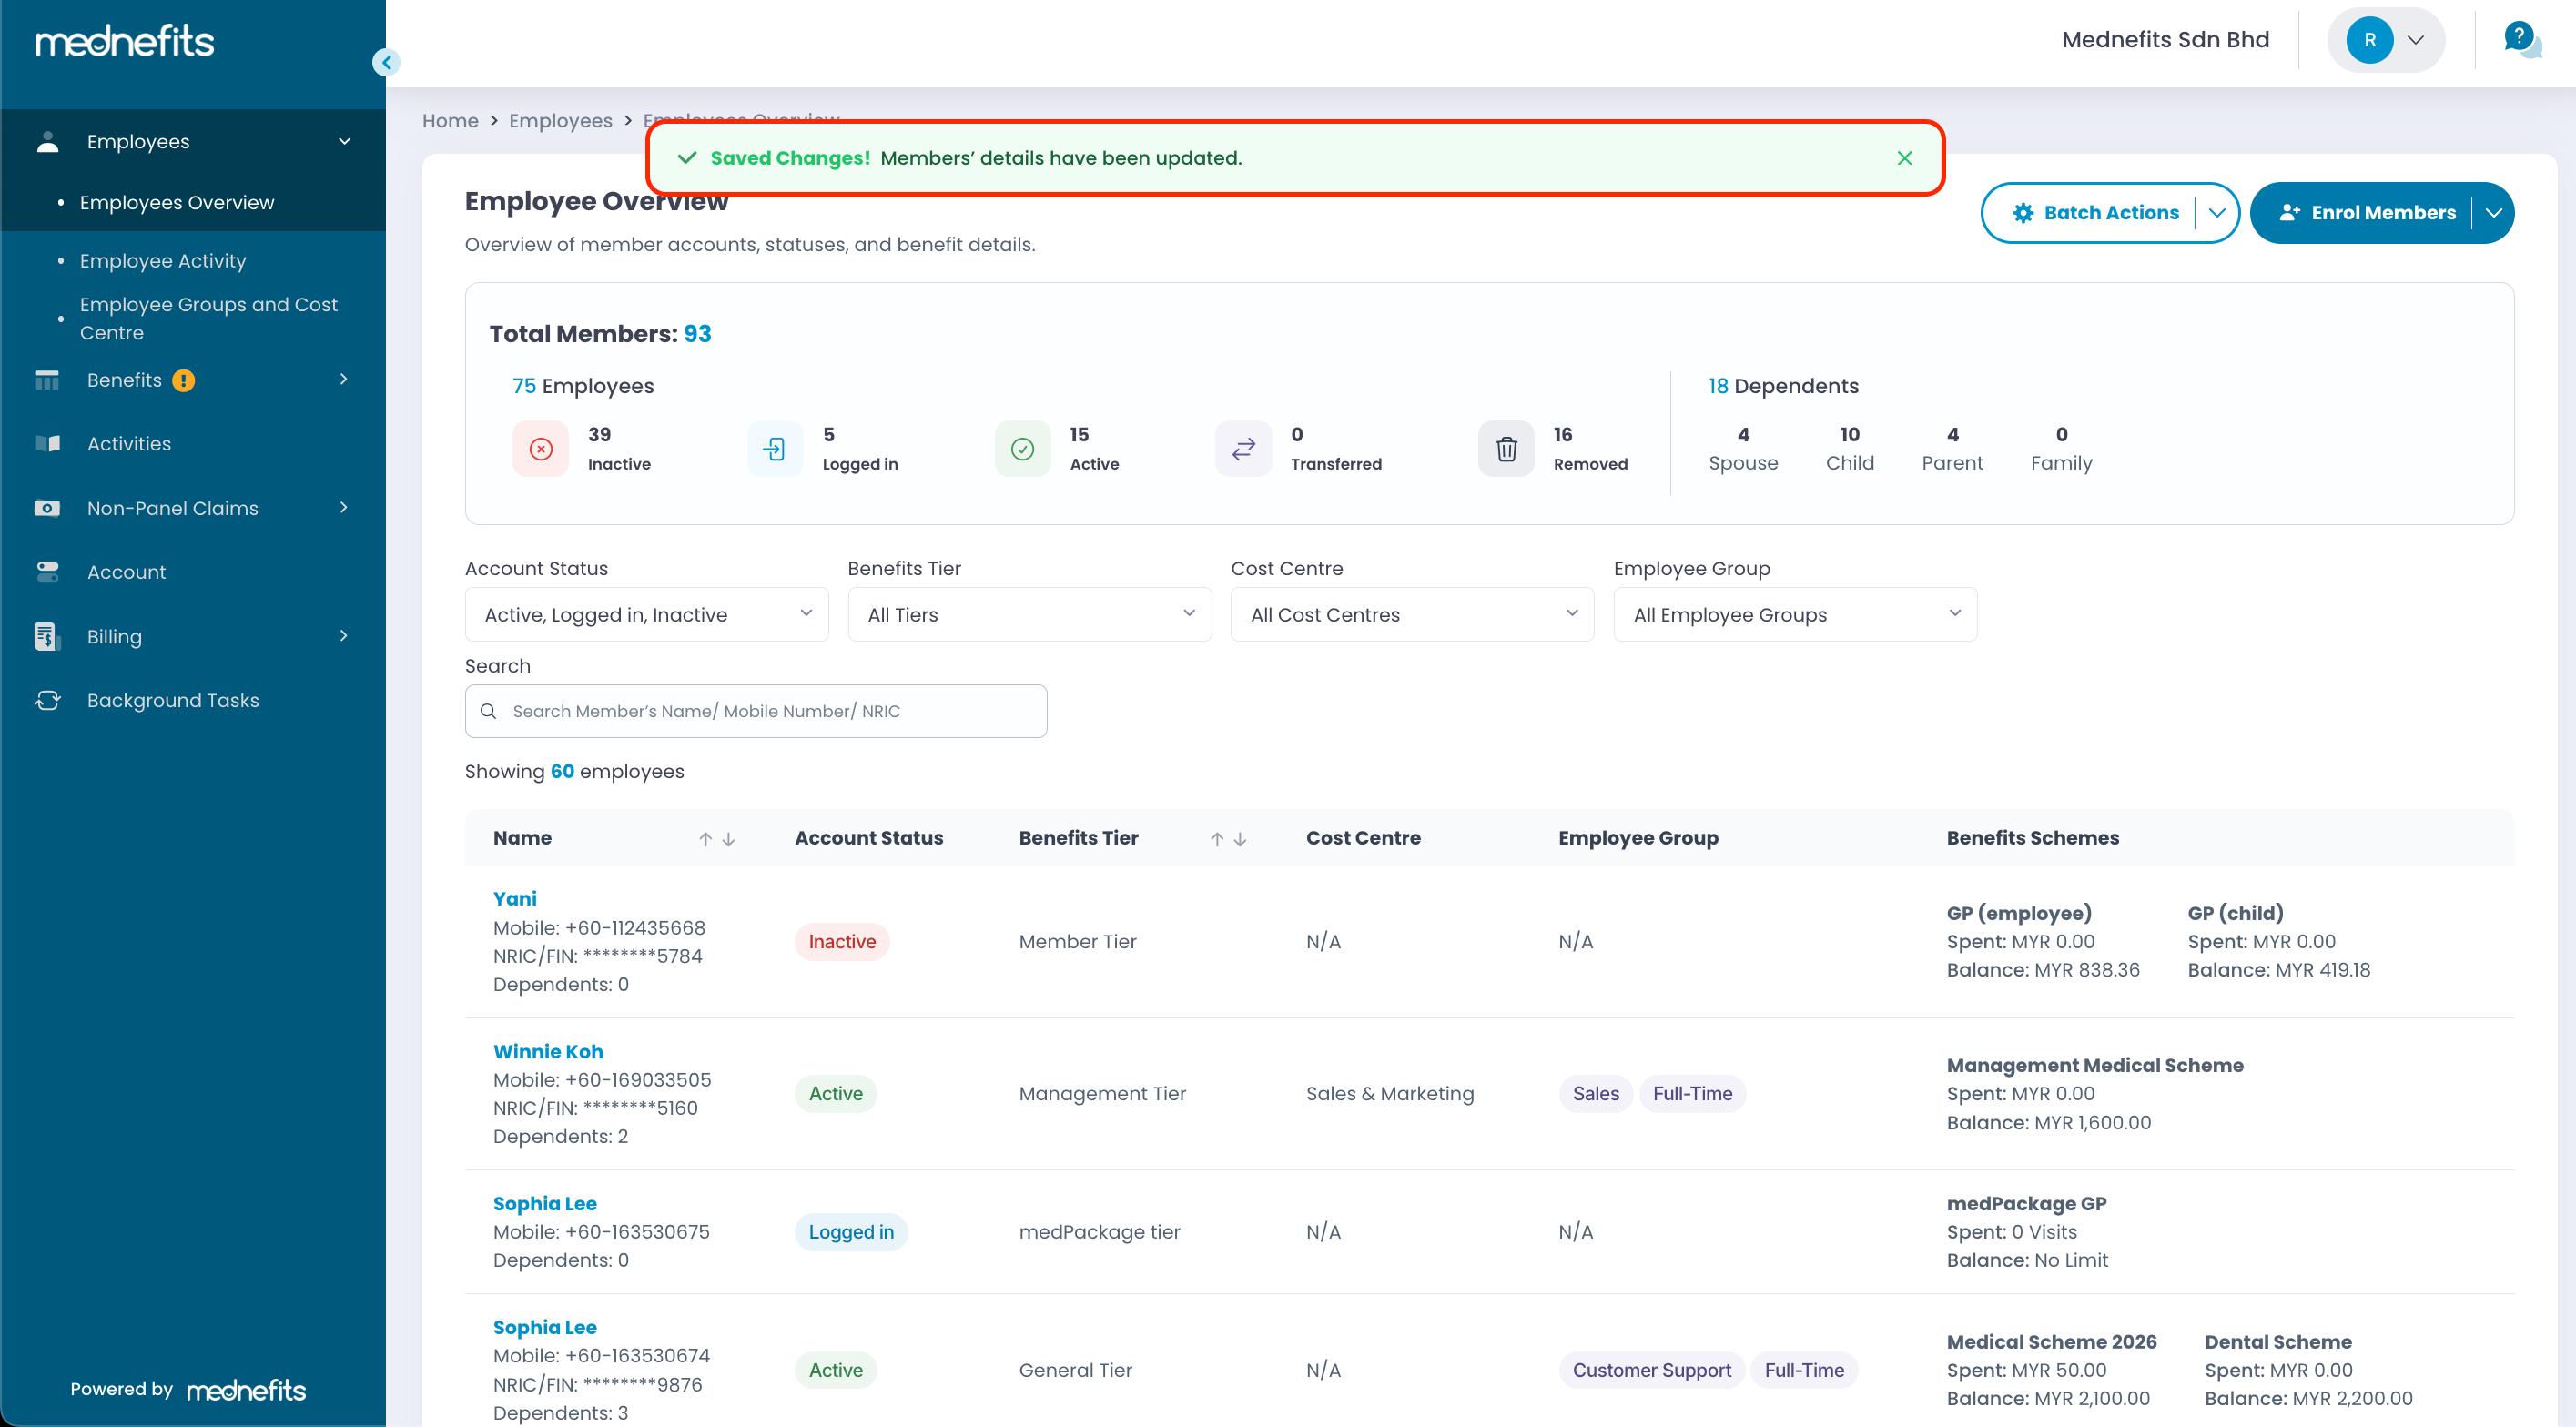
Note: The summary of the employee's removal will be saved and displayed on their profile under Removal Summary.
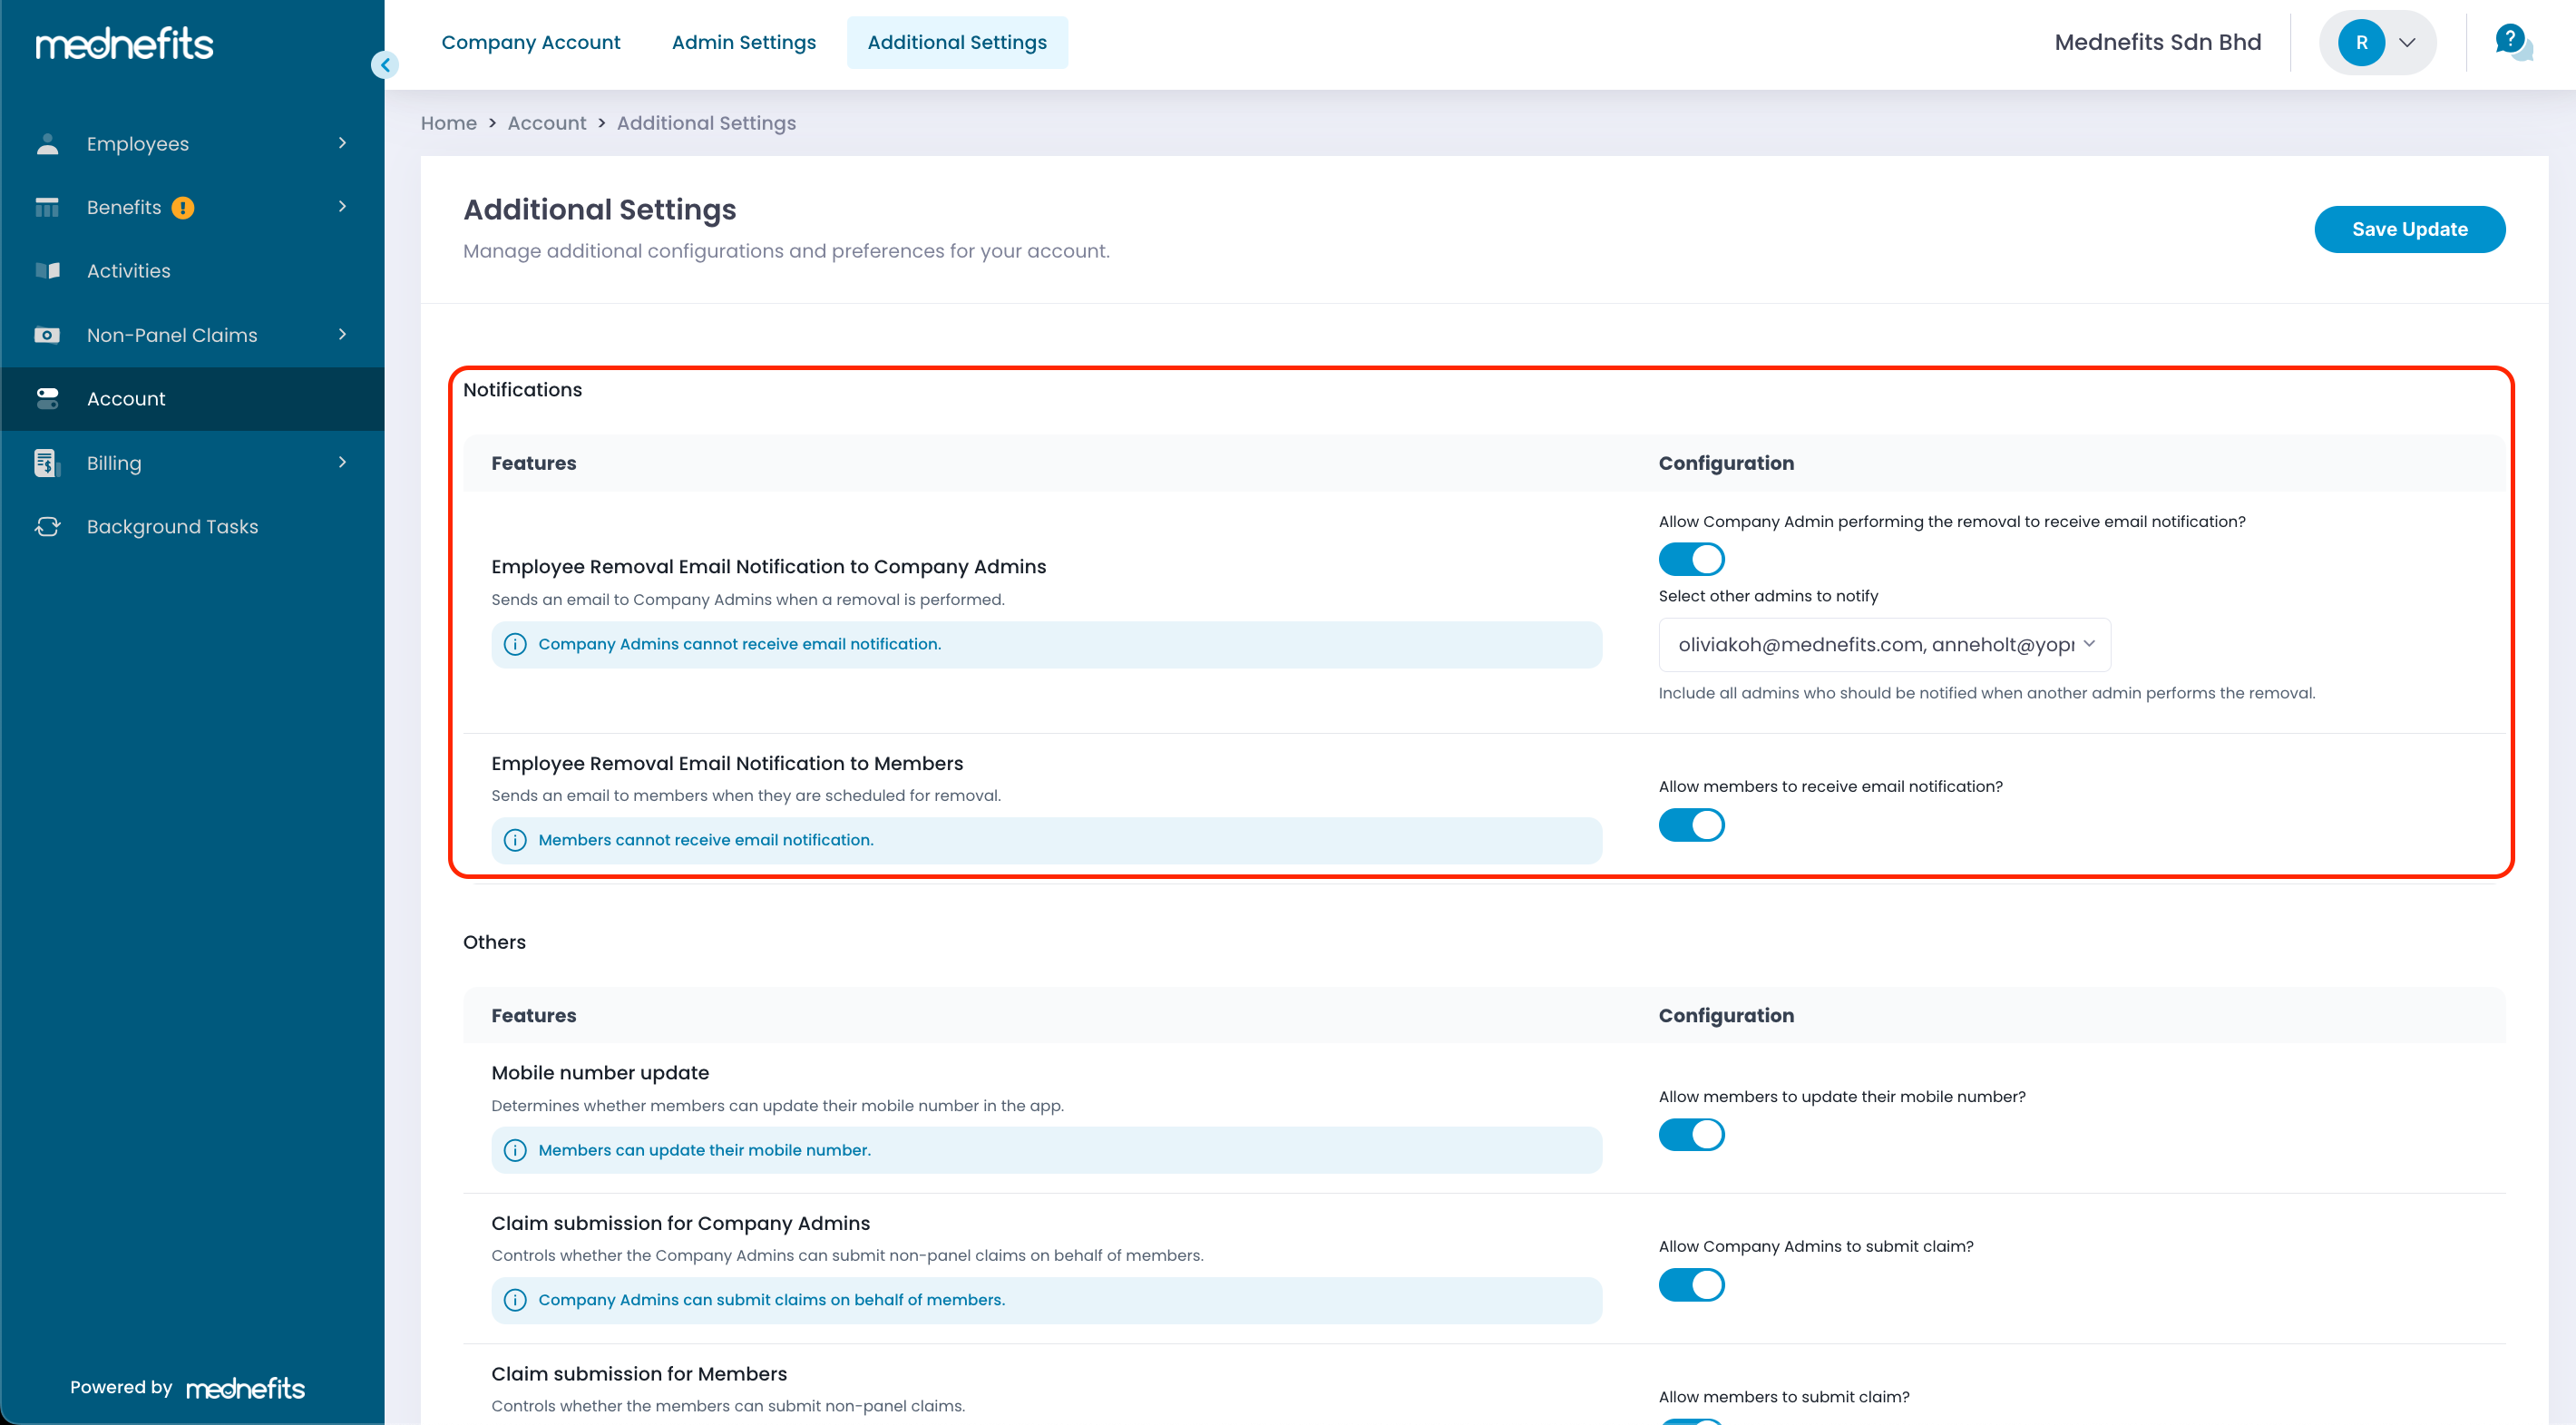
🆕 Introducing Email Notifications for Employee Removal
We are excited to announce the launch of our new feature, email notifications for the removal of employees where HR admin or employees will receive the email notification about the removal. This enhancement is aimed at improving communication and streamlining the offboarding process. Whenever an employee’s removal is initiated and completed, emails are sent to both HR and the employee to ensure everyone is informed about the removal.
We believe this enhancement will improve administration efficiency and offer clarity to both HR and employees.
To enable this feature, go to Account > Additional Settings.